

Field guide: 10 creative hummingbird shots you can try this weekend | by Élodie Meyer
If you’ve ever tried photographing hummingbirds, you already know the truth: these tiny creatures do not care about your plans, your autofocus, or your desire for the perfect shot.
But that’s exactly why they’re so addictive to photograph.
Today, I’m sharing 10 creative hummingbird shots you can try this weekend — no rainforest expedition required. Just curiosity, patience, and maybe a little caffeine (for you, not the birds). Please note that you will have to adapt my tips with your environment and light conditions on the day.
Let’s dive in!
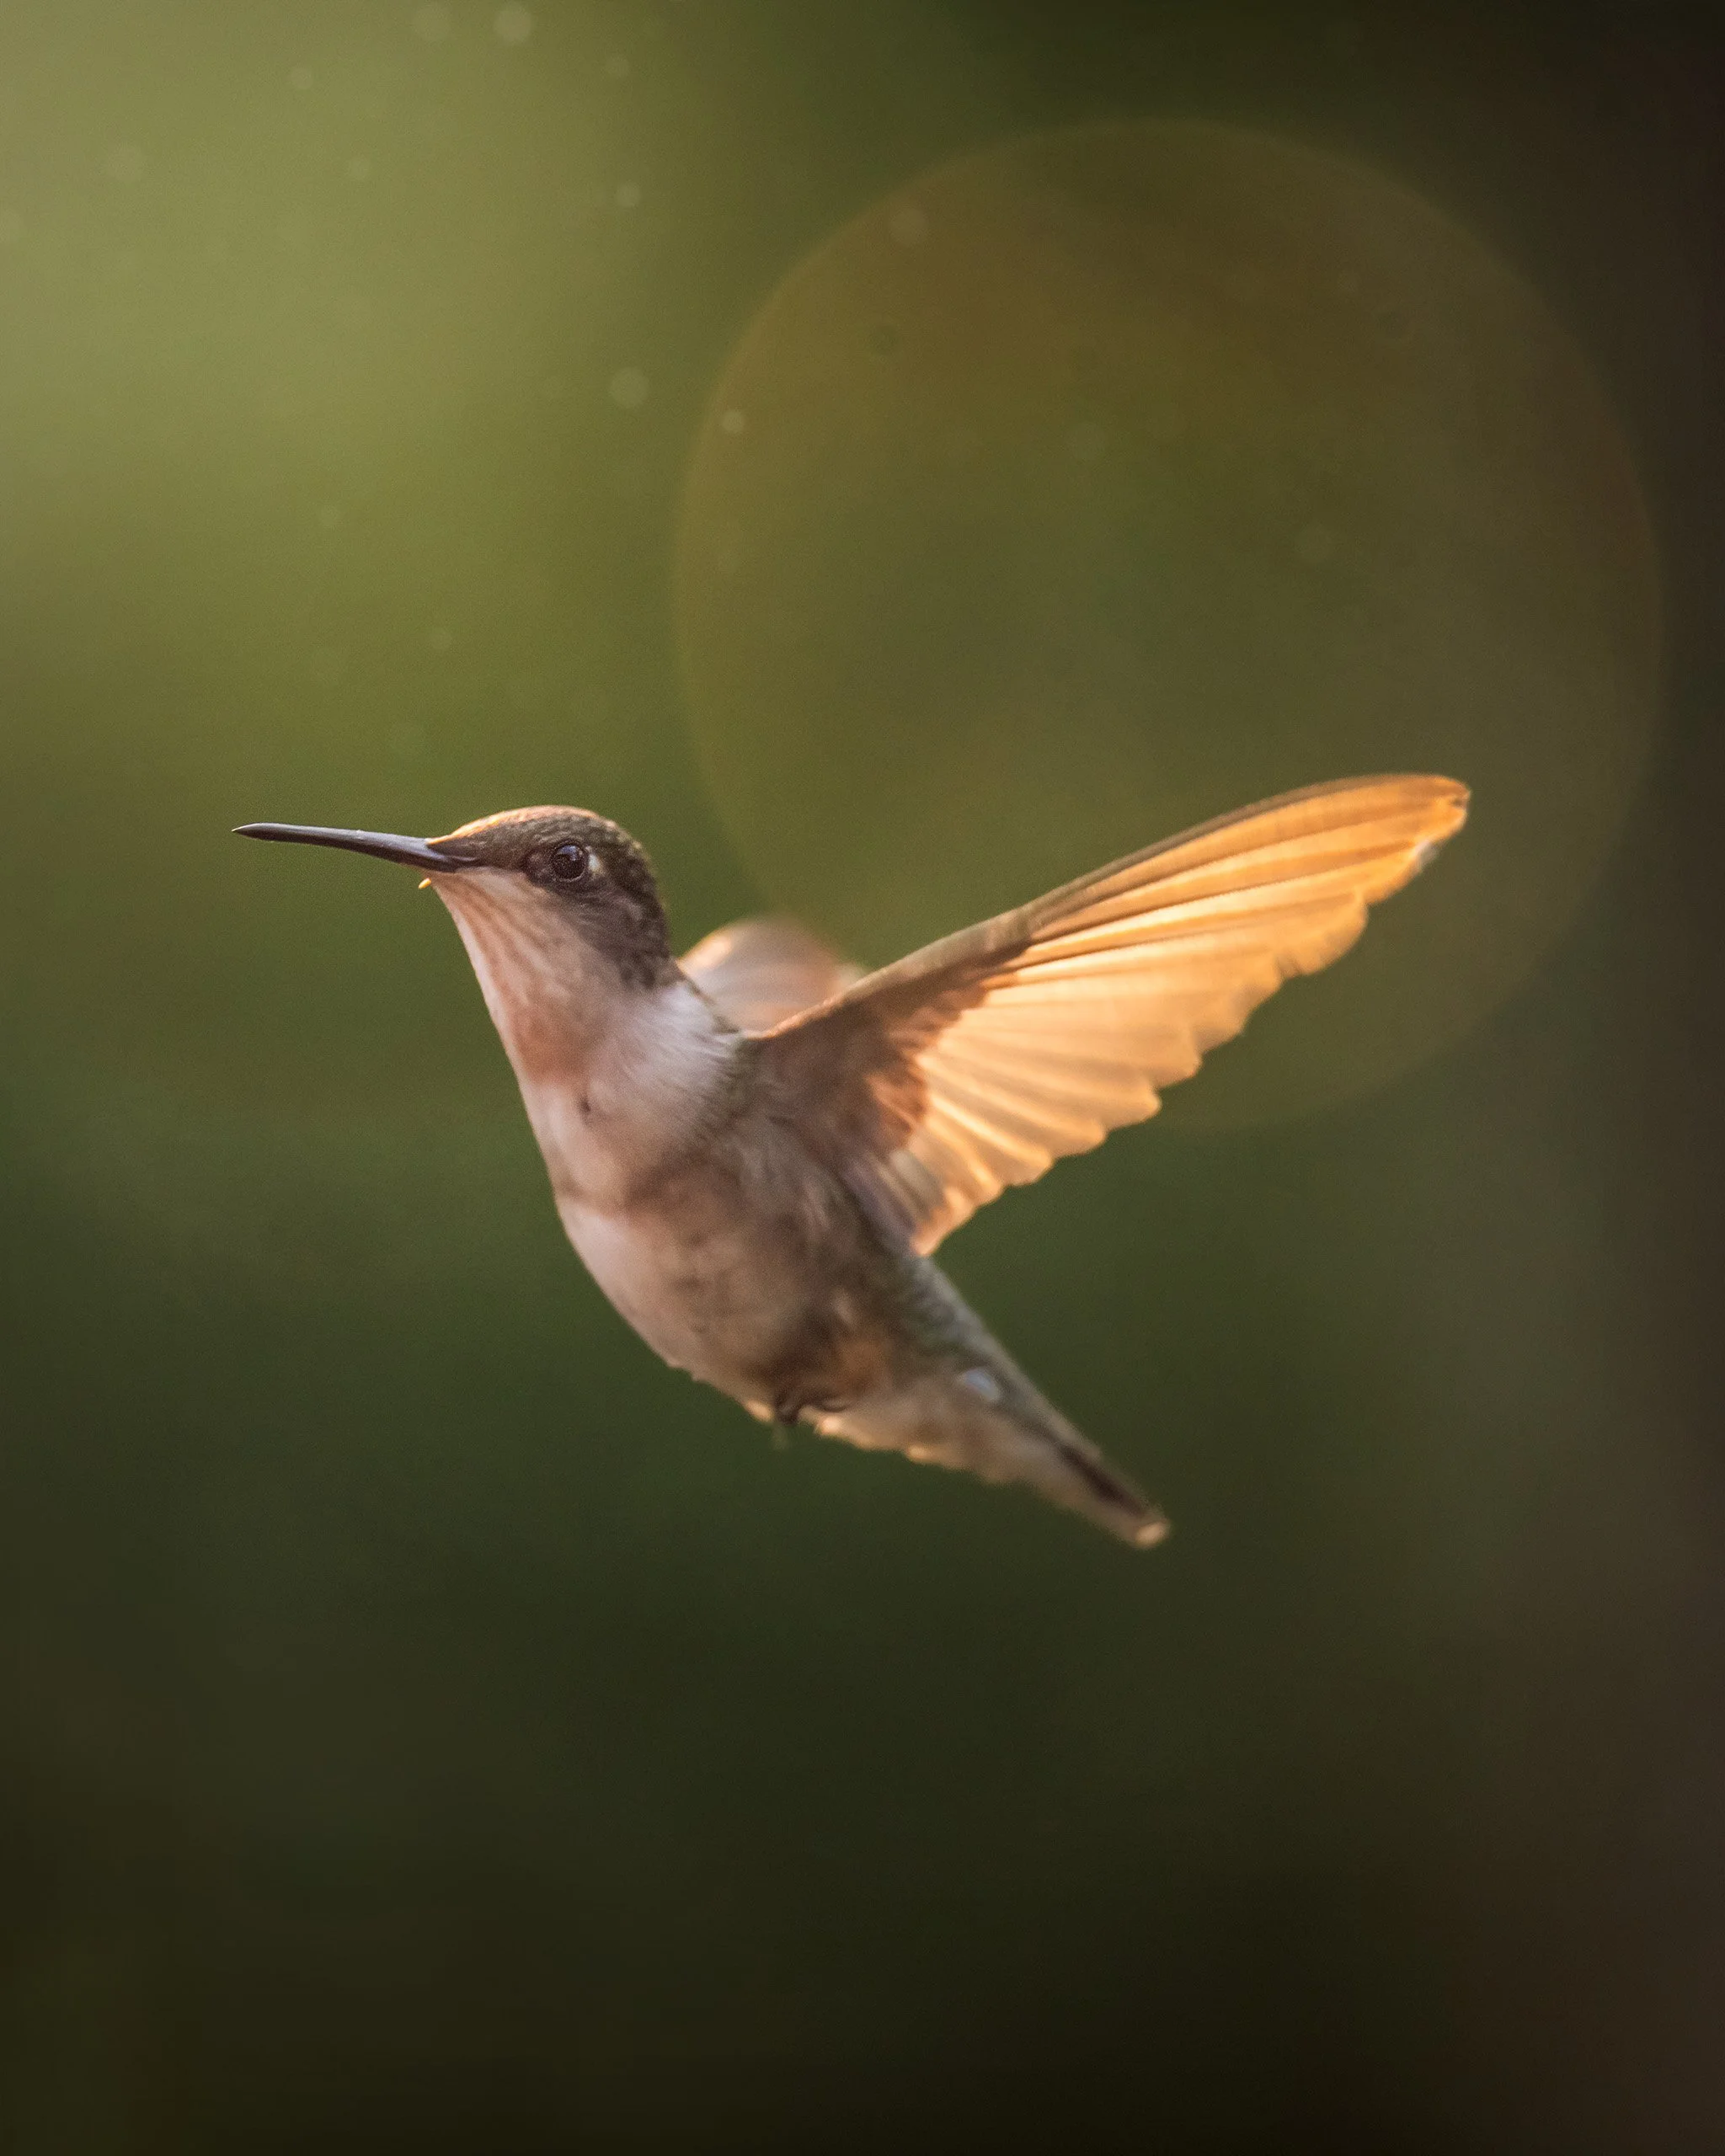
1. The backlit halo shot
When the sun hits a hummingbird’s feathers from behind, magic happens.
How to shoot it:
Position yourself so the bird is between you and the sun.
Slightly underexpose to protect the highlights and keep that halo crisp.
Watch for hover moments or slow perching stretches; that’s when the glow really pops.
Keep your background simple so the halo becomes the star of the show.
2. The wing‑blur poetry shot
There’s something irresistibly romantic about letting a hummingbird’s wings blur into soft, feathery brushstrokes. Hummingbirds beat their wings up to 80 times per second. Slowing your shutter just enough lets you capture that rhythm — not frozen, not chaotic, but beautifully expressive.
How to shoot it:
Drop your shutter speed to around 1/250–1/640 to let the wings melt into motion.
Keep your focus on the eye or head — sharp anchor, dreamy wings.
Choose a clean background so the blur becomes the star, not the distraction.
Shoot in bursts; every wingbeat creates a slightly different shape.
Warning: You may squeal when you nail it. This is normal.

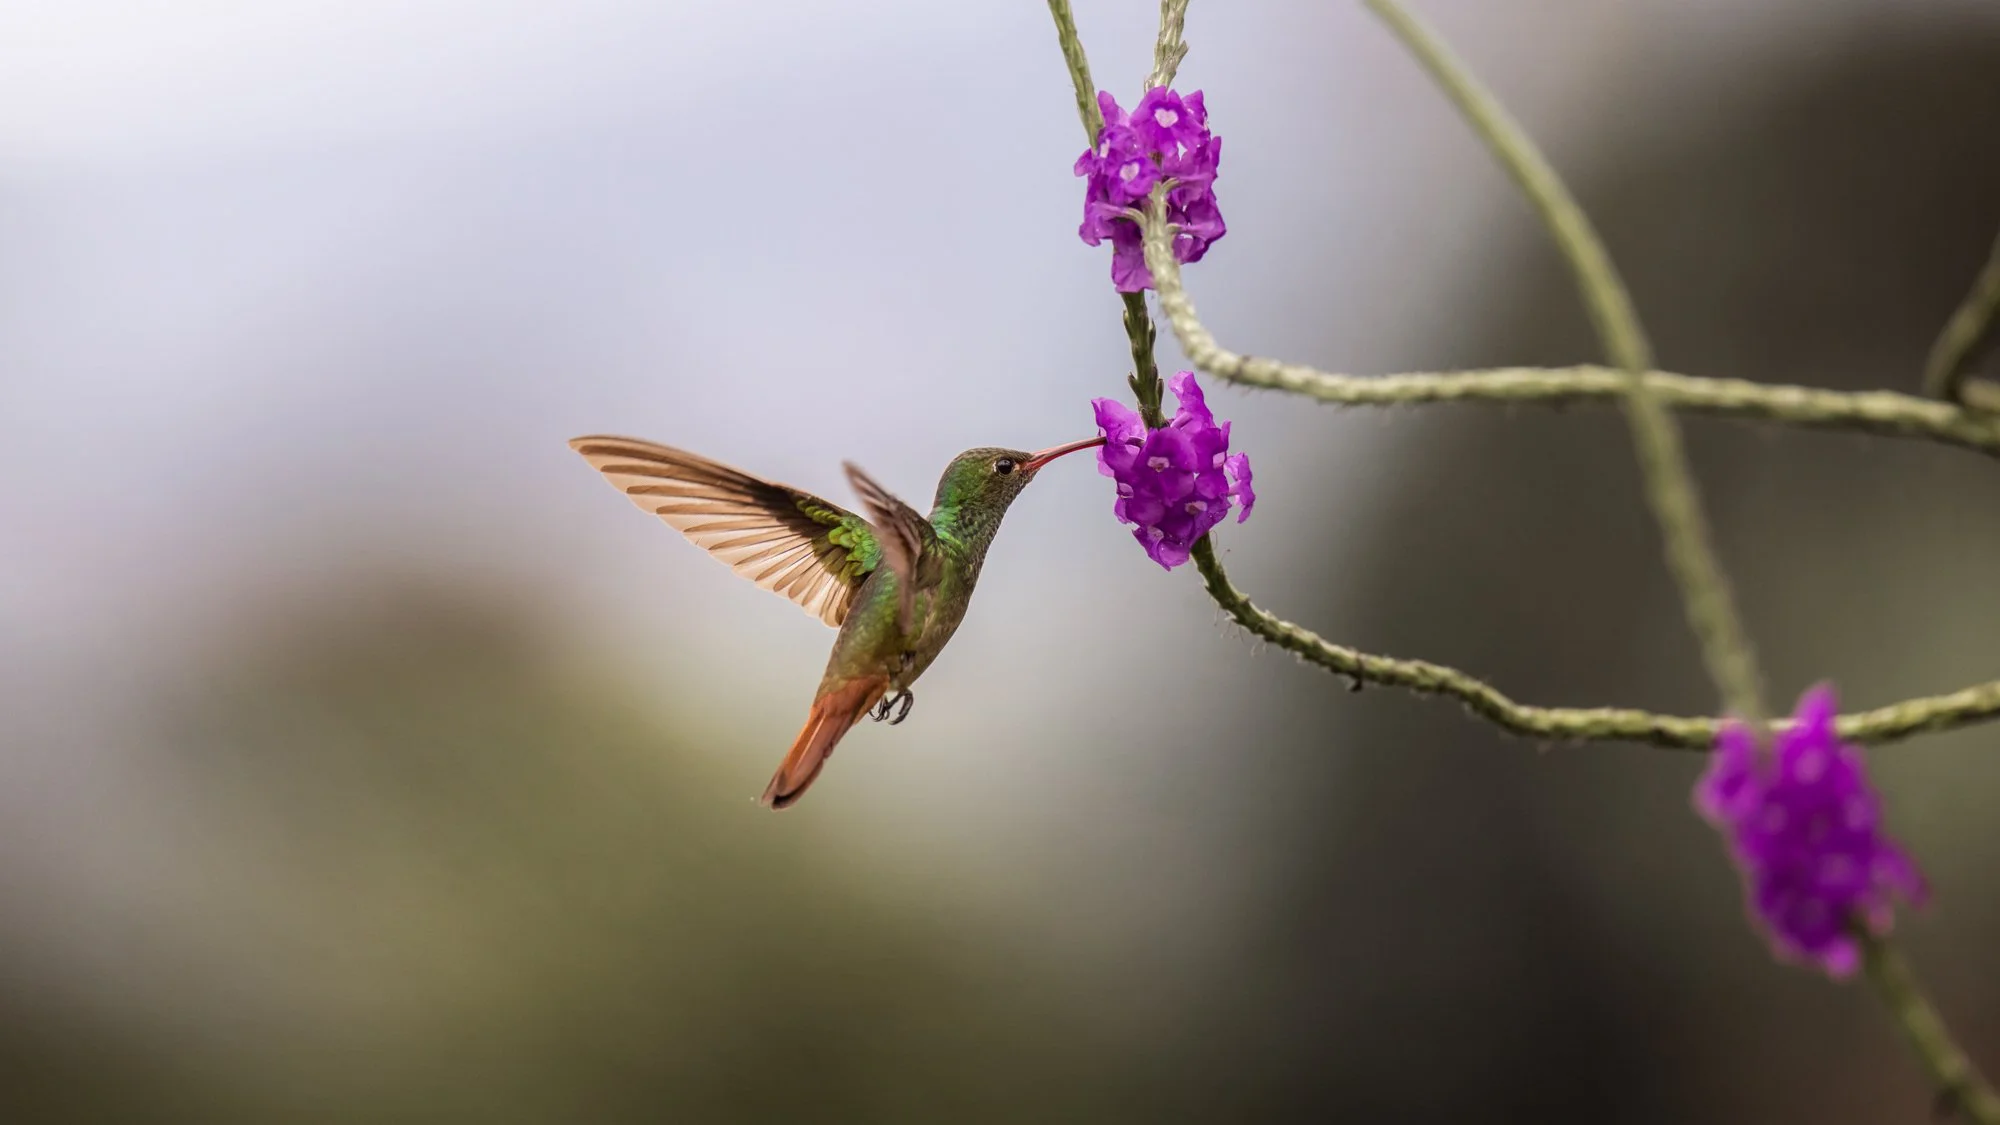
3. Bloom‑Sip Shot
It captures the essence of hummingbird life. One bird, one flower, one perfect sip. No drama, no acrobatics — just a pure, quiet moment of feeding.
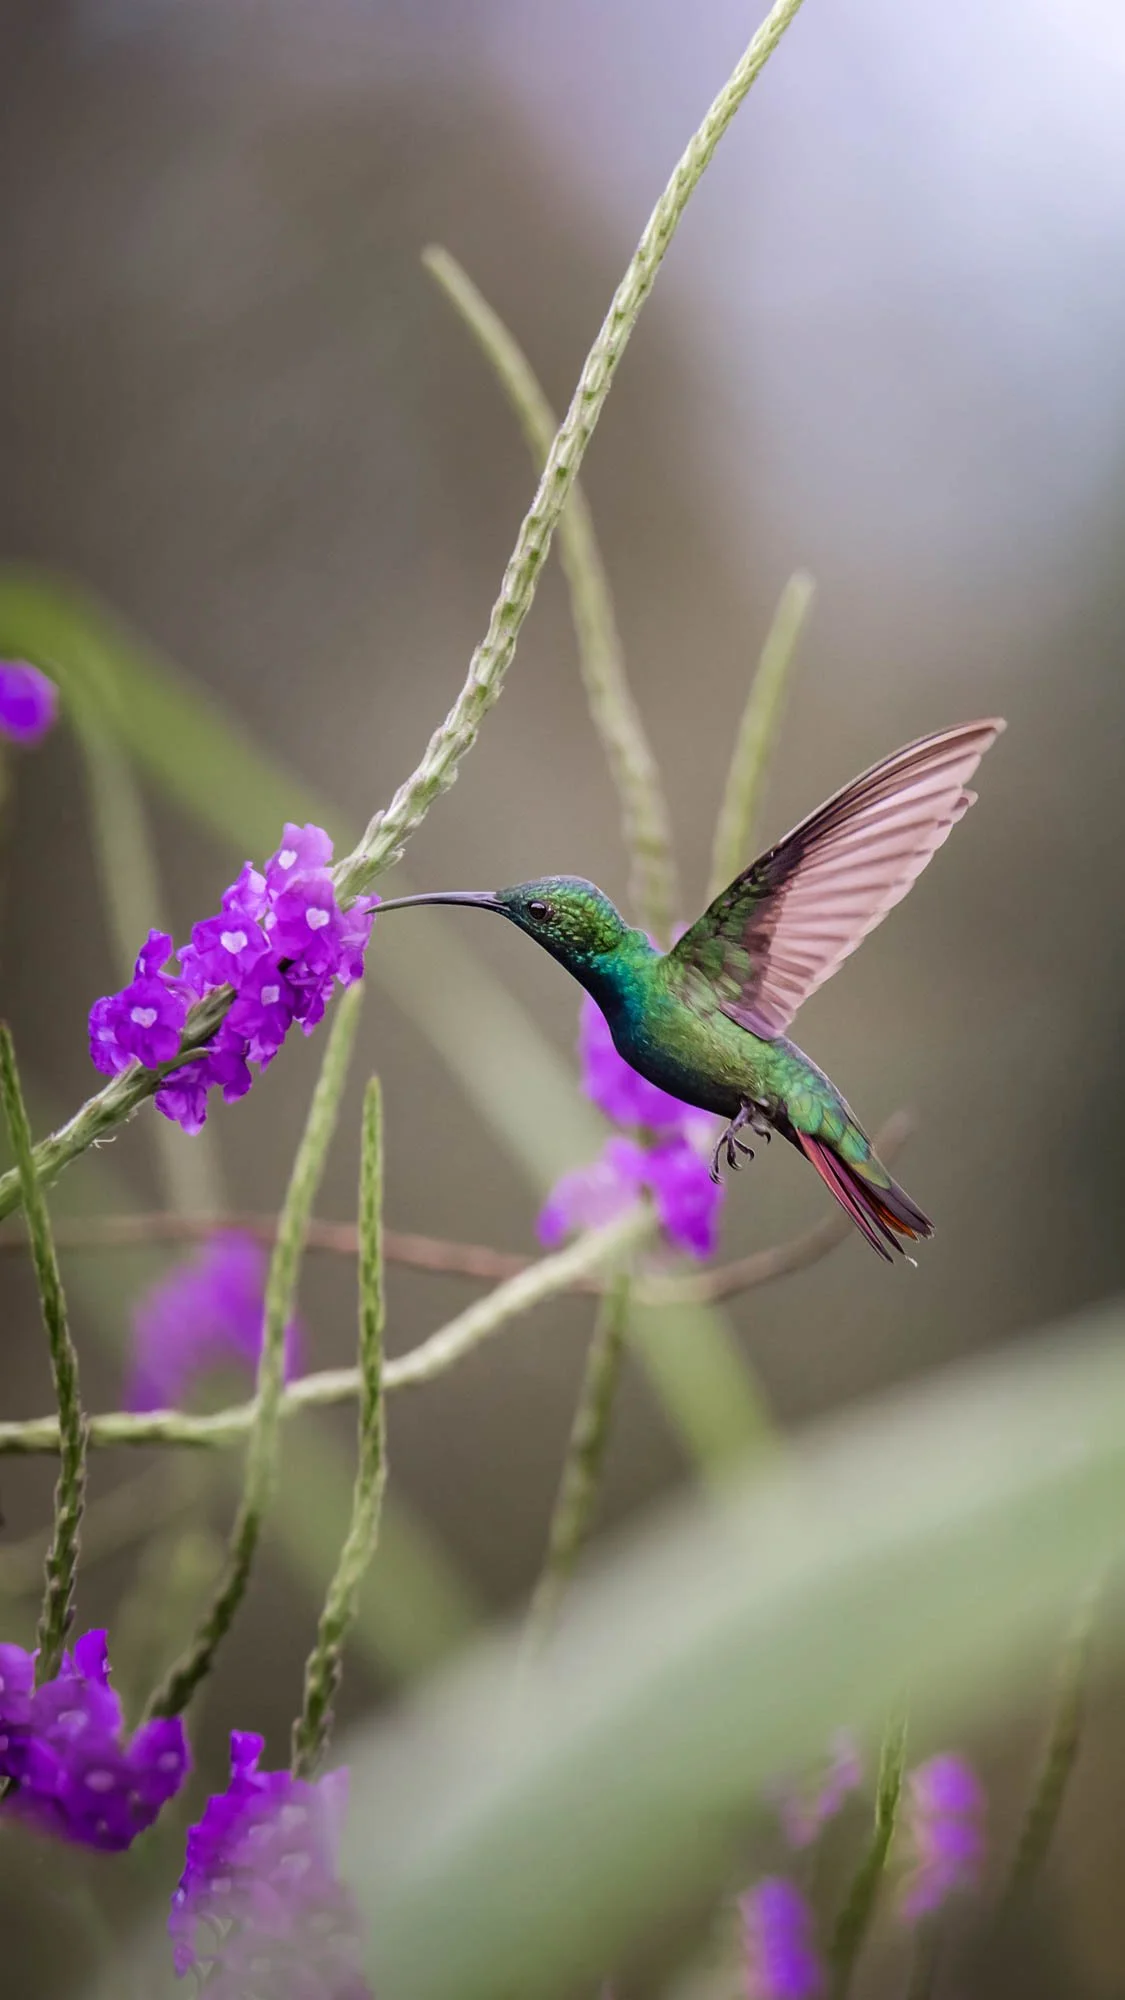
How to shoot it:
Pick a single, well‑lit flower with clean surroundings.
Pre‑focus on the bloom — the bird will return.
Use a fast shutter speed (1/1250–1/2500) to keep the moment crisp.
Keep your composition simple if possible: bird + flower + soft background.
This shot is incredibly versatile. It works in bright sun, soft shade, gardens, balconies — anywhere a hummingbird decides to stop for a drink.
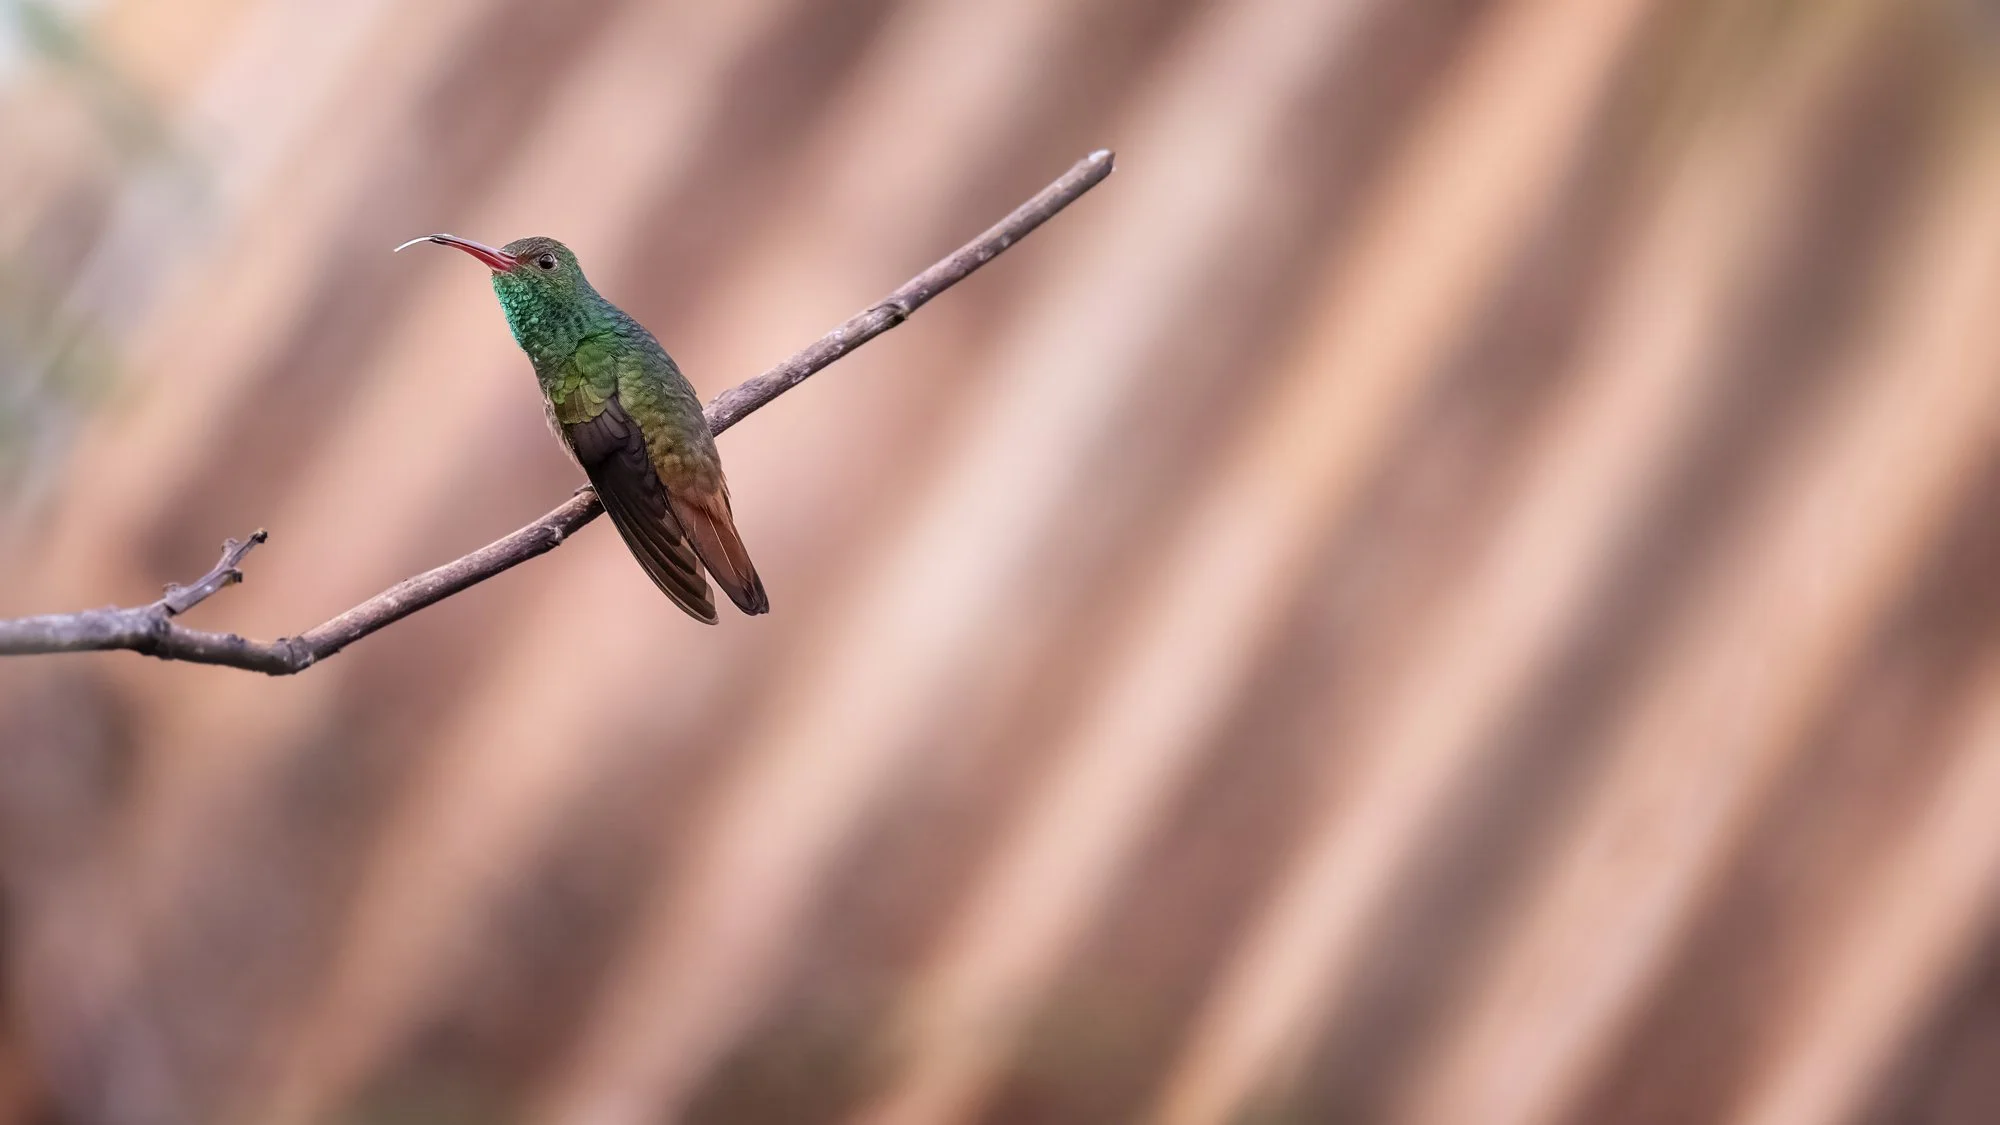
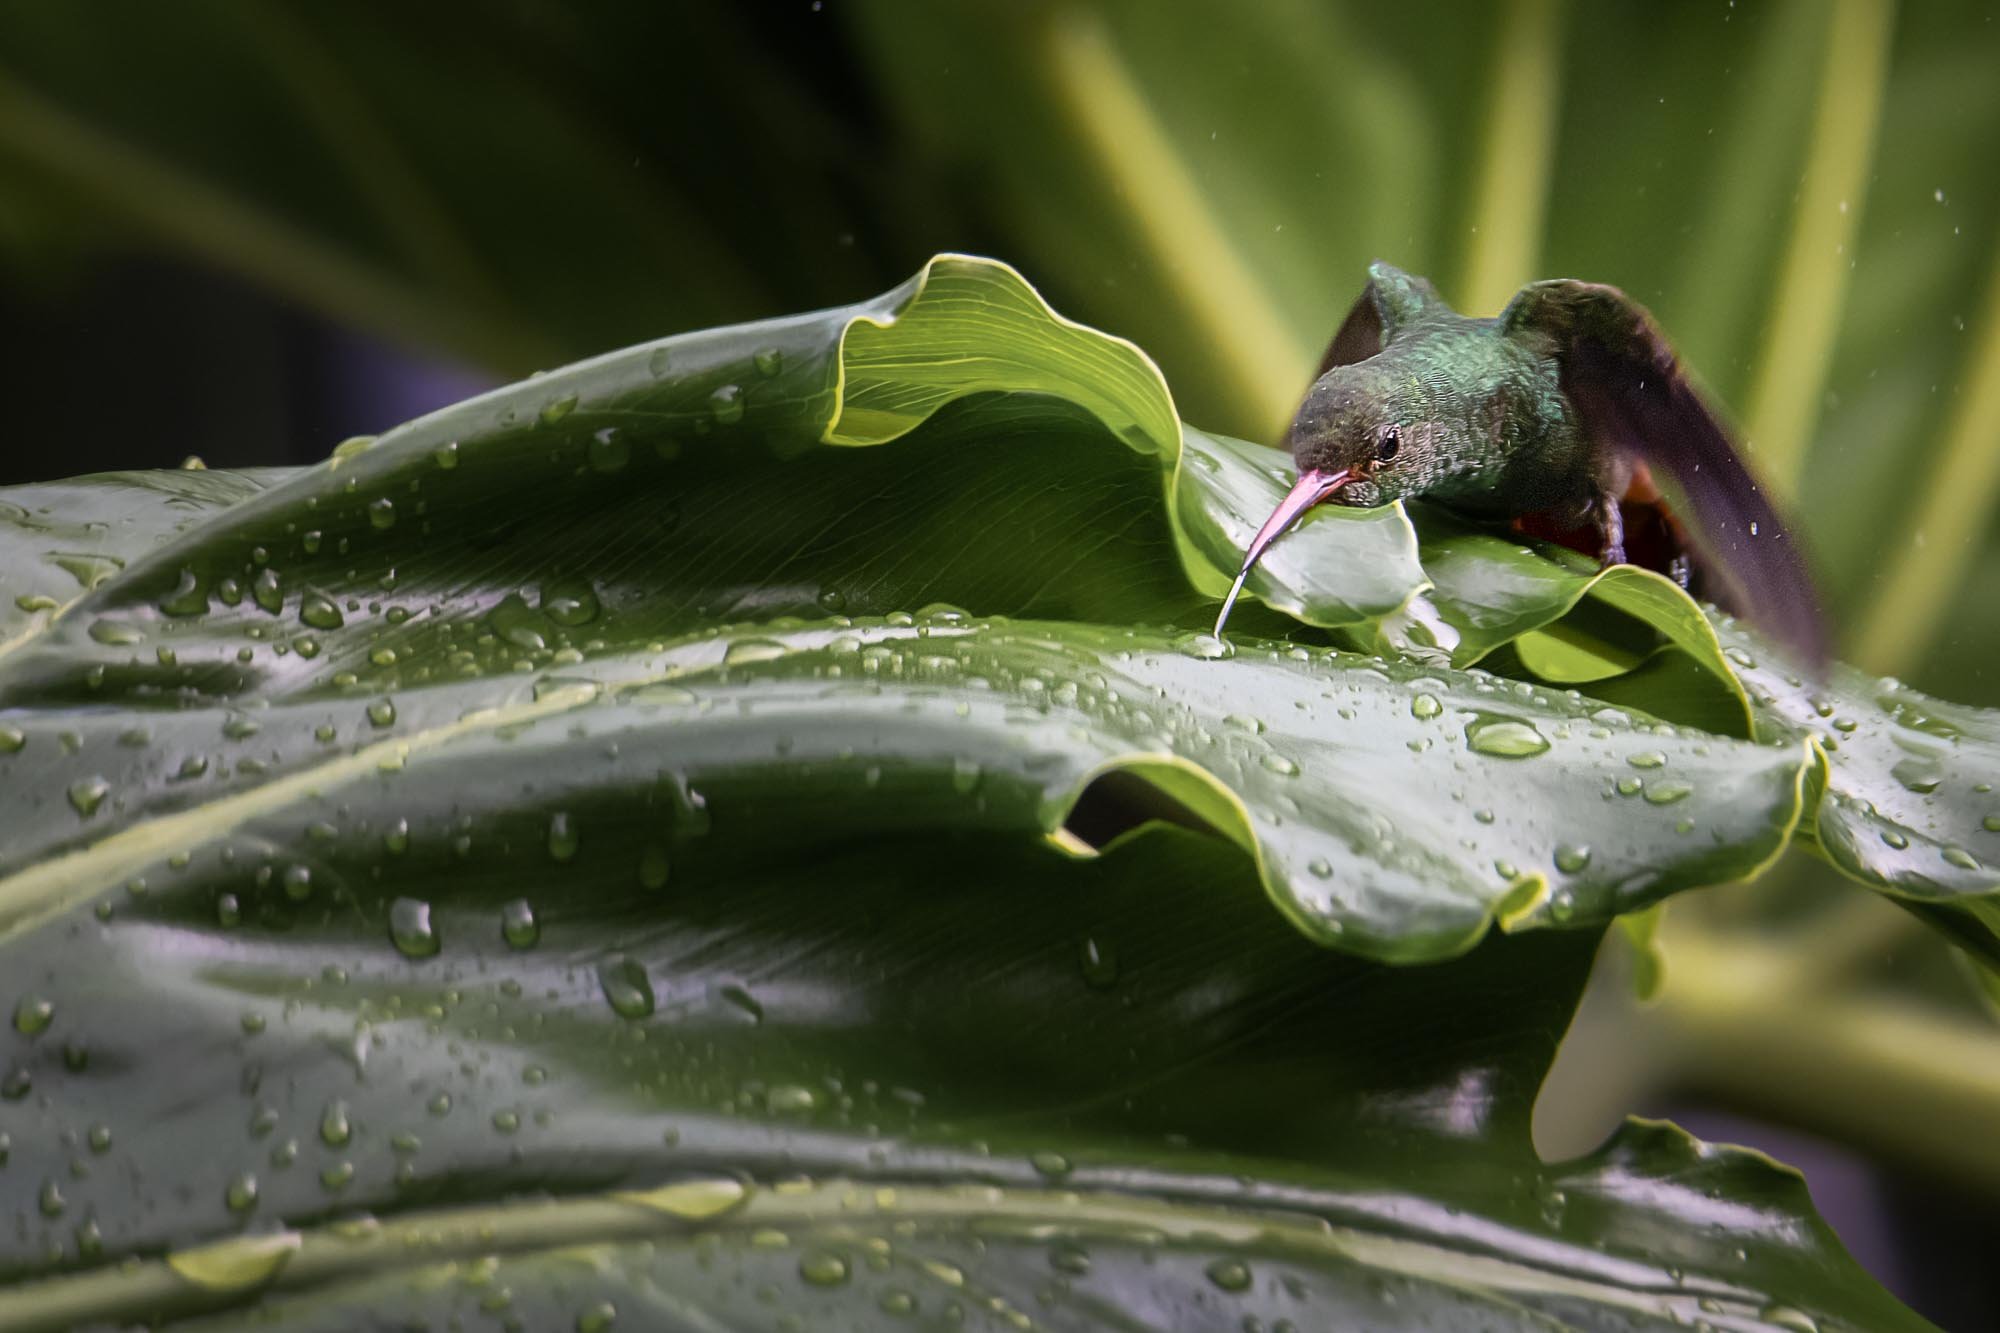
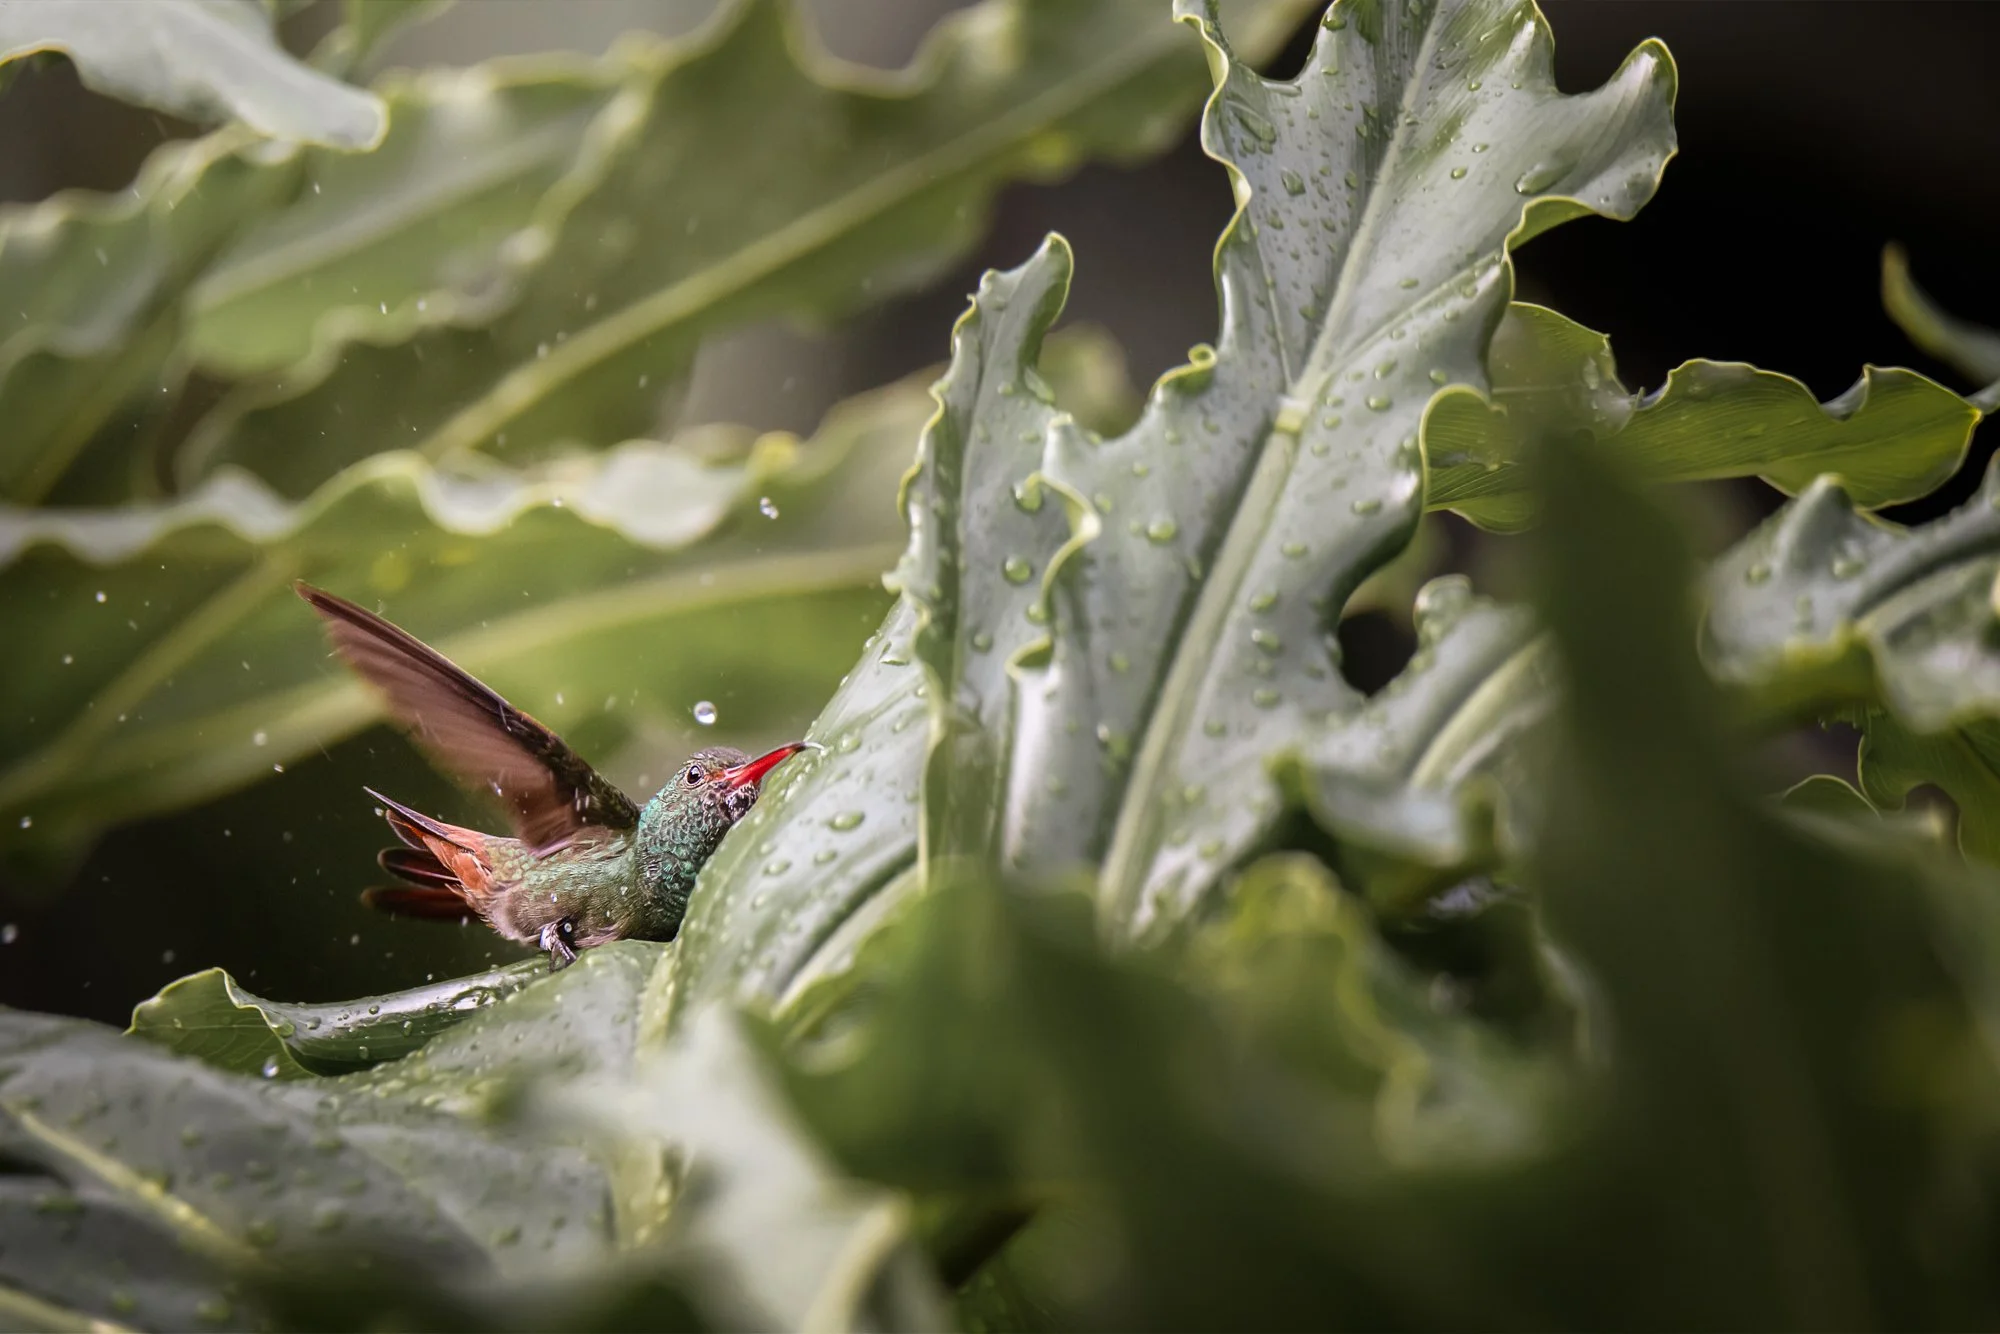
4. The tongue‑flick shot
Hummingbird tongues are very long and capable of lapping nectar at lightning speed. And every so often, after feeding, a hummingbird will stick its tongue out to clean it… giving you a shot that’s fascinating. It reveals a behavior most people never see. The tongue can extend far beyond the beak, creating a quirky, memorable image that sparks curiosity and conversation.
How to shoot it:
Watch for the moment after feeding — that’s when the tongue flick usually happens.
Use a very fast shutter speed (1/2000–1/4000) to freeze the tongue clearly.
Keep your focus locked on the beak; the tongue will pop into the focal plane.
Shoot in short bursts — the flick lasts milliseconds.
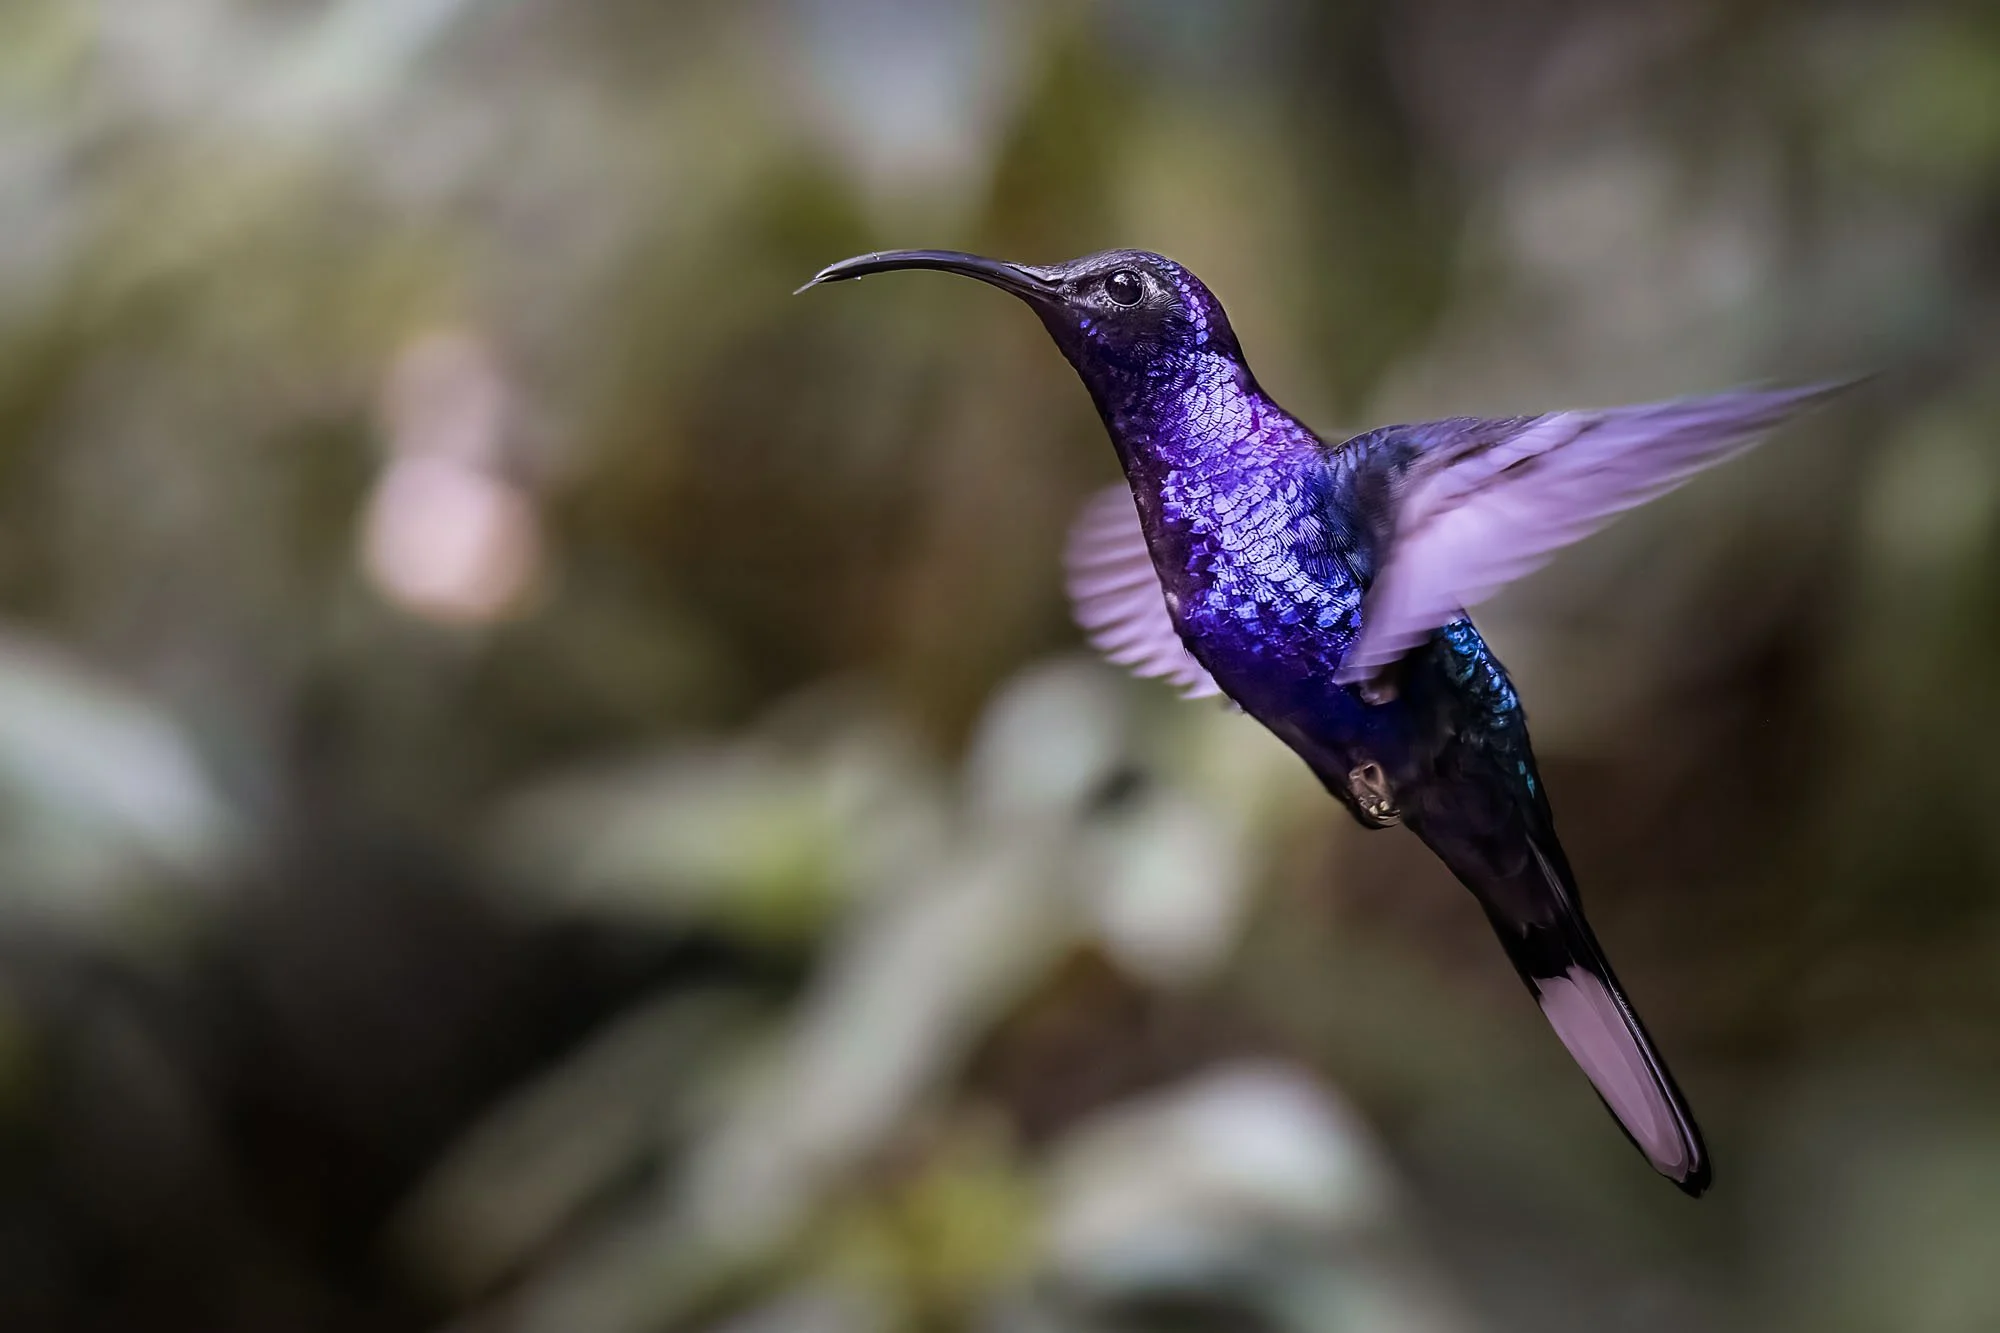
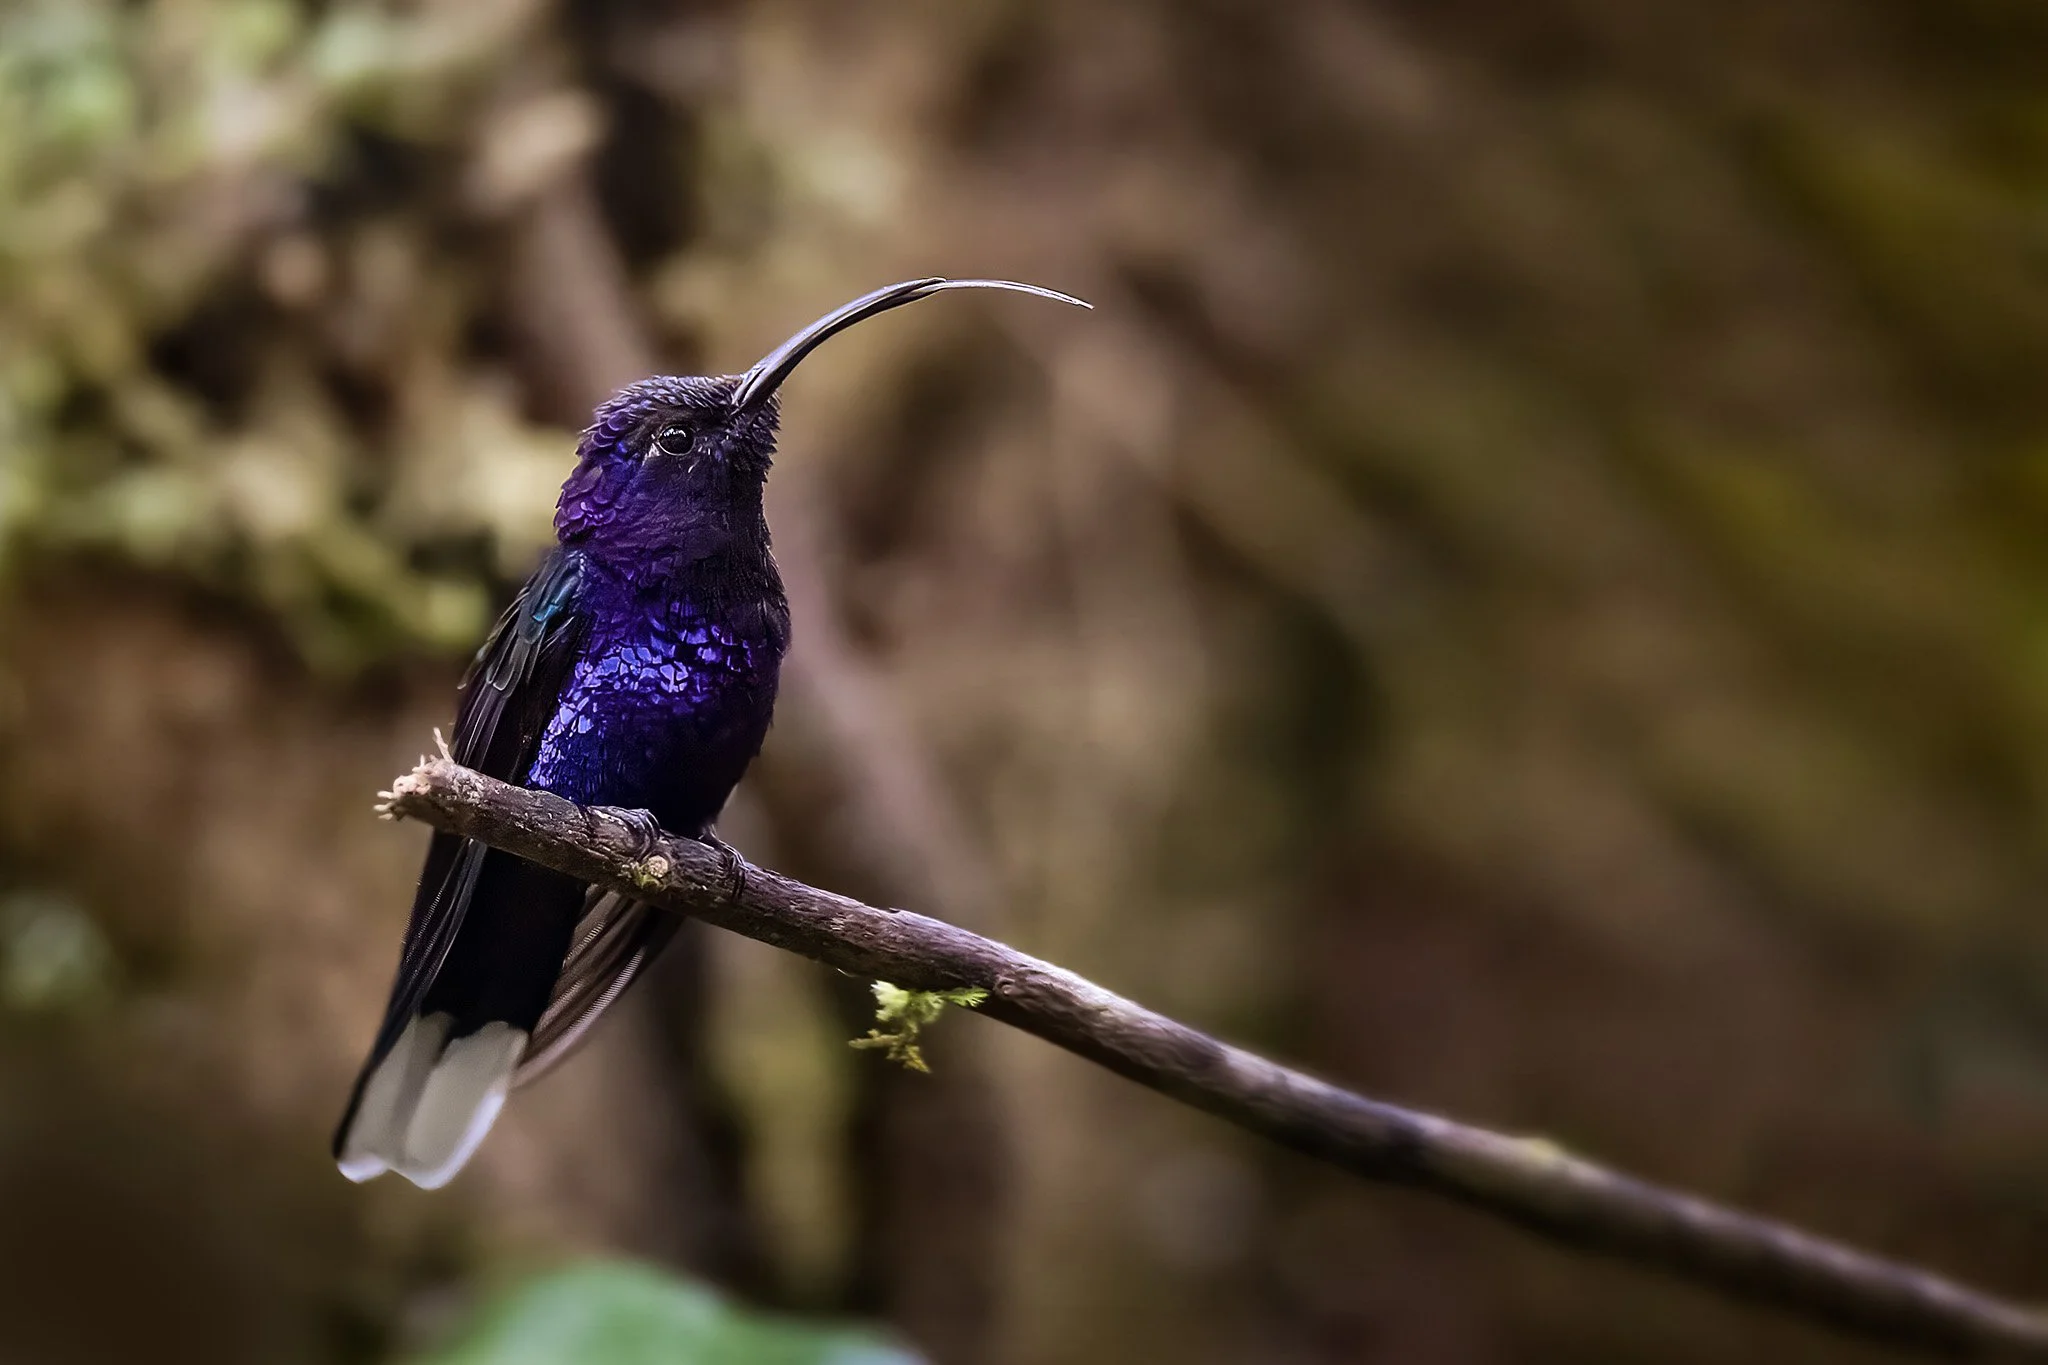
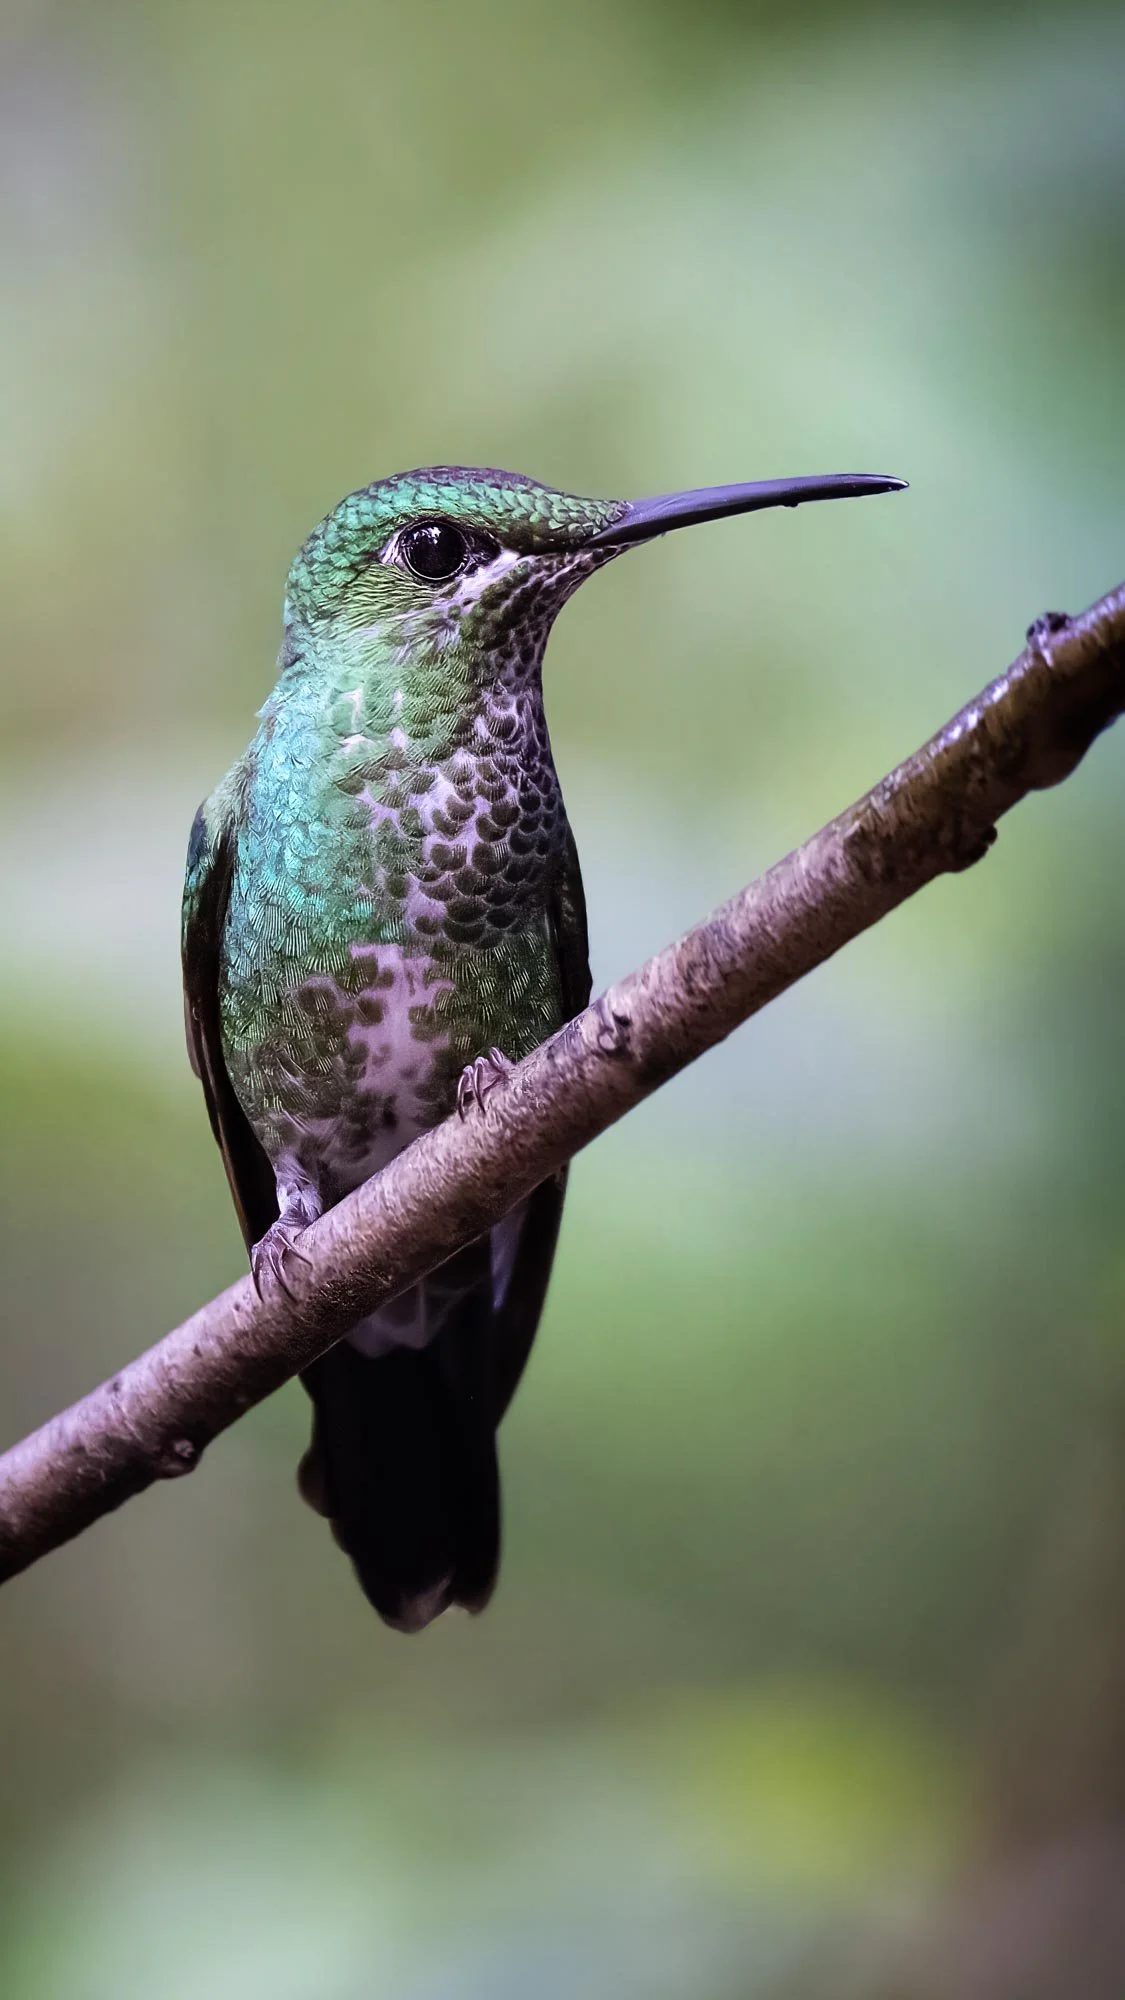
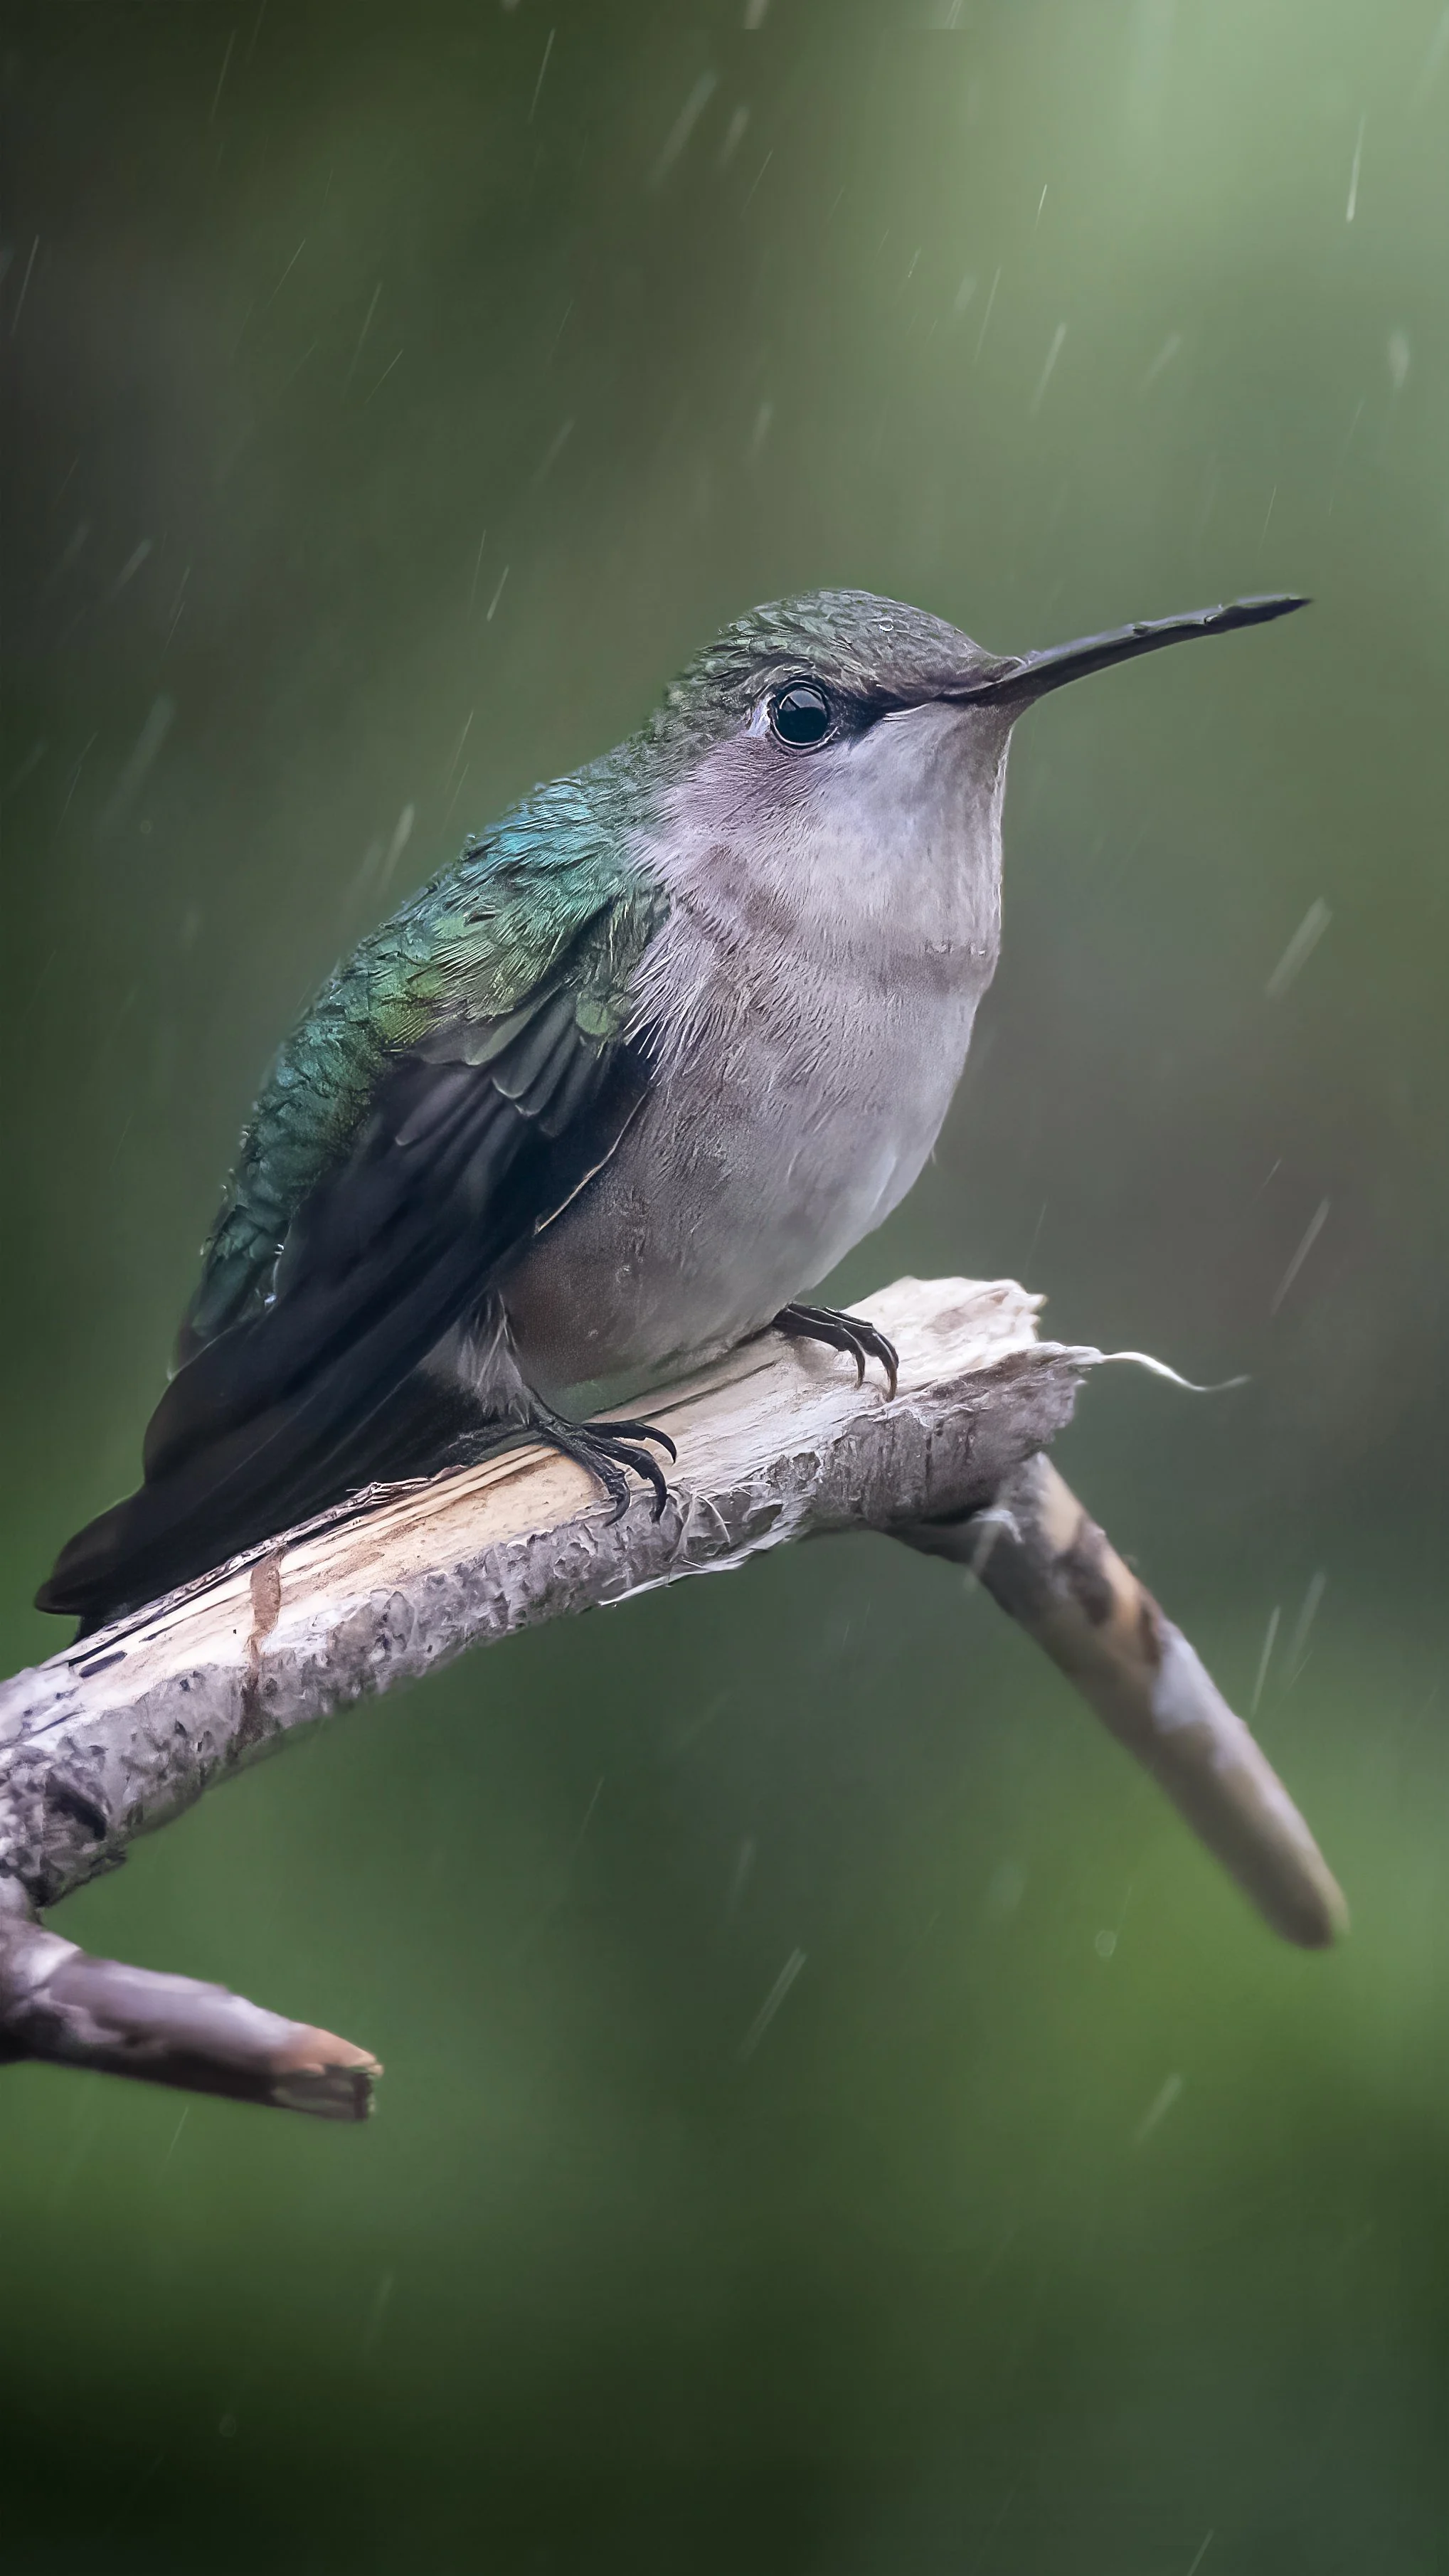
5. The perch personality portrait
When a hummingbird finally stops zooming around like a tiny jet and settles on a perch, you get a rare gift: personality. This is where their sass, confidence, and secret softness all show up. A perched hummingbird isn’t just resting — it’s posing, observing, …
Perched shots reveal details you can’t catch in flight: the subtle curve of the beak, the shimmer of the throat, the tiny feathers puffed up by the wind.
How to shoot it:
Pre‑focus on a perch they return to often; hummingbirds love routines.
Use a moderate shutter speed (1/800–1/1600) to keep things crisp without overkill.
Watch for micro‑expressions: a head tilt, a wing stretch, a fluff‑up moment.
Keep your background clean so the bird’s attitude takes center stage.
6. The interaction shot
Two hummingbirds interacting is pure storytelling gold — a chase, a hover‑standoff, a tender moment.
These shots happen fast, but when they happen… wow.
When two hummingbirds decide to have a tiny mid‑air conversation (or disagreement… or flirtation…), you get one of the most electrifying moments in wildlife photography. Interaction shots are pure storytelling — wings flashing, beaks crossing, attitudes flaring. It’s like photographing a miniature soap opera at 60 km/h.
Two birds in one frame instantly add drama, emotion, and narrative. Are they sharing a sweet moment? Defending territory? Gossiping about your camera settings? Whatever the story, the energy is irresistible.
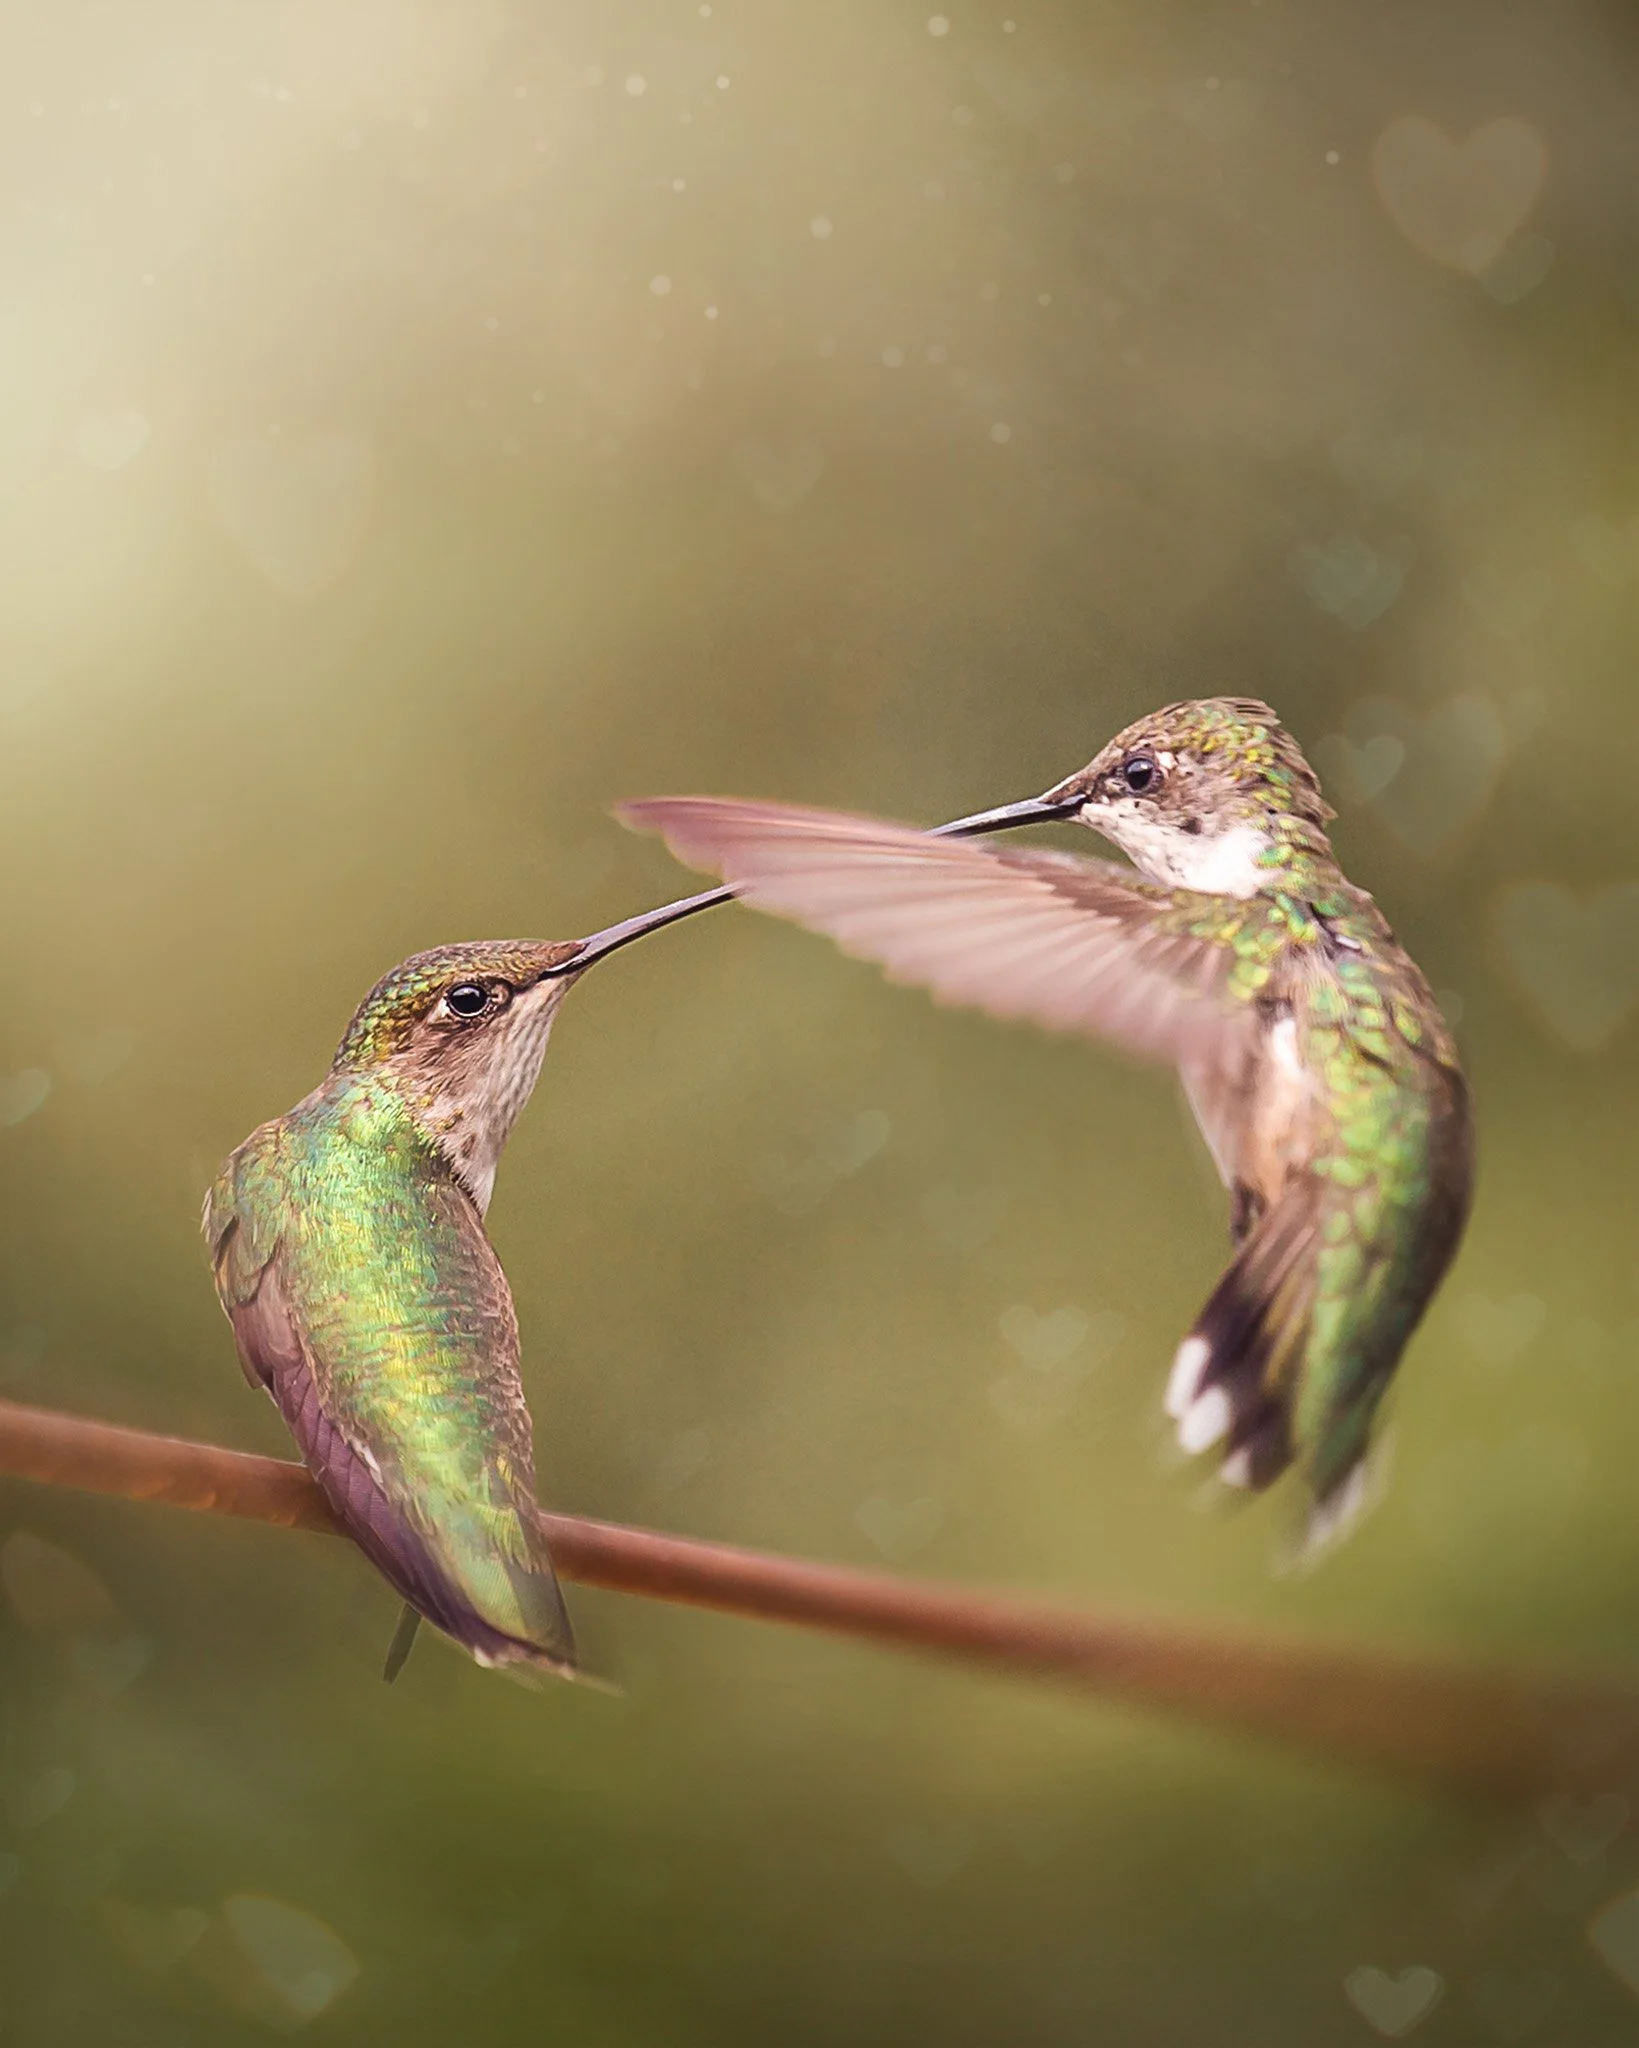
How to shoot it:
Keep your frame a little wider than usual — interactions happen fast and unpredictably. Cropping later is your friend.
Use a fast shutter speed (1/2000 or higher) to freeze the action cleanly.
Position yourself near a flower or perch that tends to attract more than one bird.
Stay patient. Interactions are rare, but when they happen, they’re unforgettable.
I give a full explanation and BTS about this shot in my latest freebie here.
7. The nesting story shot
Photographing a hummingbird at her nest is like being invited into a secret chapter of her life — quiet, tender, and full of purpose. It’s one of the most meaningful shots you can capture, not because it’s dramatic, but because it reveals the softer side of a creature we usually see zipping around like a caffeinated jewel.
A nesting shot tells a story of care, patience, and instinct. It’s intimate, emotional, and deeply memorable. These images add heart to your portfolio.
How to shoot it:
Keep a respectful distance — if she shifts, pauses, or looks uneasy, you’re too close.
Use a longer focal length to stay back while still capturing detail.
Choose soft, quiet light to preserve the peaceful mood.
Move slowly and limit your time; nesting is a vulnerable moment, and your presence should never change her behavior.
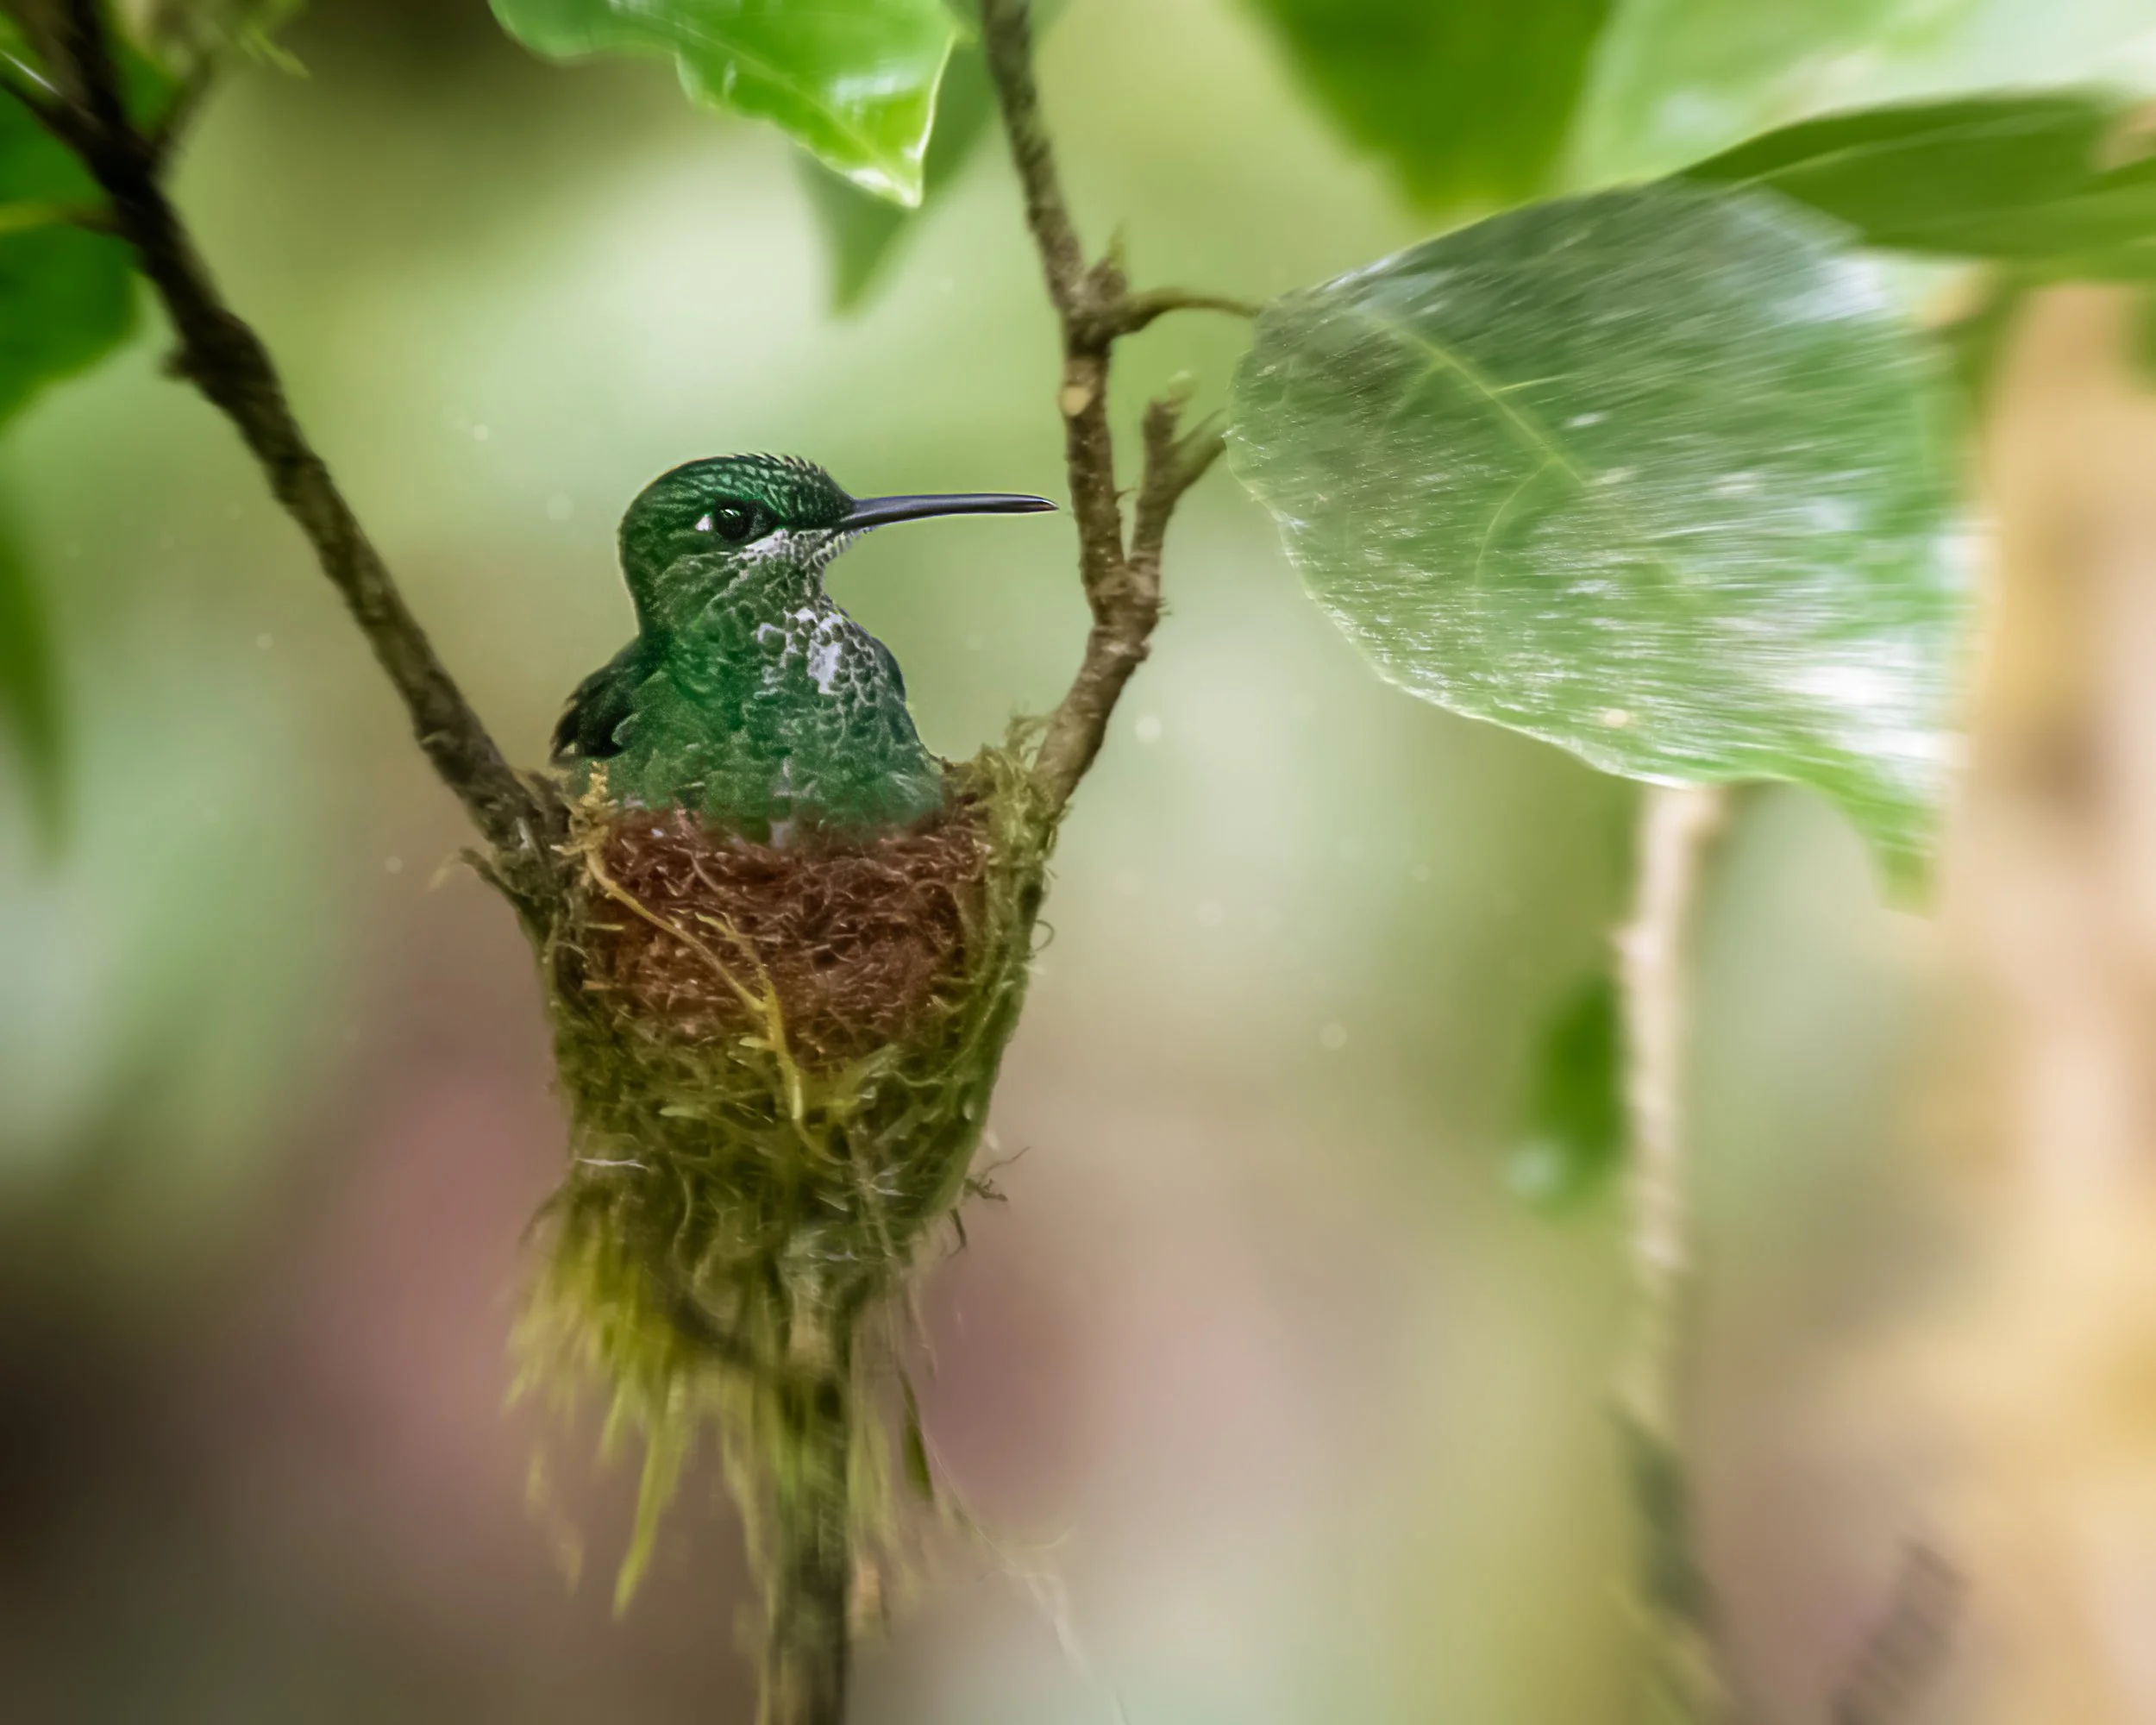
Nesting shots remind viewers that hummingbirds aren’t just fast and flashy — they’re devoted parents with tiny, intricate homes. And when you photograph them ethically, you’re not just making art… you’re honoring their world.
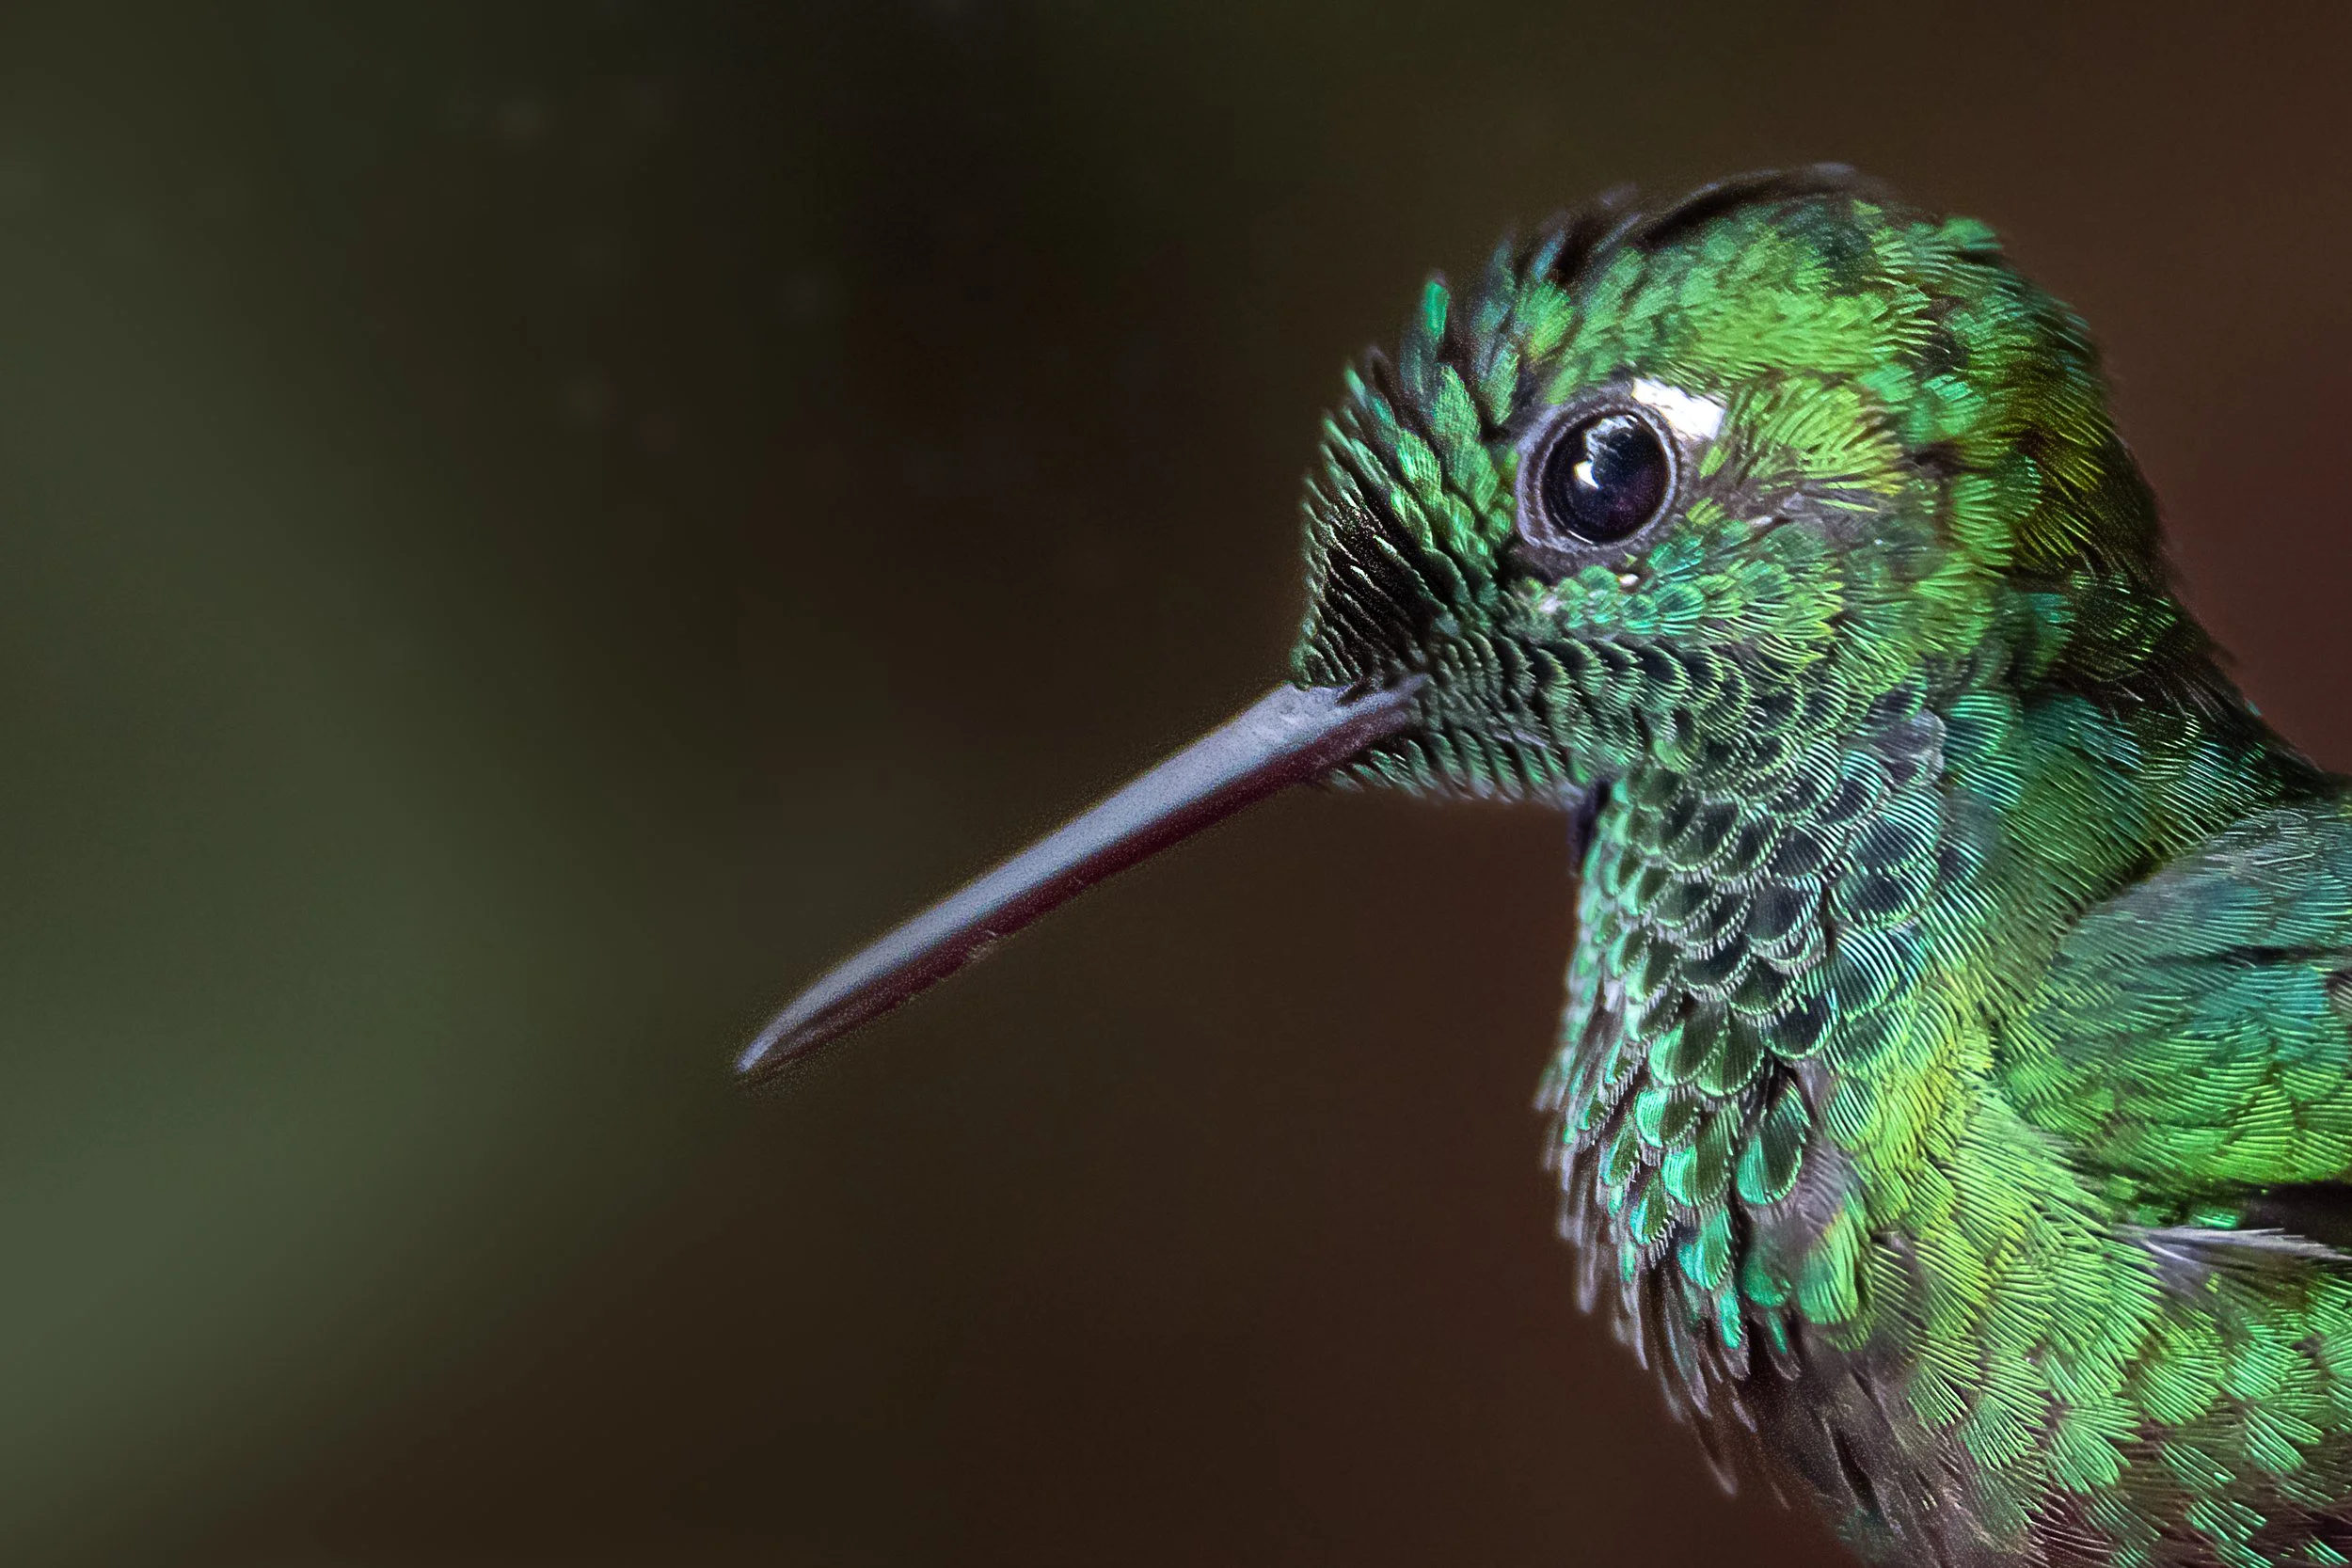
8. The Preening Shot
If hummingbirds had a self‑care routine, this would be it.
Preening is when they pause their high‑speed chaos to tidy up their feathers — and it is adorable. Tiny beak, tiny movements, tiny “just give me a minute, I’m fixing my hair” energy.
You get a rare moment of stillness. It’s like catching a celebrity backstage adjusting their outfit before stepping into the spotlight.
How to shoot it:
Watch for a perch they return to often — preening usually happens in a safe, familiar spot.
Use a slightly slower shutter speed (1/800–1/1600) to keep things sharp but still natural.
Focus on the eye or the curve of the neck as they twist and fluff.
Give them space — preening is a vulnerable moment, and you want them relaxed, not alert.
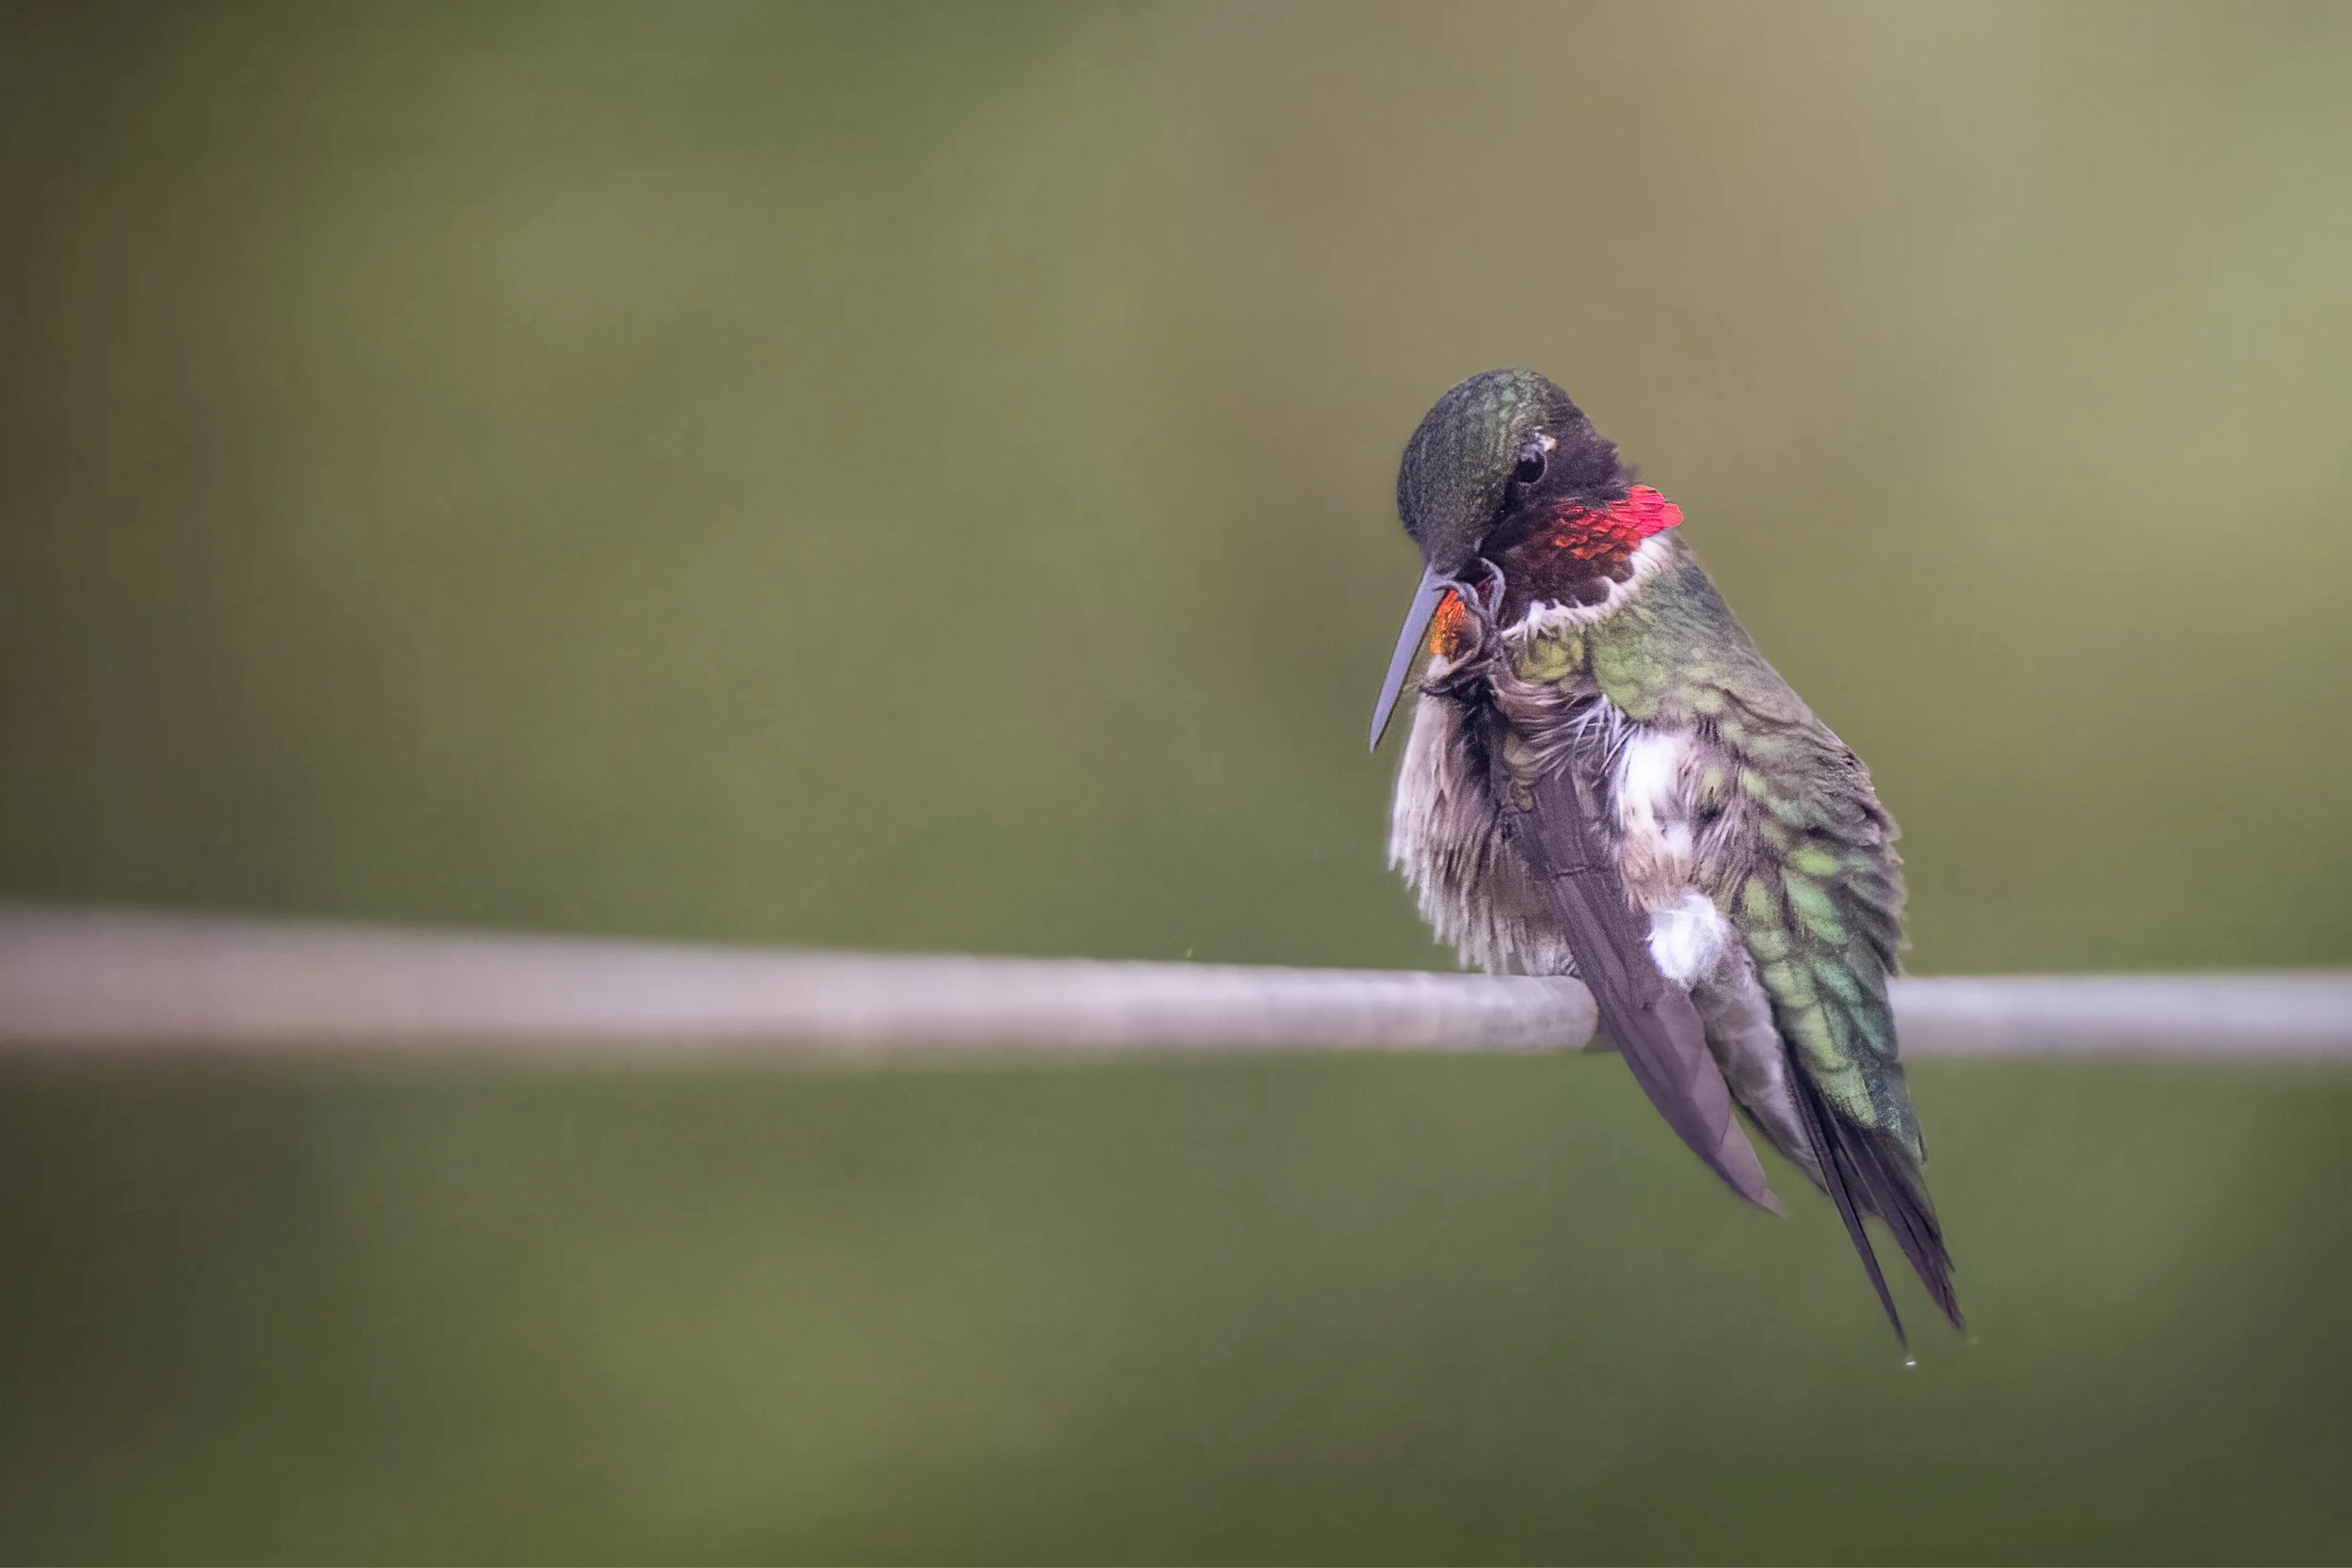
Preening shots are fantastic for showing off feather texture and iridescence. And they add a storytelling moment to your hummingbird portfolio: even tiny superheroes need grooming breaks.
9. The Dew‑Drop Crown Shot
When the world is still waking up, tiny dew droplets cling to flowers, leaves, and sometimes even the birds themselves — turning your subject into a sparkling, jewel‑studded monarch.
Dew adds texture, sparkle, and a sense of freshness that makes the whole scene feel enchanted. It’s like nature sprinkled a little extra glitter just for your lens.
How to shoot it:
Head out at sunrise when dew is still clinging to everything.
Position yourself so the light skims across the droplets — side light makes them glow.
Use a medium shutter speed (1/1000–1/1600) to keep the bird sharp while preserving the sparkle.
Look for moments when the bird pauses or hovers near dew‑laden flowers.
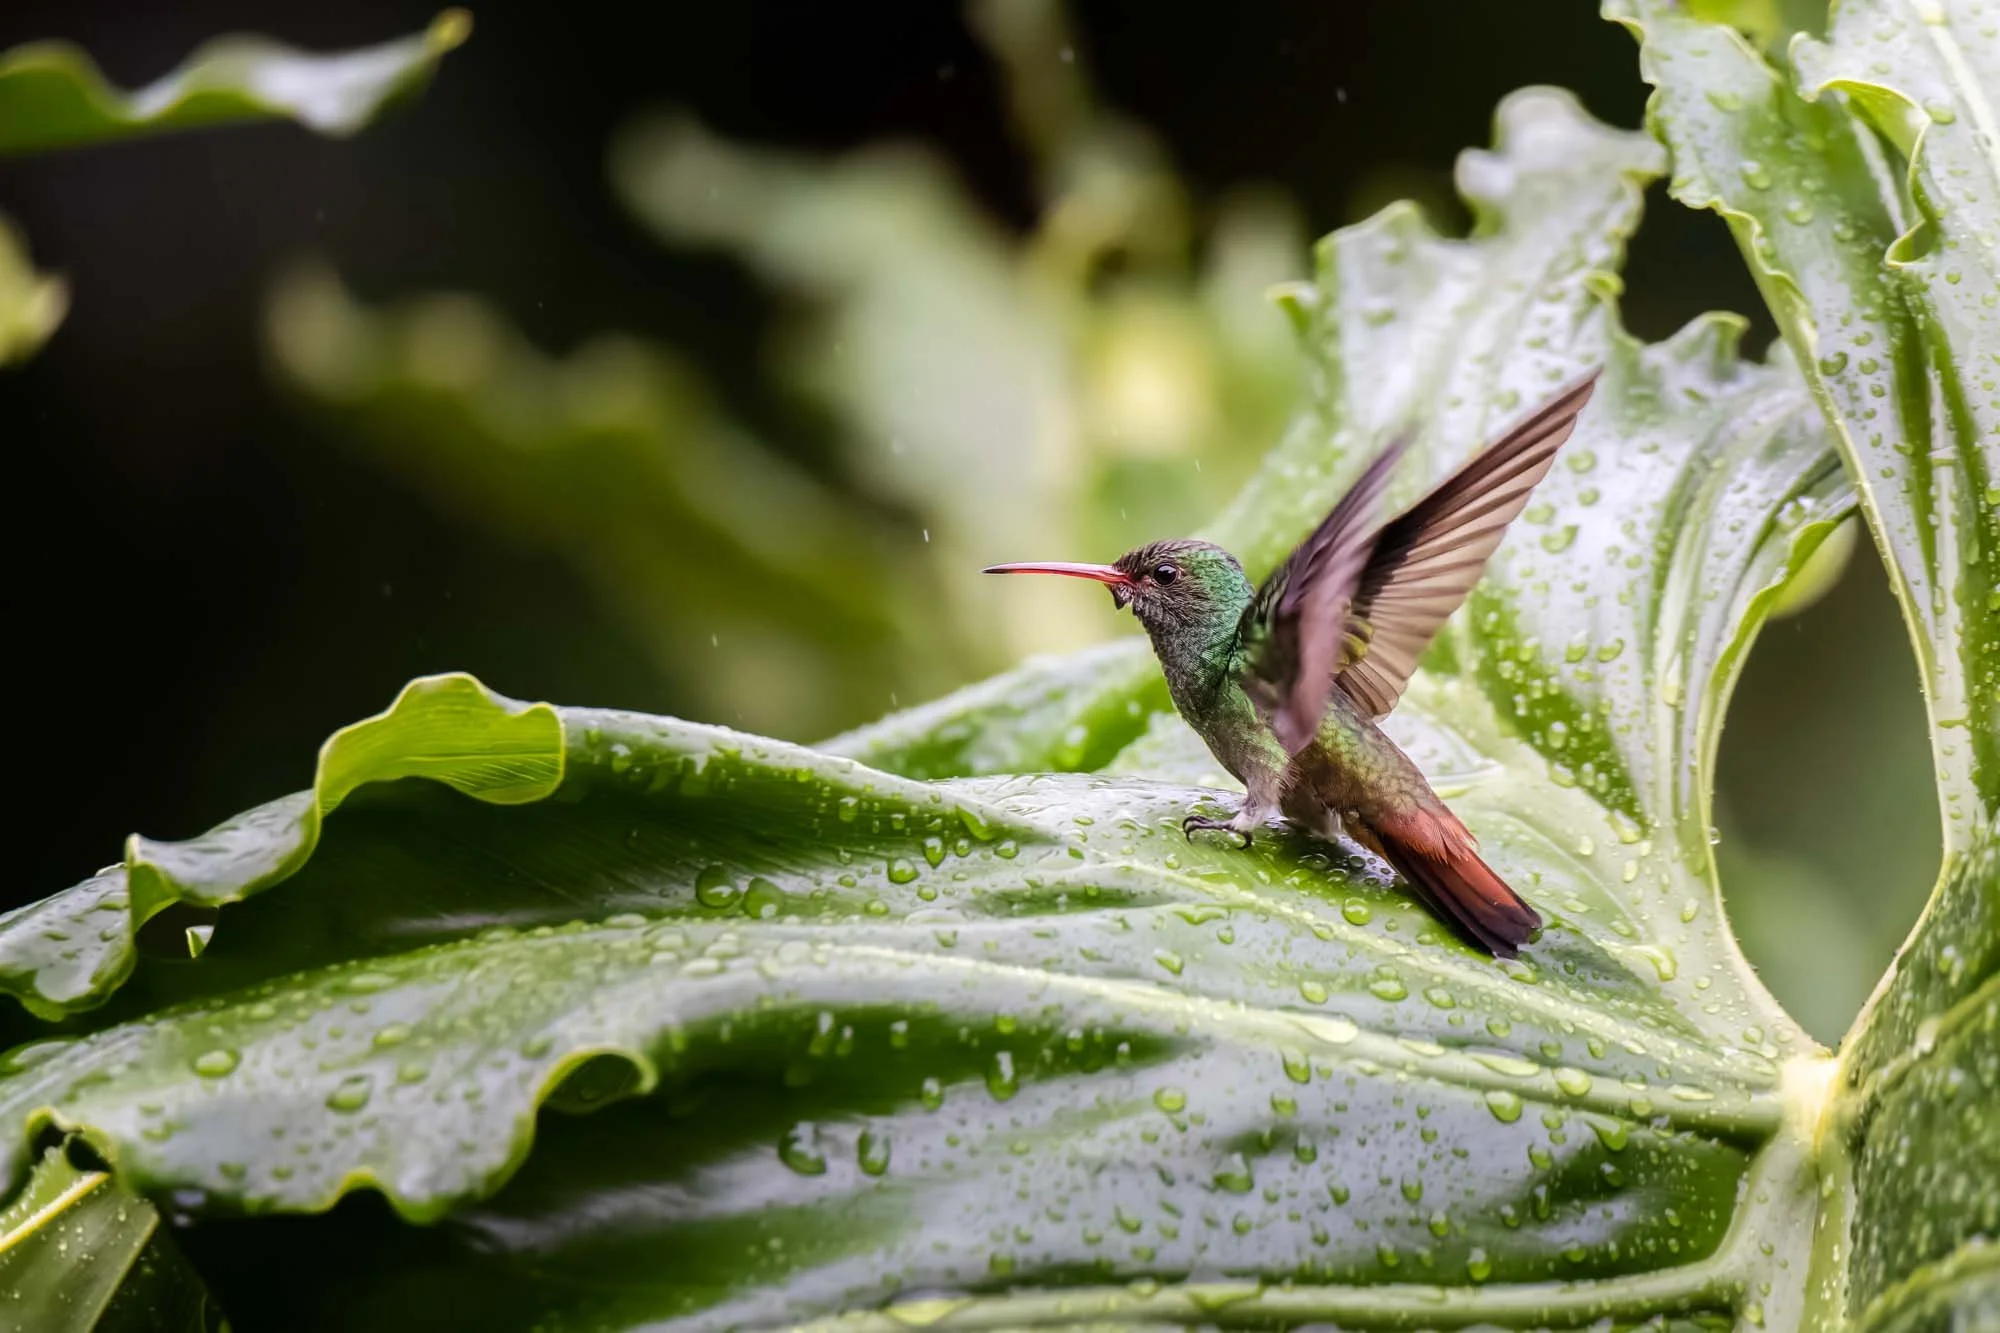
10. The Rainy Shot
Rain and hummingbirds — name a more dramatic duo. Most people pack up their gear the moment the sky gets moody, but if you stay (safely!) just a little longer, you’ll witness pure magic: tiny droplets catching the light, feathers beading with water, wings slicing through mist like miniature superheroes.
How to shoot it:
Use a slightly slower shutter speed (around 1/500–1/1000) to let the raindrops streak just a little.
Position yourself so the light hits the rain from the side — that’s when the droplets sparkle.
Keep your lens hood on and your camera covered, because you are not a hummingbird and cannot shake off water in 0.2 seconds.
Rain calms the background, deepens colors, and gives your images that moody, cinematic vibe that says, “Yes, I am a dedicated artist who photographs in the elements.”
Why these shots matter
Each of these ideas teaches you something different — about light, behavior, timing, composition, and your own creative instincts.
And once you start experimenting, you’ll realize hummingbird photography isn’t just about speed.
It’s about seeing differently.
It’s about slowing down enough to notice the tiny stories happening in front of you — and having the tools to capture them beautifully.
Want to Go Deeper?
If these ideas sparked your creativity, you’ll love my full Hummingbird Photography Guide.
It’s a download‑and‑go resource packed with:
• My complete camera setup
• Behavior cues that help you predict the action
• Composition tricks that make your images stand out
• Ethical guidelines for photographing nests and feeding
• Editing walkthroughs to bring out that magic
Think of it as your hummingbird photography superpower — all in one place.
If you’re ready to level up your hummingbird images this season, the guide is waiting for you!