

5 Exercises to Elevate Your Mobile Photography Skills | by Kristen Ryan
Your mobile phone is almost always with you, isn’t it? So why not utilize it to its fullest potential?
Don’t be afraid you forgot your big camera, or debate whether you want to lug it around with you. Have confidence in your mobile photography skills and know what your phone camera can handle and what it can’t, so you won't have to question which camera to take again.
The number one thing I remind everyone who wants to take better photos with their phone is to stop comparing their phone camera to their large format camera. They are not the same and will not produce the same photos.
Take your phone for what it is. You can take a great photo with your phone; you just need to understand what it can handle first.
Here are five exercises to practice with your mobile phone camera to help you know what it can handle and get you used to how it captures your world. These exercises will help you feel comfortable with how your phone composes, exposes, and captures each scene you come across.
They will give you the practice you need to feel comfortable taking only your phone with you when necessary, or not fretting when that is all you have with you.

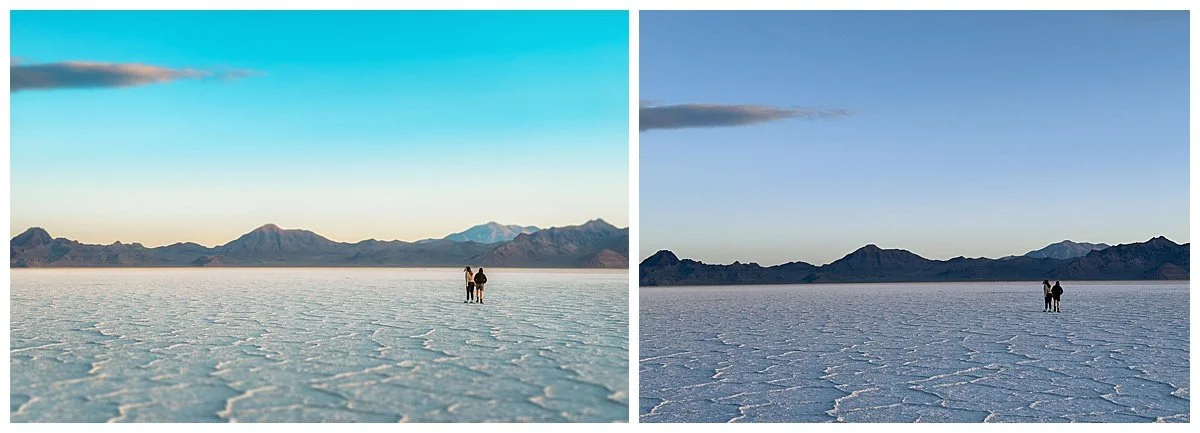
Landscape Practice- Exposure:
Our phone’s camera system is much smaller than any of our larger camera systems, and because of this, our dynamic range for our photos will differ from that of your main camera system. To get a better idea of what your phone can handle, practice taking a variety of photos in different lighting conditions. Specifically, pay attention to the highlights (the brightest parts of your image), then to the shadows (the darkest).
I like to test exactly how wide my phone’s dynamic range is, this helps me know which lighting situations my phone can handle, so I won’t worry about missing a photo opportunity when it presents itself. A great way to test this out is to find a scene with a great sky (I like fluffy white clouds if I have them) and include a subject in the foreground.
First, expose for your highlights, drag your exposure down until your highlights are well exposed, and let your shadows fall dark. Next, take a second photo exposing for your shadows. Adjust your exposure until your shadows are well exposed. Then take a third, balancing the two.
Your main Apple camera won’t have a histogram, but there are some camera apps like Moment that offer histogram options or blown/clipped masks in camera to help you visually see your highlights/shadows.
Once you have your photos, go to your favorite editing program. I usually edit in Lightroom, like I would any of my photos, and edit to your liking. See how your exposures compare to one another. Did your camera do better on highlights or shadows?
For me, I know my camera handles shadows better than it does my highlights. So I pay attention to that when I am taking my phone photos, always making sure my highlights aren’t too overexposed so I have room to bring them back in post-processing.

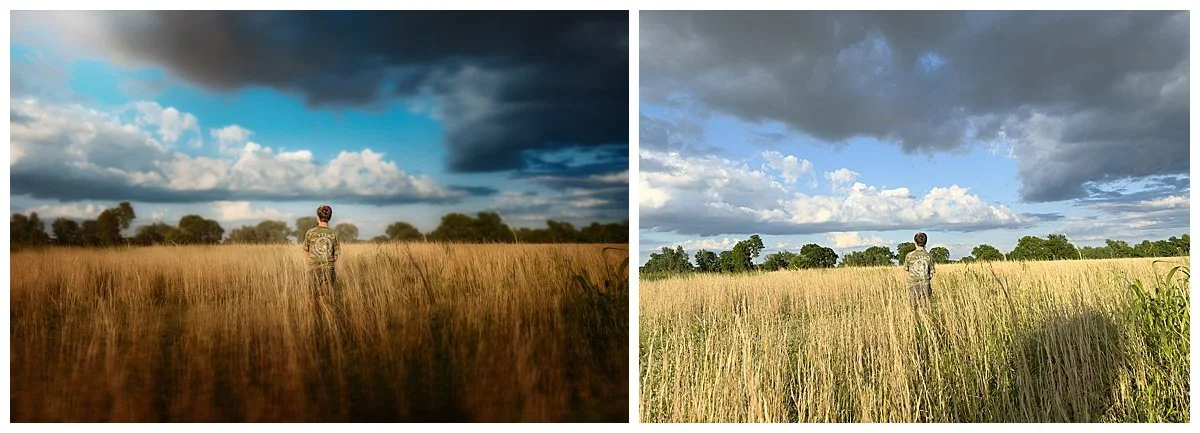
Landscape practice-Aperture and Focus:
Our phone’s system (especially on Apple) is known for having very sharp, sometimes too sharp, photos. When taking a landscape photo, most of your scene will be in sharp focus. There are some options like portrait mode that are supposed to help give you an f/stop; however, it is not the prettiest bokeh, and to me is a big giveaway that it is a phone photo.
I like all my photos to blend cohesively, no matter what camera I use, so I tend to avoid portrait mode and try these tricks instead.
First, I add depth in post-processing. If I have a big scene and a single subject, I can add depth by adding a Gaussian blur to my background or adding a tilt-shift to my scene. This gives me the line of focus I would have with a wide f/stop on my other camera systems.
Or get close to your subject and allow the background to blur more naturally. Your phone, while not as strong as a wide aperture lens, will blur your background when you are close to your subject. You can then exaggerate that blur in post-processing again if you’d like.
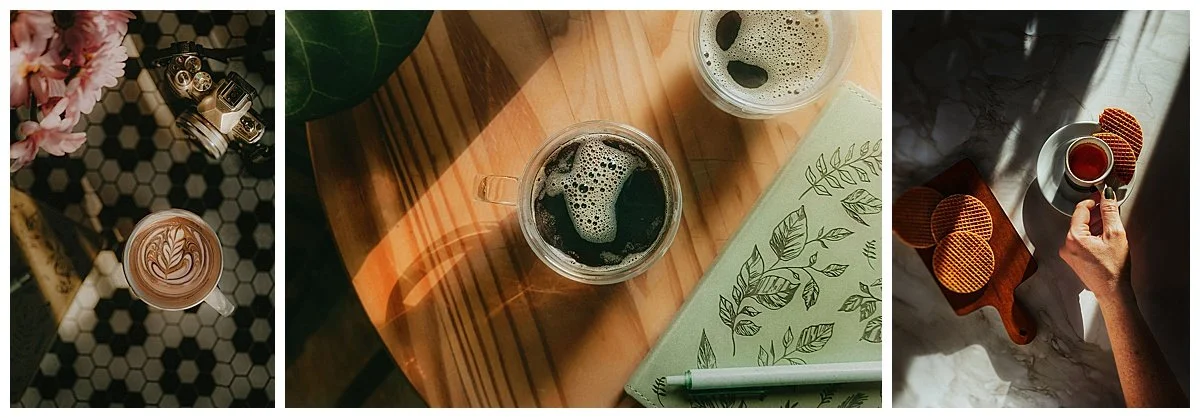
Still life:
By practicing still-life photography, you can really get an understanding of how your phone composes. Like any new lens you get, you have to have an understanding of how that lens composes your subject. For example, a 16mm lens will not line up your subject the same way your 85mm lens will.
Your phone does not take photos as your full-frame camera does, so you need to have a full understanding of what it will do when you raise your phone up to take a photo. It will give you much more confidence using that camera and understanding it as you do any other lens in your collection.
I suggest still life because you can focus on one subject and move around it, creating a variety of looks from a single scene. This is a great exercise to practice creativity and learn how your lens works at the same time.
Set up your subject with the lighting of your choice and take 10 photos, each with a different look. How can you adjust your settings, perspectives, and compositions to create 10 distinct looks from the same subject and location?
This exercise will help you push your creativity with just your phone and feel comfortable using it like you would any other camera and lens combo.
Portrait:
You are probably thinking, " This is the last camera I would grab for a portrait of someone.” But what if that’s all you had? Or you had the perfect photo idea, but didn’t bring your camera.
I love to practice the occasional portrait session with my phone, one, just to see what I can do with it, and two, to push my skills further and be confident I can create with any of my cameras I have with me in that moment. So I encourage you to practice a portrait session this week using only your phone.
Find a friend, or do a self-portrait session. During my session here, I set up my phone on a tripod and used a cheap Bluetooth remote to easily capture some photos of myself.
Just as with any portrait session, light is key in setting the mood you want. I find with my phone (and what we talked about earlier about sharpness), a plain/simple background works best, to simplify your scene and bring your viewers eye right to your subject.
Use post-processing to play with background blur if you desire, but if you have a simple background, usually that isn’t even necessary.
On a personal note, I tend to soften the overall texture of my portraits (very slightly) on the photos from my phone to give them a soft (not crunchy) look. Since our phones tend to oversharpen everything, this just gives it that more natural feeling.
Play with that idea yourself and see what you prefer.

Editing:
A big help to me, loving my phone photos more, was when I was able to match my editing style to that of my full-frame photos. This helped all my photos to be more cohesive when I went back over my galleries. This took some time to adjust to and learn what worked well and what didn’t for my editing style.
I encourage you to explore editing your phone photos. You can send them right to Lightroom like you would your DSLR photos and edit them just the same. But remember, the photo sizes are much smaller than those of your full frames, so your editing movements will be much smaller than what you might be used to.
Your go-to preset you use might feel too strong on your phone photos, but you can lower the opacity by half or more and still keep the look you are going for.
I personally like to crop my phone photos to match my other camera photos, too. Before I even begin editing, I will crop to a 2x3/4x6 ratio. This, again, helps all my photos to be cohesive, so when I am scrolling through all my images at the end of the month, there is no difference between them.
You can definitely keep all of your editing on your phone, too. There are some great apps, such as Lightroom mobile, Snapseed, and A Color Story, that let you edit right on your phone, and I will do that from time to time as well.
However, what really made me love my phone photos was being able to keep them cohesive with all my other work, and for that, I had to edit them the same way. Give it a try and see what you think.
Overall, the biggest thing you can do to improve your phone photography is to simply do it more. The more you practice and use your phone camera, the more comfortable you will be with it.
It is not solely about how new your phone is or how “good” your camera is; it is knowing what that camera can and cannot handle. I have photos in my course “Your Guide to Mobile Photography”, from all generations of iPhones. Photos that I am proud to share, and they came from understanding what that camera could do.
So don’t let the older versions stop you from using your phone camera more. You are an amazing photographer, and it is not the camera that makes that possible! So use that talent in all forms and with any camera you come across.
If you want to dive into this topic more and watch how I use and edit my phone photos, check out my course in The Framed Focus shop, “Your Guide to Mobile Photography.”