Creating Multiple Exposure Portraits | By Emma Challinor
Although I’m primarily a documentary photographer, I’ve discovered a love for creating double (or multiple) exposure portraits of my family—and for my clients.
How It Started
Honestly, I’m not sure I would have ever tried a double exposure if it hadn’t come up as a theme in 52 Clicks, a weekly photo project I take part in with The Framed Focus. As soon as I saw the prompt, I knew I wanted to create a portrait that reflected something meaningful about my son’s personality.
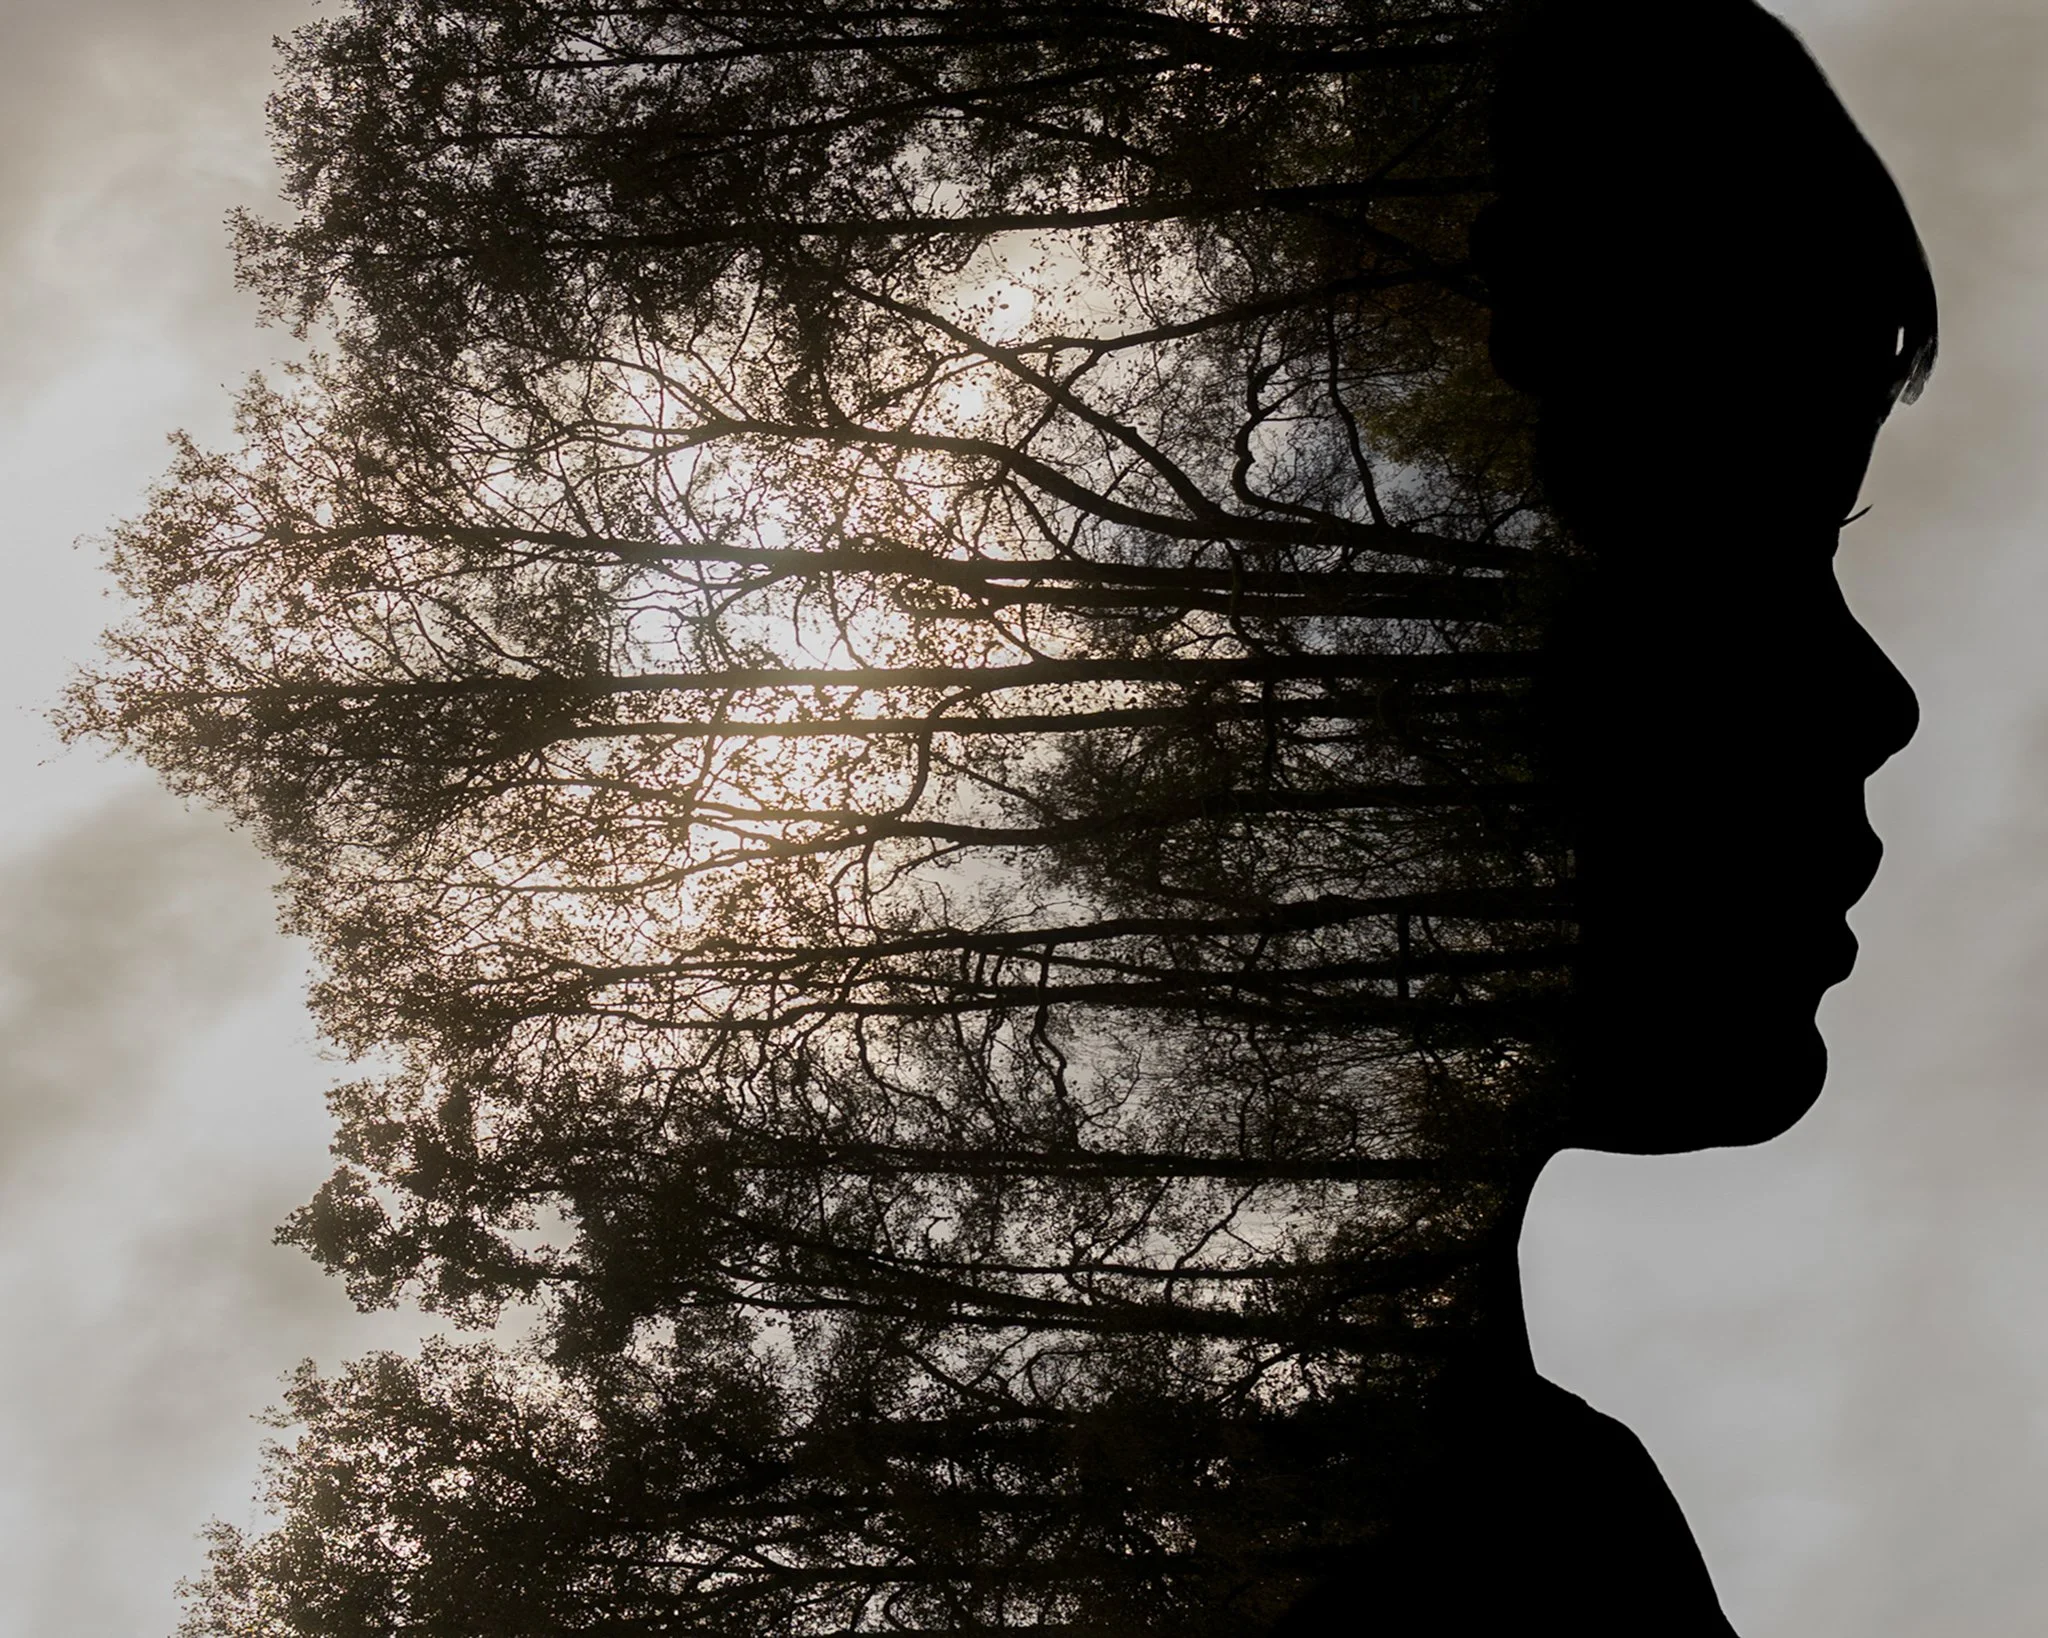
At the time, my youngest was attending a forest preschool in a beautiful outdoor location. I decided to use a photograph of that setting as the second exposure, hinting at how this time outdoors was shaping him.
My first creative portrait, Little Wilding, came together one evening through trial and error. I layered two images, experimented with blending modes, and moved the images around until they worked well together.

My Why
At that point in my photography journey, I was defining my style as a documentary photographer. This new style of portrait was quite a departure, and I initially worried about whether it fit with my existing work.
I’ve actually found these images provide a wonderful counterpoint to my documentary work, and I appreciate the contrast between the two. My day-to-day editing is very true-to-life-I use a light touch-whereas these portraits require longer, more involved, editing sessions. I enjoy the creativity and freedom that these bring, and find the process almost meditative- a form of relaxation.
In my documentary work, I let my children’s (or clients’) interests and passions guide the story. With these portraits, my own vision takes the lead. I plan, imagine, and shape the story in a more conceptual way. While my documentary photos tell the literal story of my boys’ childhood, these creative portraits offer something more poetic, more allusive and interpretive. They allow me to explore connections in a much more subtle way.

Tips for Creating Multiple Exposure Portraits
1. Start with a Theme or Concept
My creative portraits always start with an idea- a desire to say something about one of my family members or the relationship between people. (With clients, I send out a questionnaire which we then discuss over the phone to arrive at a suitable theme.)
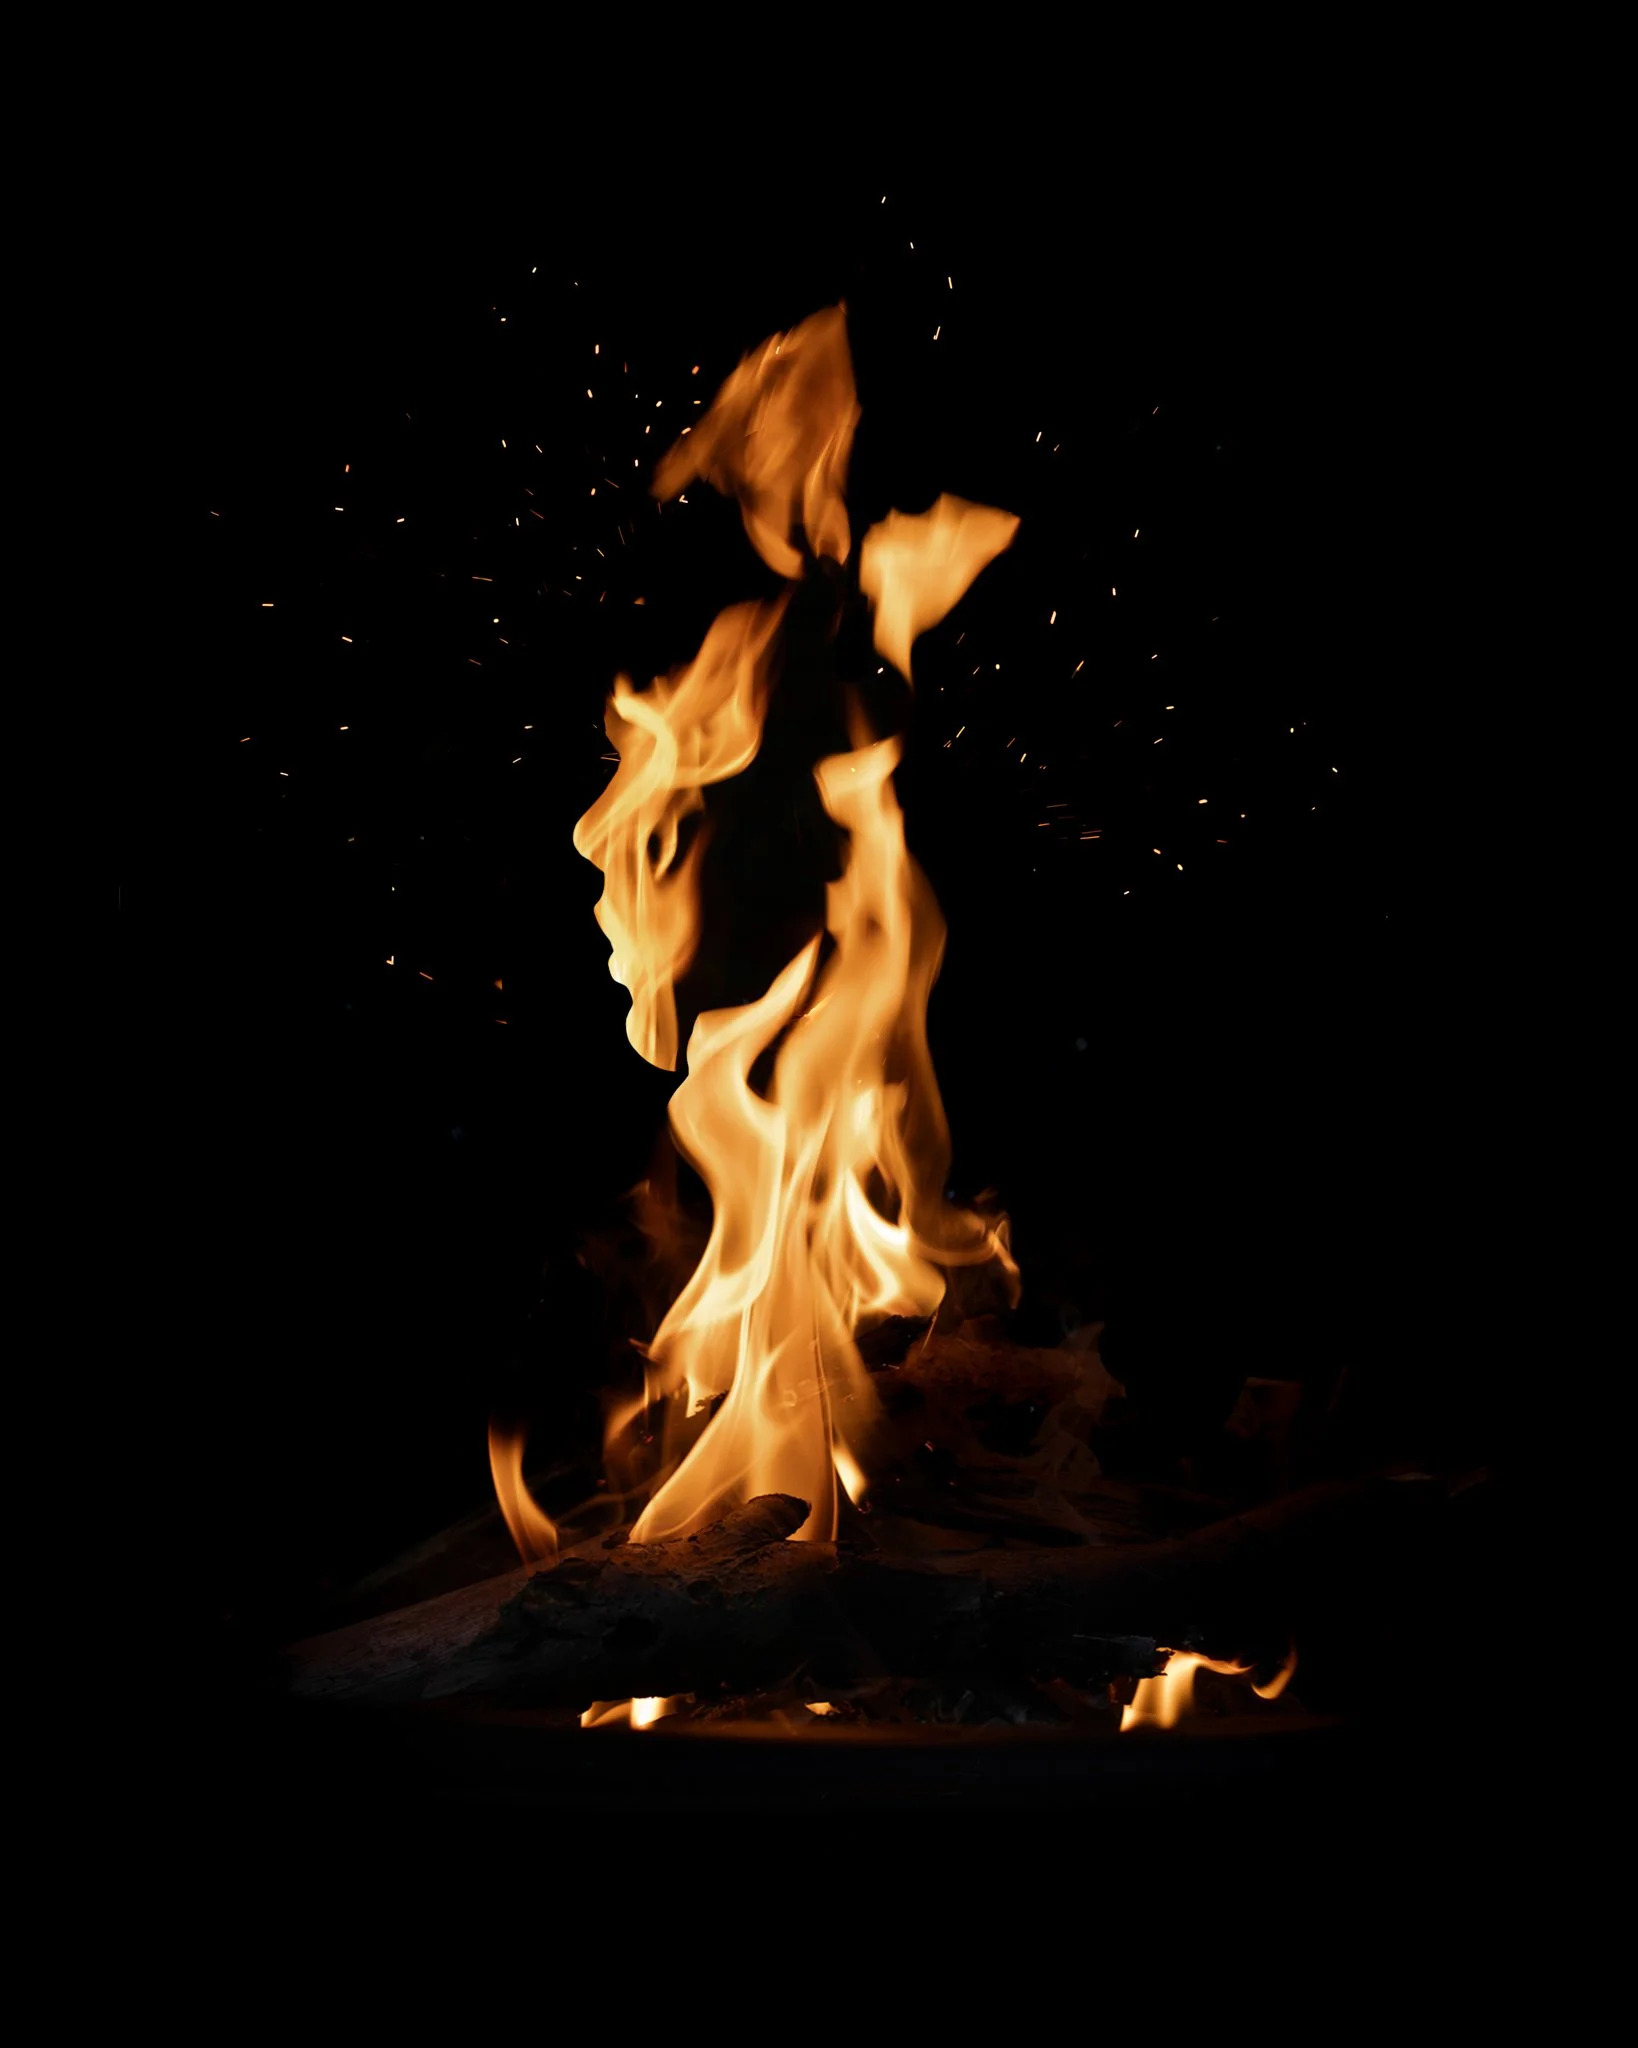
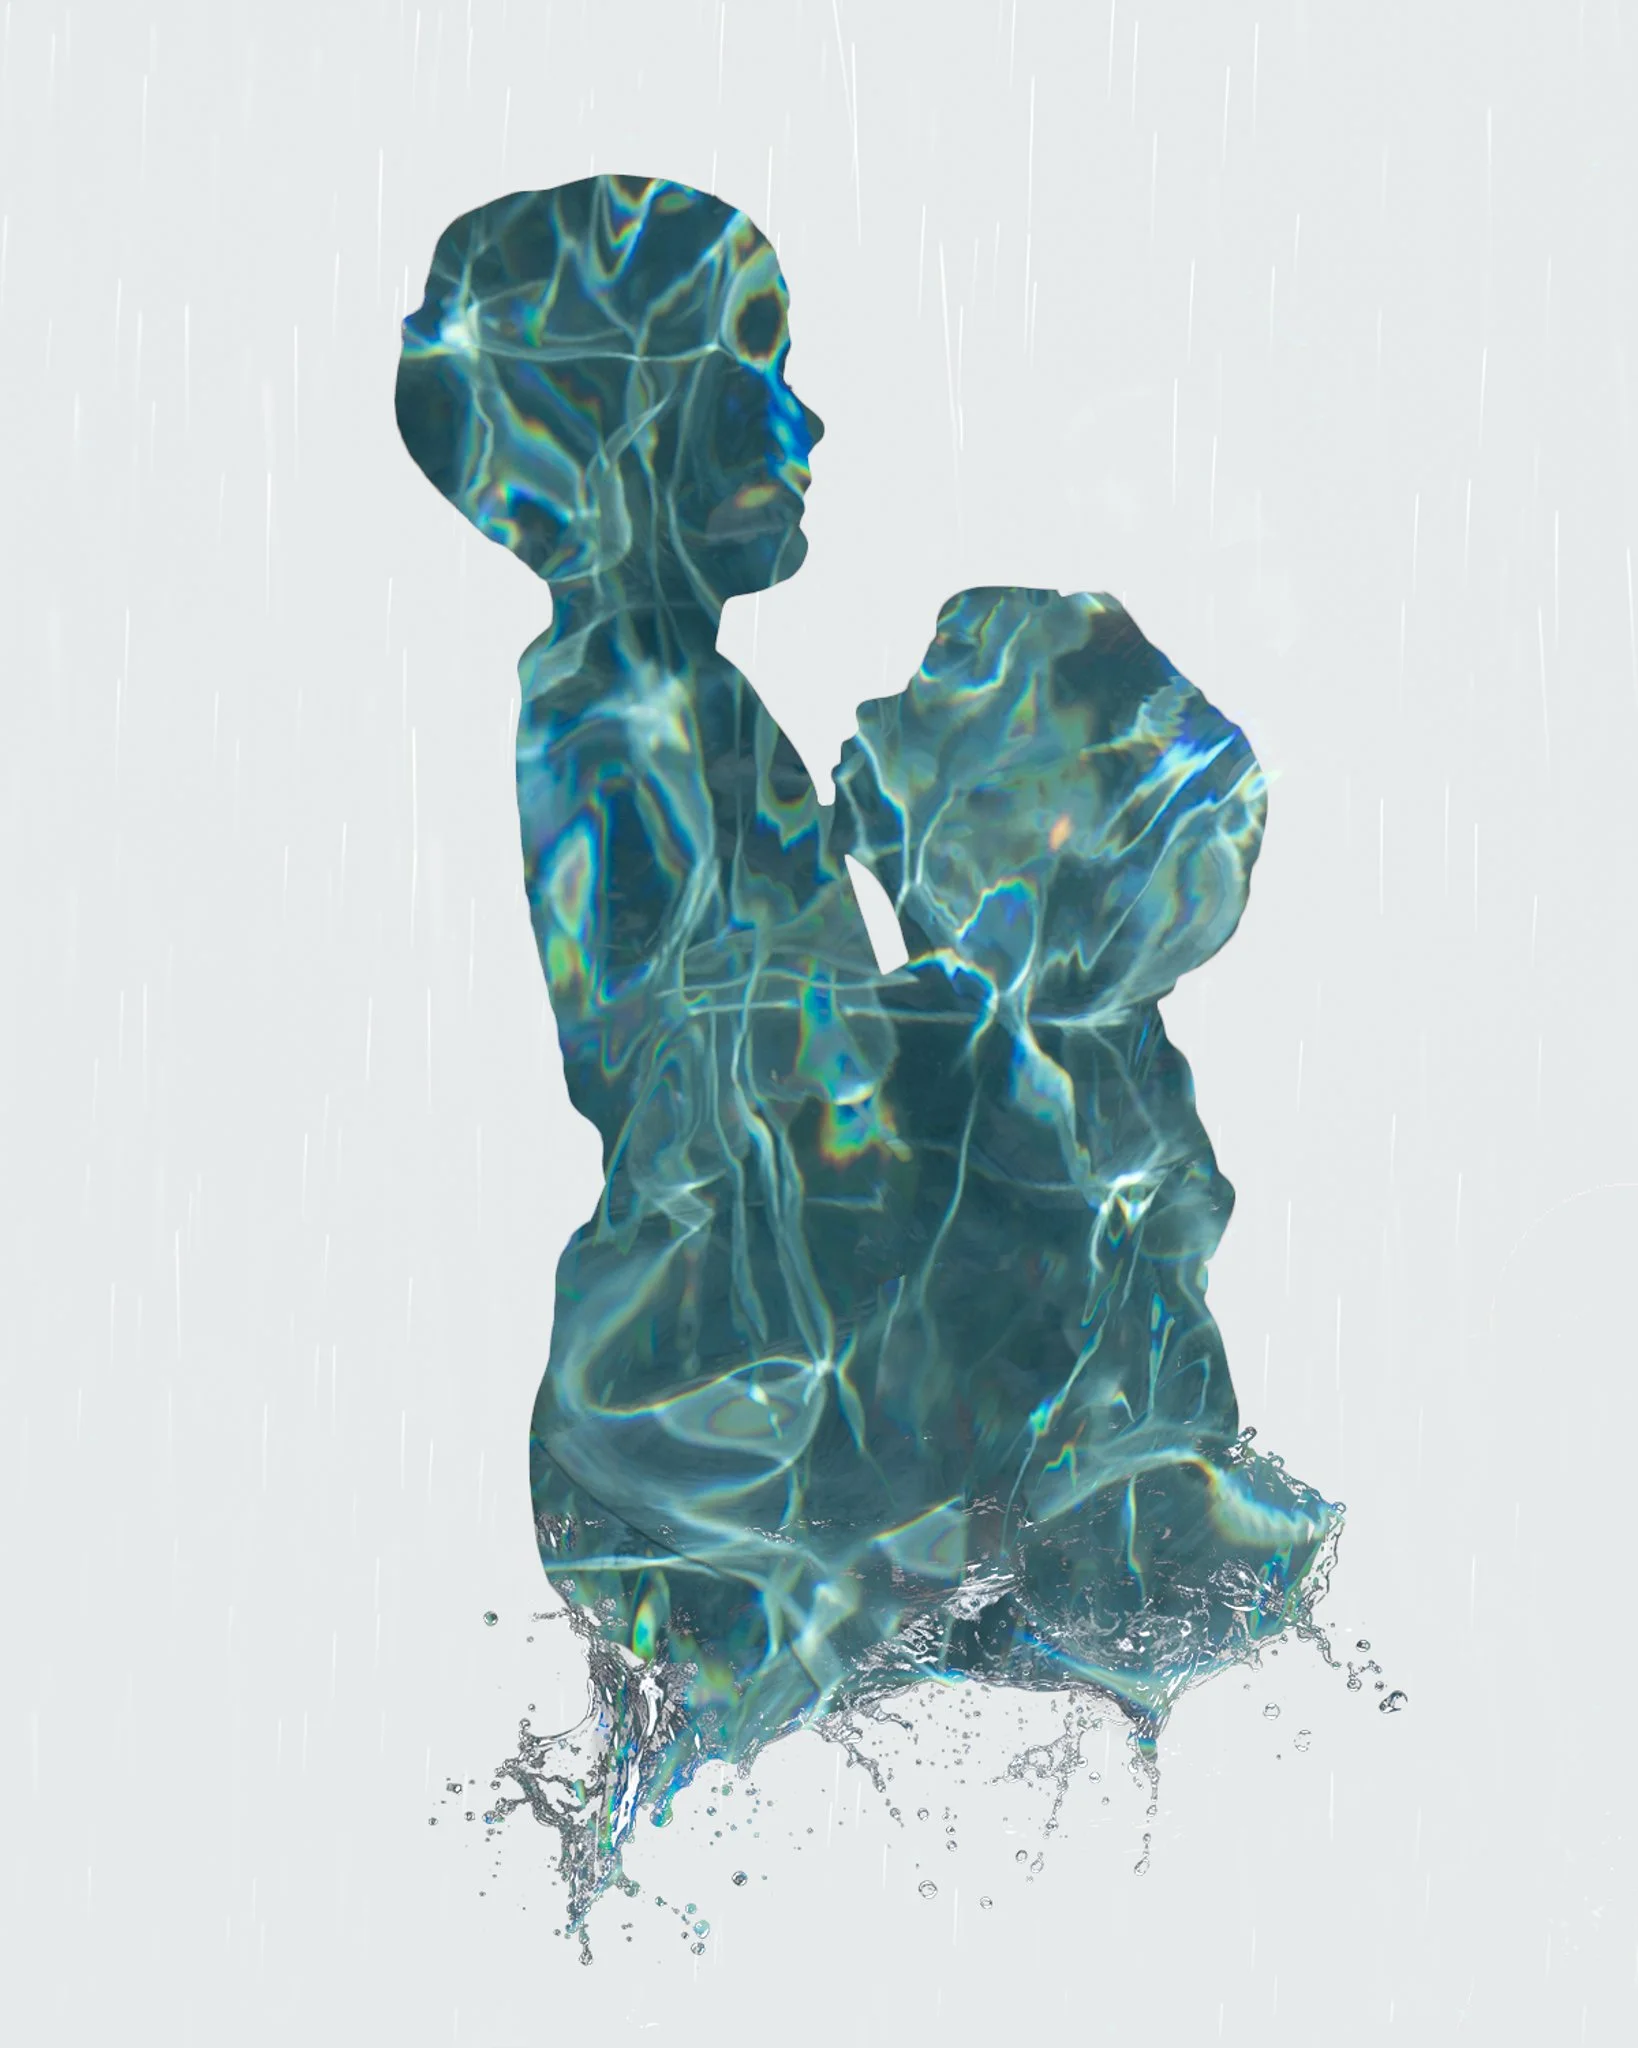
Earlier this year, I created a series of four images around the four elements- earth, air, water, fire- when these were a monthly theme in our P52. These were planned to correspond to my sons’ personalities and their relationship with one another.

2. Create Your Base Portrait
Things to consider:
Do you want to capture your subject’s face in profile or straight on?
For profiles, try to make sure your subject is fully at 90 degrees to the camera, and check that the full outline of their face is visible (details such as whether their eyelashes, etc. can be important).
Consider how much detail you need. Will you mask the subject so only their profile matters? If you include their features, elements like catchlights in their eyes may become important.
I often underexpose compared to a typical portrait, because I often use the images as silhouettes or I use the “lighten” blend mode to bring out the second image in the shadowed areas.
As long as there’s a blank wall directly behind my subject, I’m not too worried about the background- I often add a fill layer behind their image.
You can see from the contact sheet below that I usually take a range of images. I often use a quick subject mask in Lightroom and lower the exposure to get a rough idea of how it will look after more precise masking in Photoshop. In this case, I ended up using the image marked in red for my Air image.

3. Build a Series of Images Based on Your Concept
Once I have a subject for my double exposure, I spend some time shooting images based on my theme. For example, when working on the element of air, I spent a week photographing clouds, birds, and kites- anything that fit the theme.
I also look through my back catalogue for any images that might work.
In this case, none of my initial images felt like a good fit with my son’s portrait. Then I thought of using smoke to represent air, so I ran over the road to buy incense sticks and took a series of photos of the smoke.
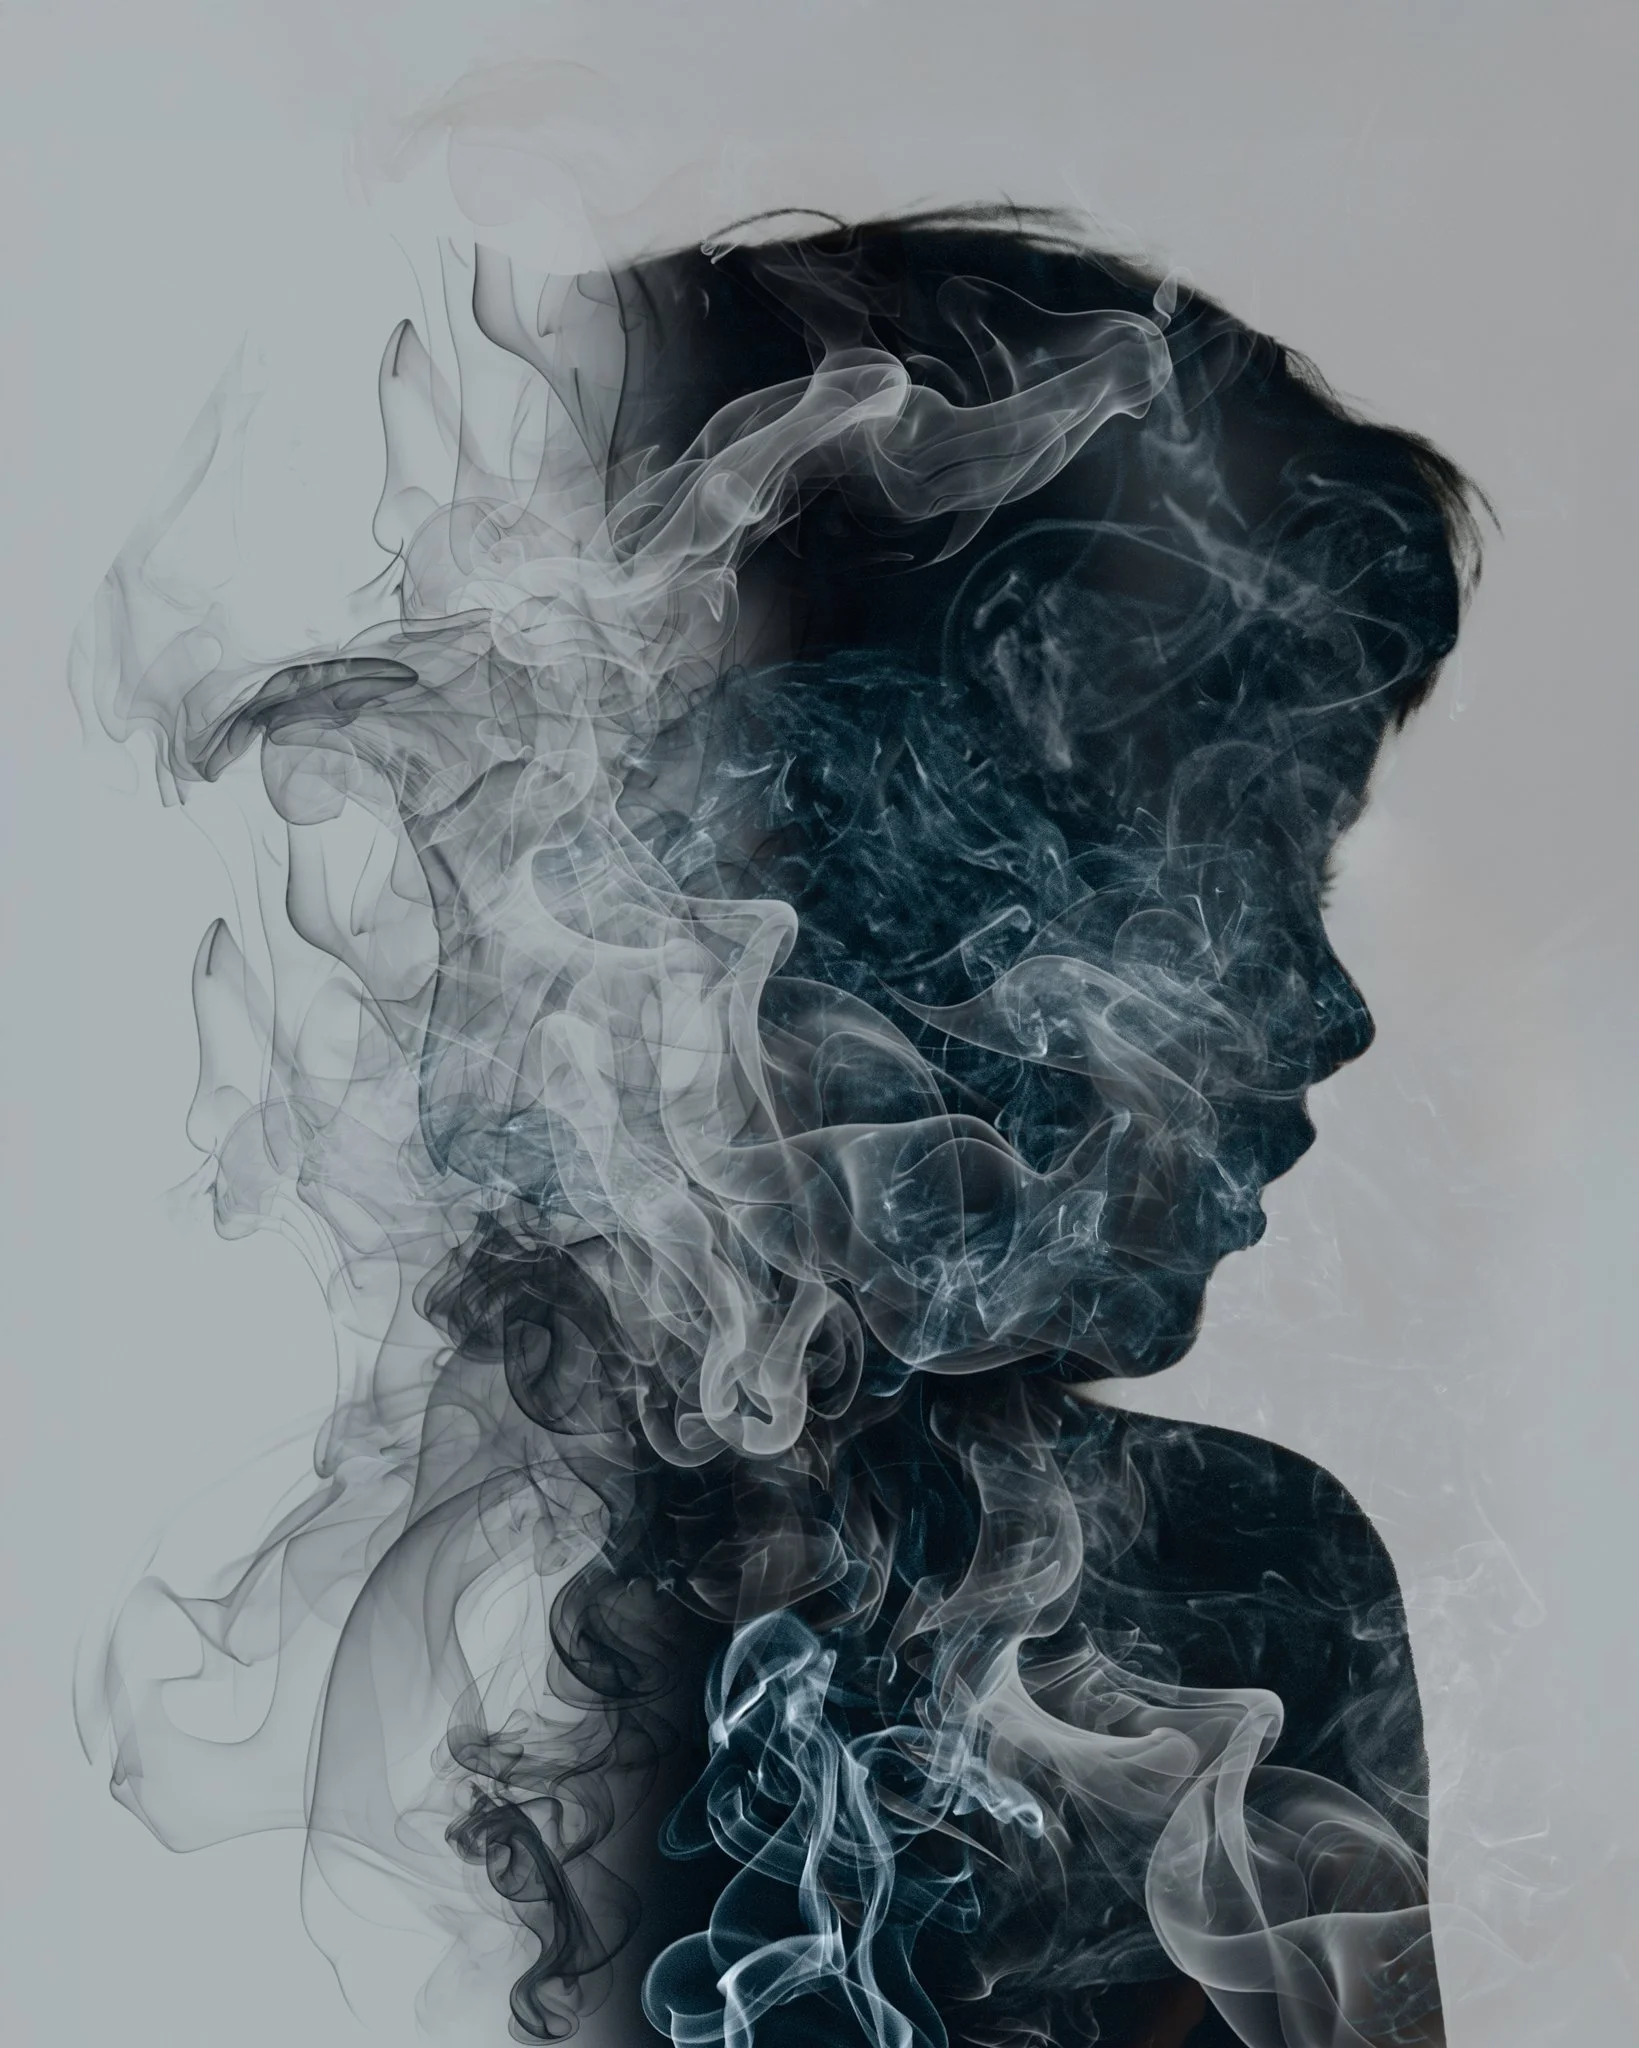
The final image, above, was created by masking my son’s profile in Photoshop, adding a grey fill layer beneath it, and layering images of smoke on top. I used different blending modes and masks to reveal the smoke. I also created a set of brushes from the smoke images to soften the back of his head—so it looks like he’s appearing in a cloud.
4. Clear Some Time for Editing
Sometimes, two (or more) images come together quickly. Other times, I’ll spend hours trying different combinations until I find a match. I like to set aside an evening, once the boys are in bed, when I can put on music and let myself experiment.
I gather all the project images, let my mind wander, and notice visual links between them.
For example, in Little Wilding, my son’s curly hair and the grass in front of the water immediately suggested a pairing. Once I moved the reeds to the level of his hair, and the white flowers rested at his neck, it felt just right.
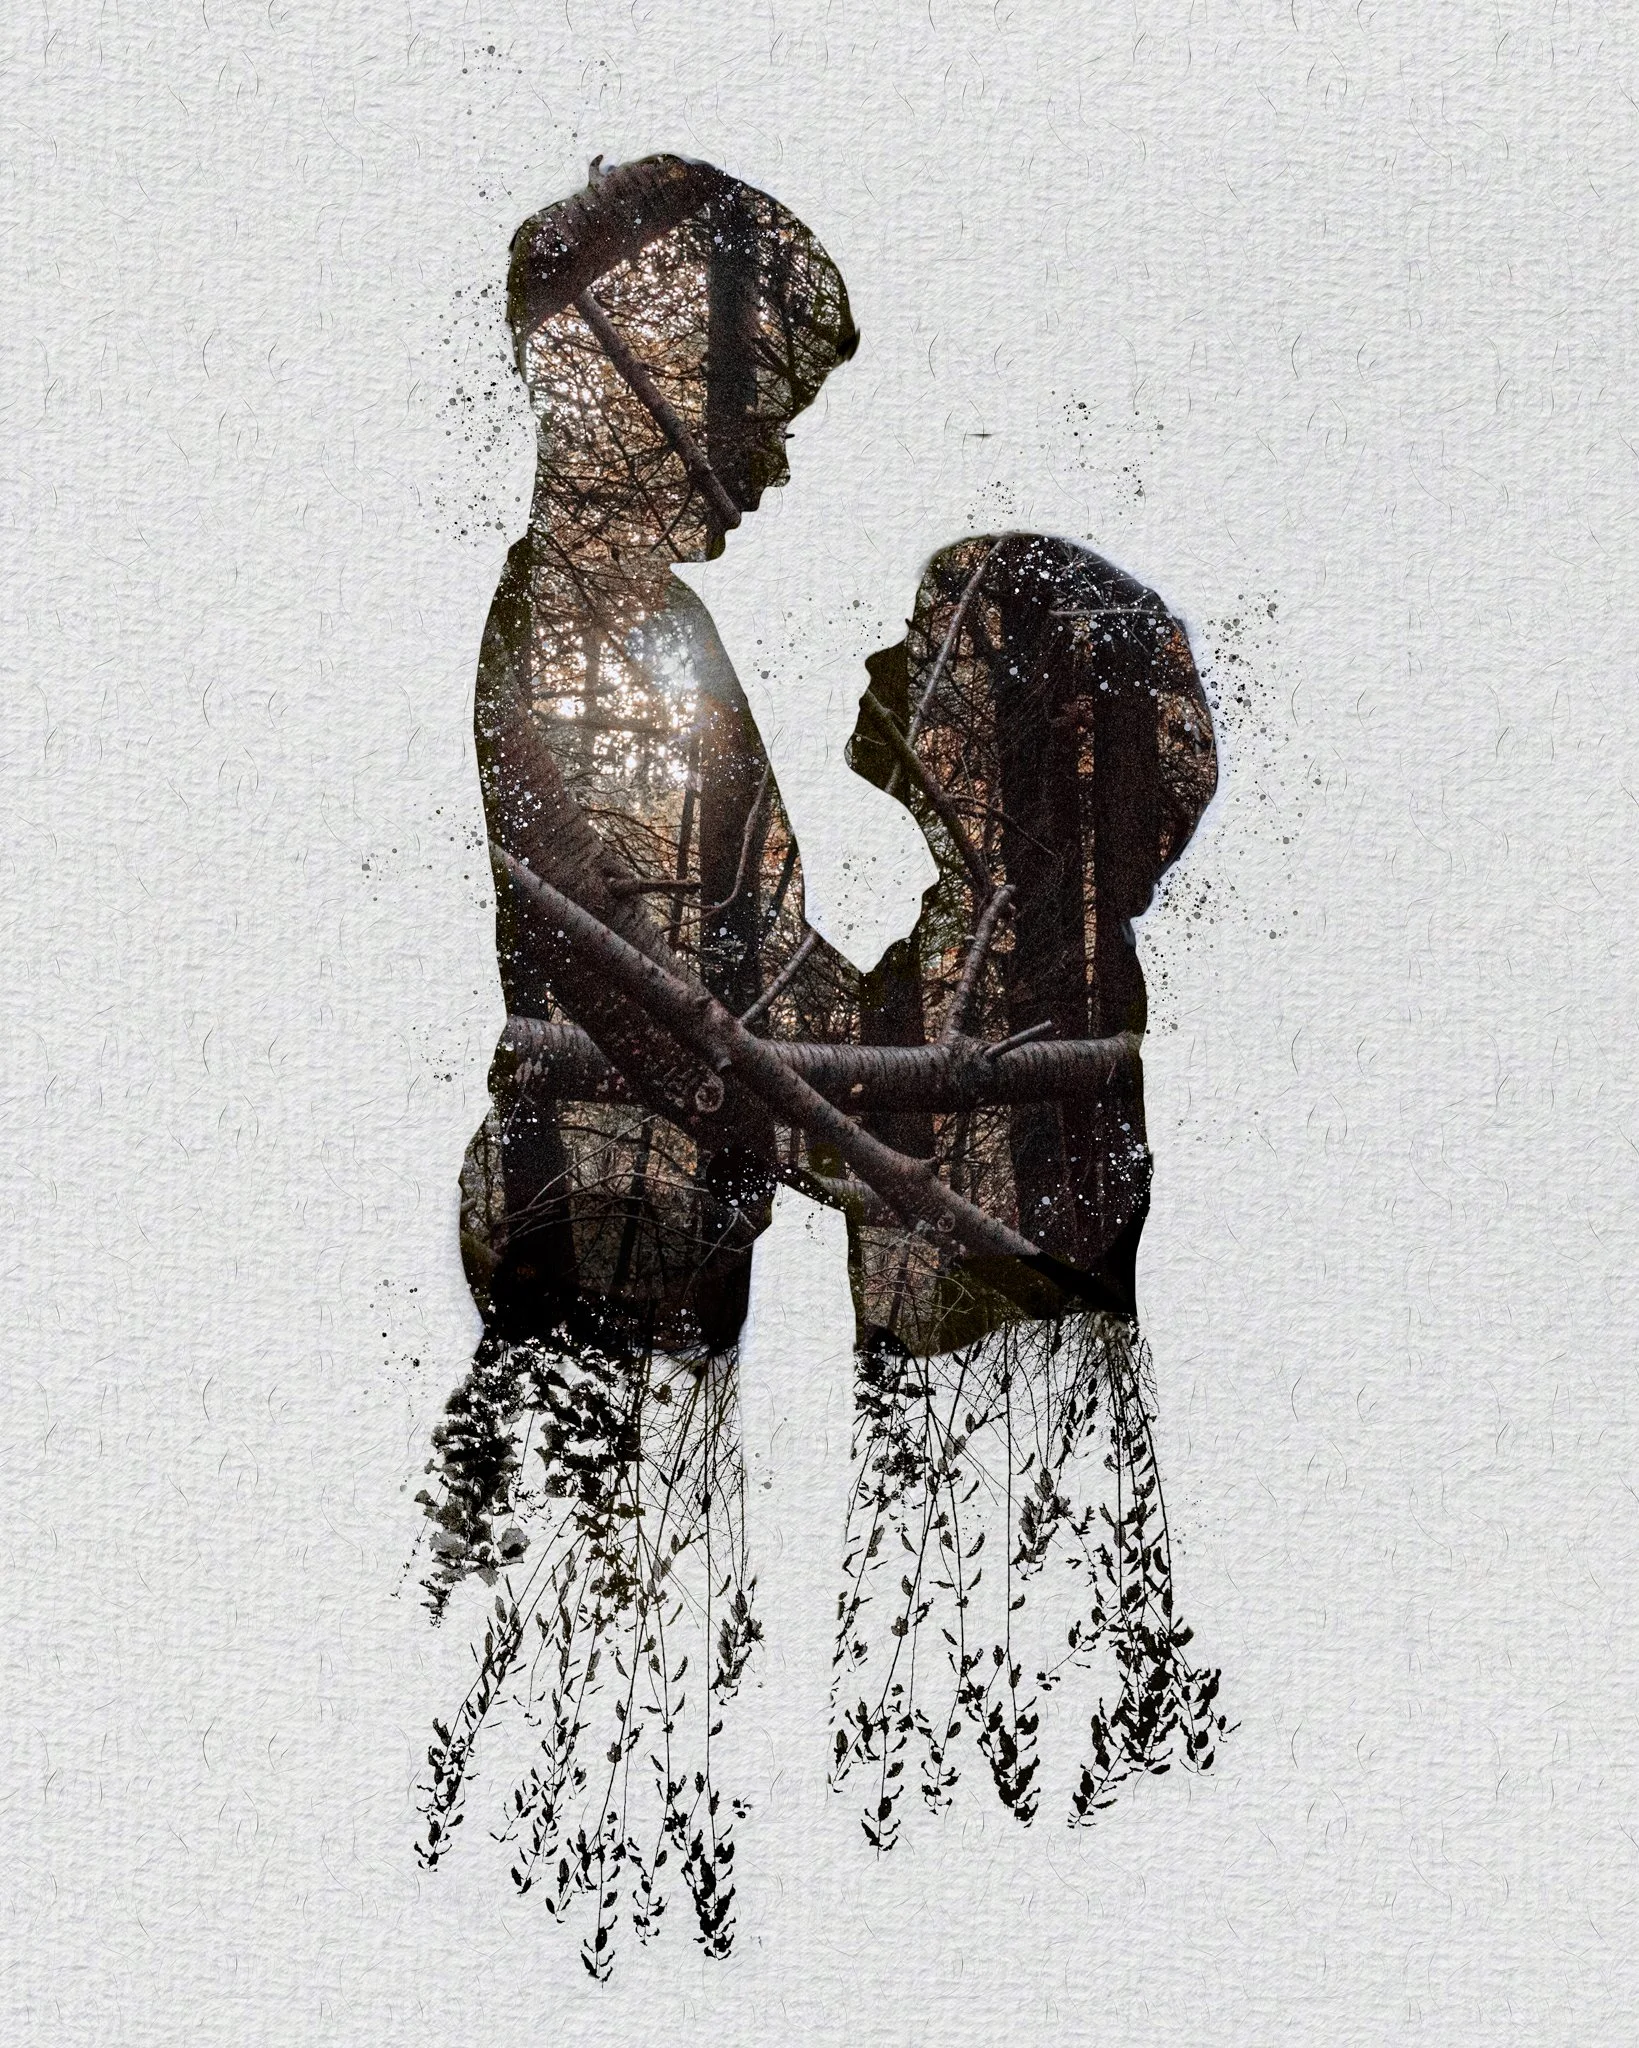
Similarly, the image I created for the element of earth developed after I noticed the branches of two trees twisting together, like arms. I decided to overlay an image of my sons hugging.
5. Learn to Mask Your Subject Well
Whichever editing program or app you use, I highly recommend finding a good tutorial on subject masking. I spent a long time learning the “Select and Mask” tool in Photoshop. Understanding how to improve initial selections and refine edges (especially around hair) has been incredibly helpful.
Planning where the transition between the different images will happen- and how to blend them- relies on masking technique.
6. Let Go of Perfectionism and Experiment
All you need to do is start layering images and see where it takes you. If you let your mind wander and allow yourself to play, you’ll start to see connections between the images that guide your next steps. If you get stuck, change something or simplify things. Converting your images to black and white, for instance, can help remove distracting colors and this can sometimes bring the project together.
Check out this great course:
Hidden Depths: The Art of Layering, Overlays & Multiple Exposures with Abi Coop
7. Organise Files for the Future
These days, I often shoot photographs while I’m out and about, thinking they might work in future projects. I’ve started organizing these into folders in my library so I can find them later. I have collections for textures, natural elements, and favorite locations.
Do tag me in your images if this inspires you to create your own double exposure portraits, I’d love to see them!