Golden Hour Photography: How to Find and Use Beautiful Golden Light | by Holly Awwad

There is something about golden hour that makes even an ordinary moment feel a little more magical.
The light is warmer, shadows stretch a little longer, and everything seems to take on a soft glow. It is one of my favorite times to pick up my camera, whether I am photographing a person, a field of flowers, or a tiny detail in the garden.
But simply showing up before sunset does not automatically create beautiful golden hour photos. The real magic comes from slowing down, noticing where the light is coming from, and choosing how you want to use it.
What Is Golden Hour?
Golden hour is the period shortly after sunrise and shortly before sunset when the sun is low in the sky. At this time of day, the light is usually softer, warmer, and more directional than it is during the middle of the day.
Despite the name, golden hour is not always exactly one hour long. The timing changes depending on the season, your location, the weather, and even the landscape around you. Trees, buildings, and hills can block the sun earlier than the listed sunset time, so I always recommend arriving early and giving yourself time to observe the light. I personally live surrounded by trees so I have to go out much earlier than actual golden hour to capture the golden light in my back yard.
It also helps to remember that every golden hour looks different. Some evenings are filled with rich warmth and dramatic flare. Others are cloudy, hazy, or softly pastel. There is still beauty to be found when the light does not look exactly the way you expected.

Pay Attention to the Direction of the Light
One of the simplest ways to improve your golden hour photography is to move around your subject and notice how the light changes.
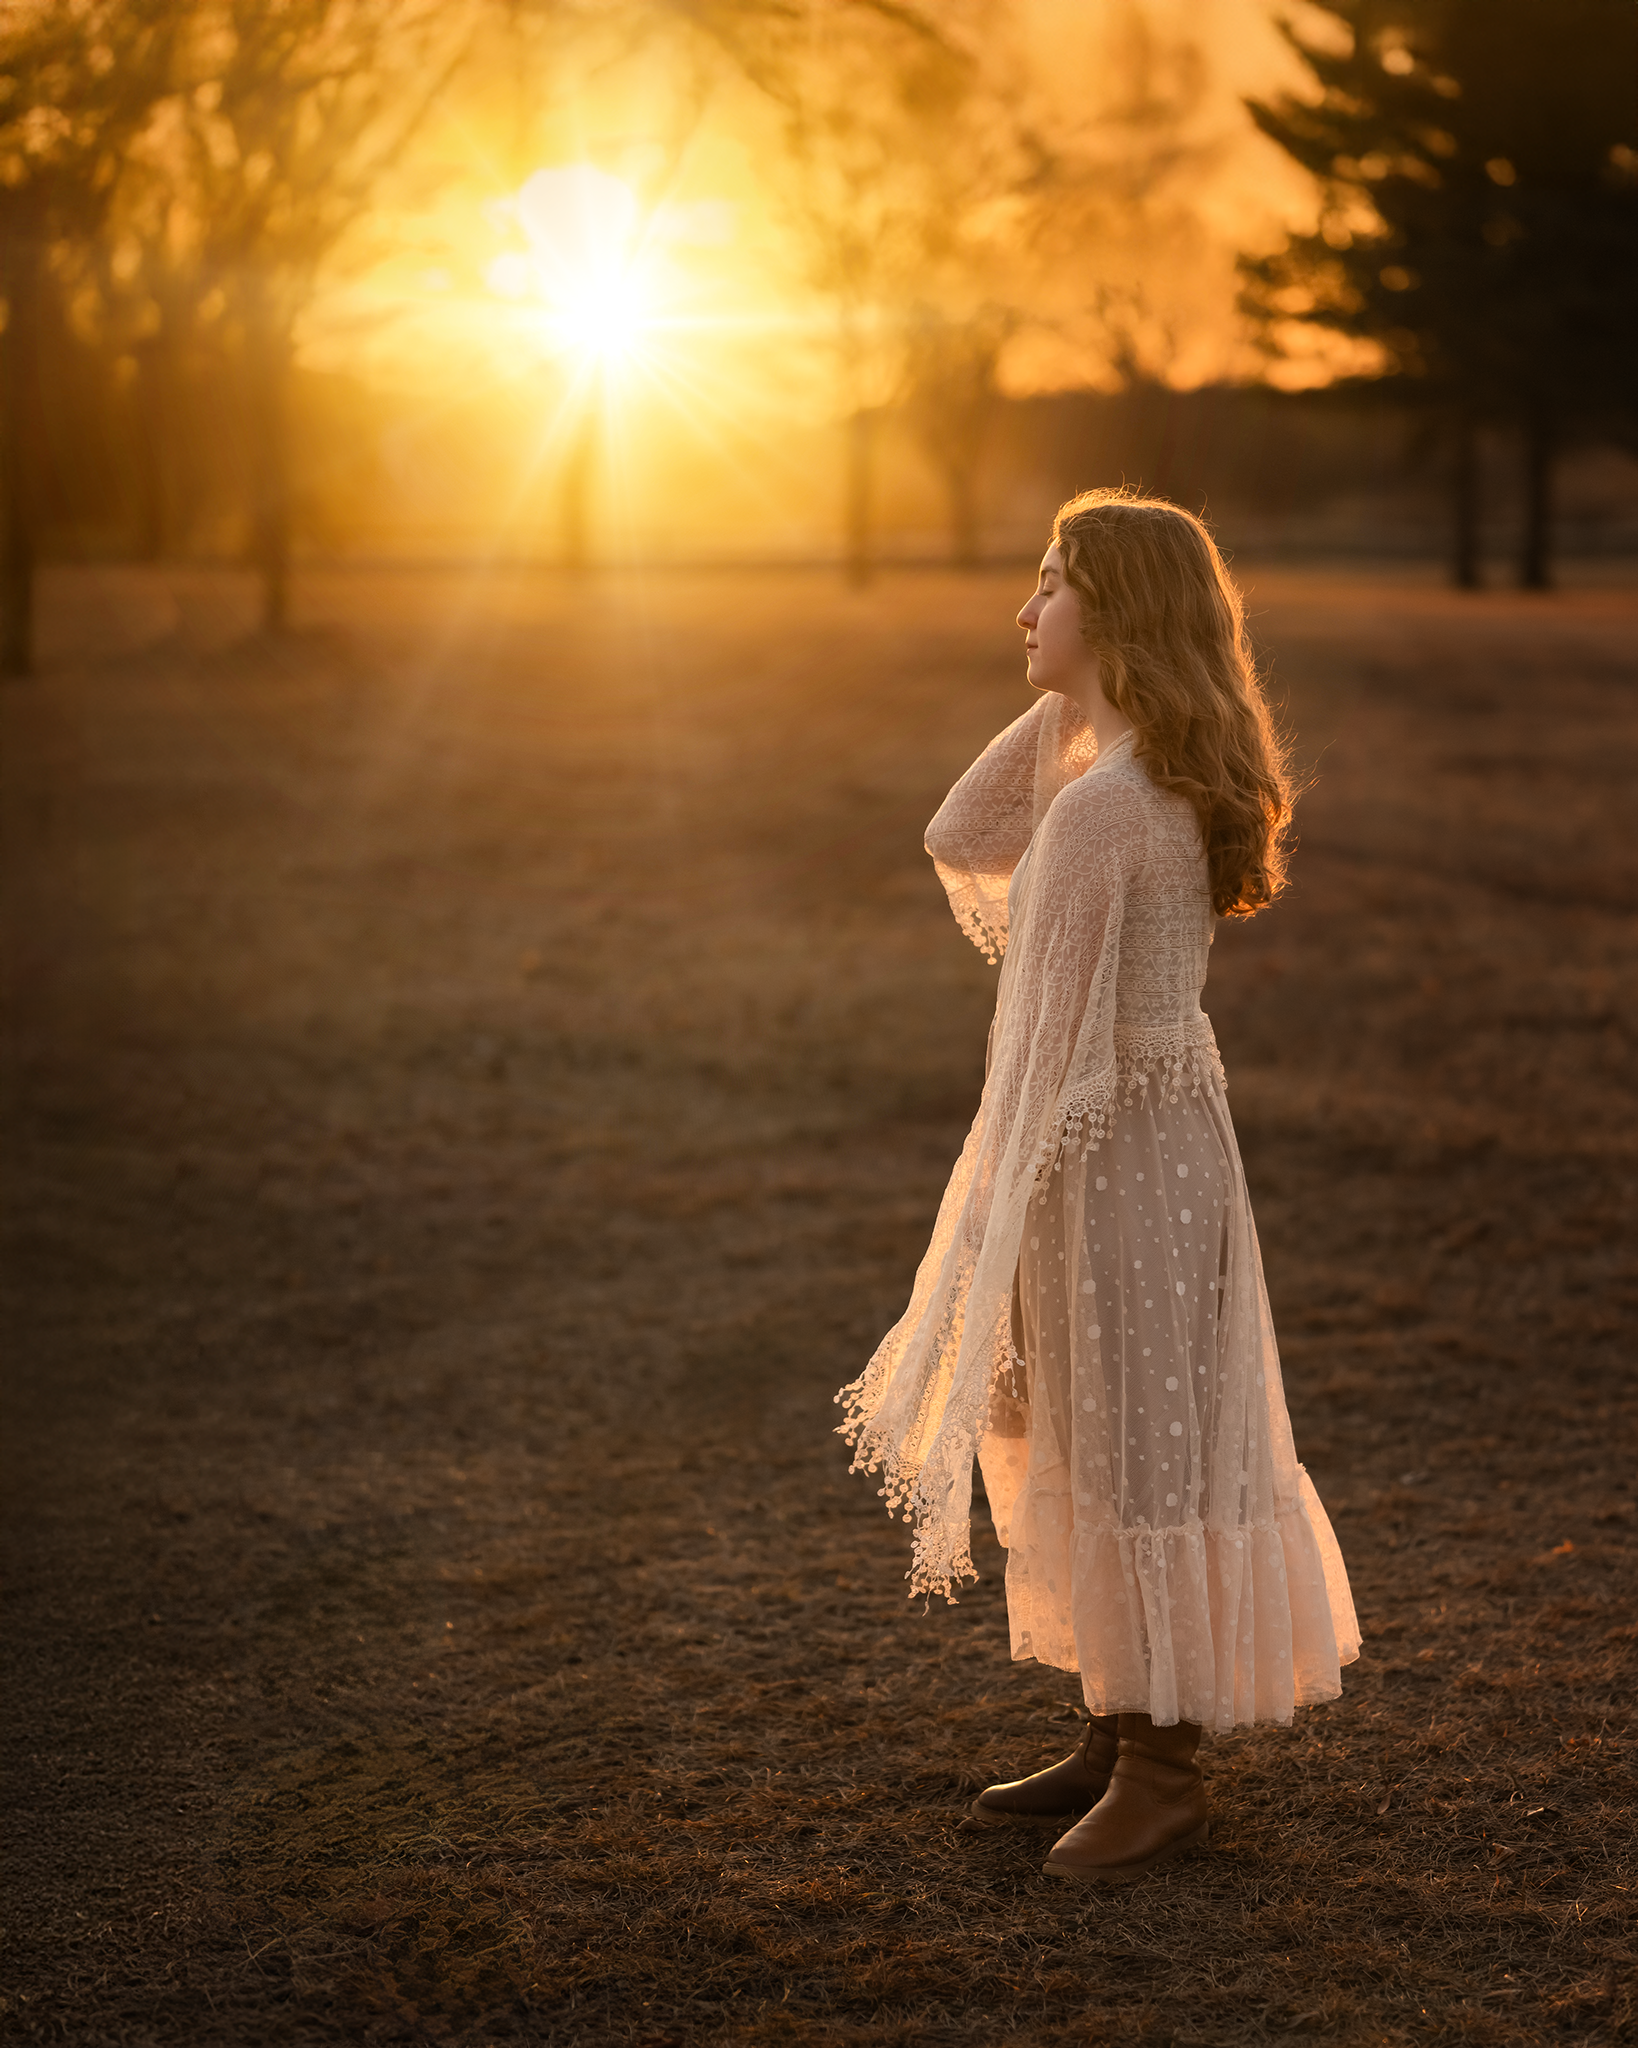
When the light falls onto the front of your subject, it can create bright, warm color. It also is more flat coming from the front (which can be a way to naturally smooth skin). Side light adds depth, shape, and texture. When the sun is behind your subject, you may see glowing hair, illuminated flower petals, rim light, haze, or sun flare.
Backlighting is one of my favorite ways to photograph golden hour, especially with flowers and portraits. Even a very small shift in position can completely change the amount of glow or flare in the frame. Try partially hiding the sun behind your subject, a tree, or another object, then move slightly left or right and watch what happens. You have to be careful in backlight if the sun is not diffused by something like trees, clouds or even your subject because shooting directly into the sun can create overwhelming haze and distracting flare. You can use these flaws creatively too… but getting haze or flare in images unintentionally can be very difficult to edit or even ruin an image.
Do not get stuck in one place. Move closer, step back, lower your angle, and photograph the same subject from more than one direction. Learning to see how the light changes is far more valuable than memorizing a single formula.

Golden Hour Camera Settings
There is no perfect set of golden hour camera settings because the light changes quickly and every subject is different.
Choose an aperture that gives you the depth of field you want, whether that is a softly blurred background for a portrait or more detail throughout a nature scene. Keep your shutter speed fast enough to prevent camera shake and freeze movement, especially when photographing children, insects, pets, or flowers moving in the breeze. As the light fades, raise your ISO when needed rather than allowing your shutter speed to become too slow.
If you shoot in RAW, you will have more flexibility to refine the exposure and white balance later. Most importantly, pay attention to the highlights when photographing toward the sun. I usually expose for the highlights so I can retain the golden color in the rim light and sky. Exposing for the subject, especially in backlight, can cause highlights in the hair and sky to be blown out and completely white. This will usually cause your subject to be underexposed somewhat, but shooting in RAW means you can easily bring up your shadows in editing for a more balanced exposure that keeps that gorgeous golden color.
The goal is not to use the same settings every time. It is to understand what your camera needs as the light changes.

Golden Hour Portraits and Nature Photography
For portraits, look for soft light on the face and watch for distracting patches of brightness or color casts from the surroundings. When your subject is backlit, open sky in front of them can help softly illuminate their face while the sun creates a beautiful glow from behind.

For nature and macro photography, look for subjects that catch or transmit the light. Petals, grasses, leaves, seed heads, spiderwebs, and fuzzy stems can all become luminous when they are backlit. A darker background can make that glowing edge stand out even more.
Background and foreground elements also help create atmosphere. A small patch of illuminated foliage can become beautiful bokeh, while shooting through nearby leaves or flowers can add soft color and depth to the image.
Whether you are photographing people or nature, the same idea applies: slow down and look beyond the subject itself. Notice the entire frame and the way the light moves through it.

Editing Golden Hour Photos Naturally
When editing golden hour photos, I want to preserve the feeling of the light without pushing every color toward yellow or orange.
Begin with exposure and white balance, then gently adjust the highlights and shadows. Bring back detail where you need it, but be careful not to remove all the softness and atmosphere from a backlit image.
A little warmth can help recreate what the moment felt like, but keep an eye on skin tones, flowers, and neutral colors. Local adjustments are especially helpful for brightening a face, enhancing a rim of light, or adding warmth only where the sunlight naturally falls.
The best edit should support the light that was already present, not completely reinvent it.

Learn to Use Beautiful Light Anywhere
Golden hour is a wonderful time to practice seeing light, but beautiful photography is not limited to the hour before sunset. Window light, open shade, overcast skies, harsh midday sun, and deep shadows all offer creative possibilities when you understand how to work with them.
If you want to explore the technical and creative sides of natural light more deeply, my Light Chaser: The Complete Guide to Natural Light Photography course was designed to help you do exactly that.

Inside the course, we go beyond these general golden hour photography tips and explore how to recognize, shape, photograph, and edit many different types of natural light. It includes detailed instruction, shooting demonstrations, real-world examples, creative assignments, and a bonus Golden Hour Editing Bundle so you can follow my editing process step by step.
Golden hour may be what first makes us fall in love with light, but learning to truly see light changes the way we photograph at every time of day.